
Grand Caravan FWD V6-3.3L VIN 3 Flex Fuel (2002)
Sliding Door Hold-Open Latch: Removal and Replacement
Hold Open Latch
HOLD OPEN LATCH
REMOVAL
1. Open sliding door.
2. Remove sliding door sill plate. Refer to Trim Panel.
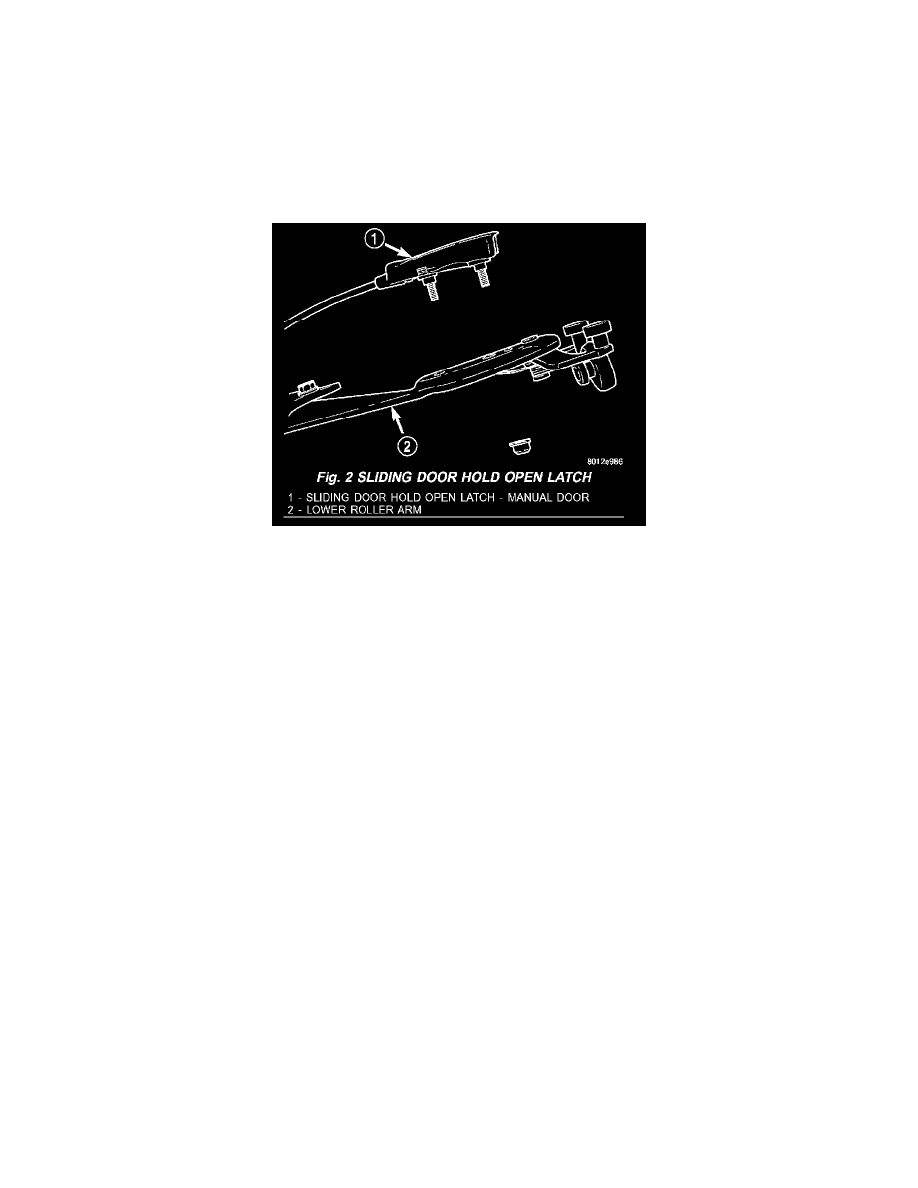
Fig. 2
3. Remove nuts attaching hold open latch to lower roller arm (Fig. 2).
4. Remove hold open latch from lower arm.
5. Disconnect cable from hold open latch.
6. Remove hold open latch from vehicle.
INSTALLATION
1. Place hold open latch in position on vehicle.
2. Connect cable to hold open latch.
3. Place hold open latch in position on lower arm.
4. Install nuts attaching the hold open latch to lower roller arm. Tighten nuts to 5 N.m (45 in.lbs.) torque.
5. Install sliding door sill plate.
6. Verify sliding door operation.
Hold Open Latch Cable
HOLD OPEN LATCH CABLE
REMOVAL
1. Disconnect and isolate the negative battery cable.
2. Remove the appropriate side door trim panel from the vehicle.
3. Peel watershield away from adhesive around perimeter of inner door panel.
4. Open the side door and remove the latch assembly.
CAUTION: Make note of cable routing and foam insulator placement. This will prove helpful when reinstalling replacement cable. Be
certain replacement cable is routed and retained correctly.
5. Trace the hold open latch cable along its routing path and disconnect from its retaining clips.
6. Disconnect the hold open latch cable from the latch assembly. Gently pry cable sleeve retainer out of the latch mounting bracket and then unhook
swedged cable end from the latch link.
7. Remove the hold open latch from the side door.
8. Disconnect the hold open latch cable from the hold open latch. Gently pry cable sleeve retainer out of the handle bracket and then unhook swedged
cable end from the latch link.
9. Remove the hold open latch cable from the side door.