
Grand Caravan FWD V6-3.3L VIN 3 Flex Fuel (2002)
Crankshaft: Removal and Replacement
REMOVAL
1. Remove the engine assembly.
2. Separate transaxle from engine.
3. Mount engine on an engine stand.
4. Remove the oil filter.
5. Remove the oil pan and oil pick-up tube.
6. Remove the timing chain cover.
7. Remove timing chain and sprockets.
8. Remove crankshaft rear oil seal and retainer.
9. Rotate the crankshaft until connecting rod cap is accessible.
10. Mark connecting rod cap position using a suitable marker/scribe tool.
11. Remove connecting rod bearing cap. Use care to prevent damage to the crankshaft bearing surfaces.
12. Repeat removal procedure for each connecting rod cap.
13. Remove and discard the main bearing cross bolts and washers (3.8L engine only).
NOTE: Install new cross bolt and washer assembly (3.8L engine only) upon reassembly.
14. Remove the main bearing cap bolts
15. Remove the main bearing caps.
16. Remove the crankshaft from engine block.
INSPECTION
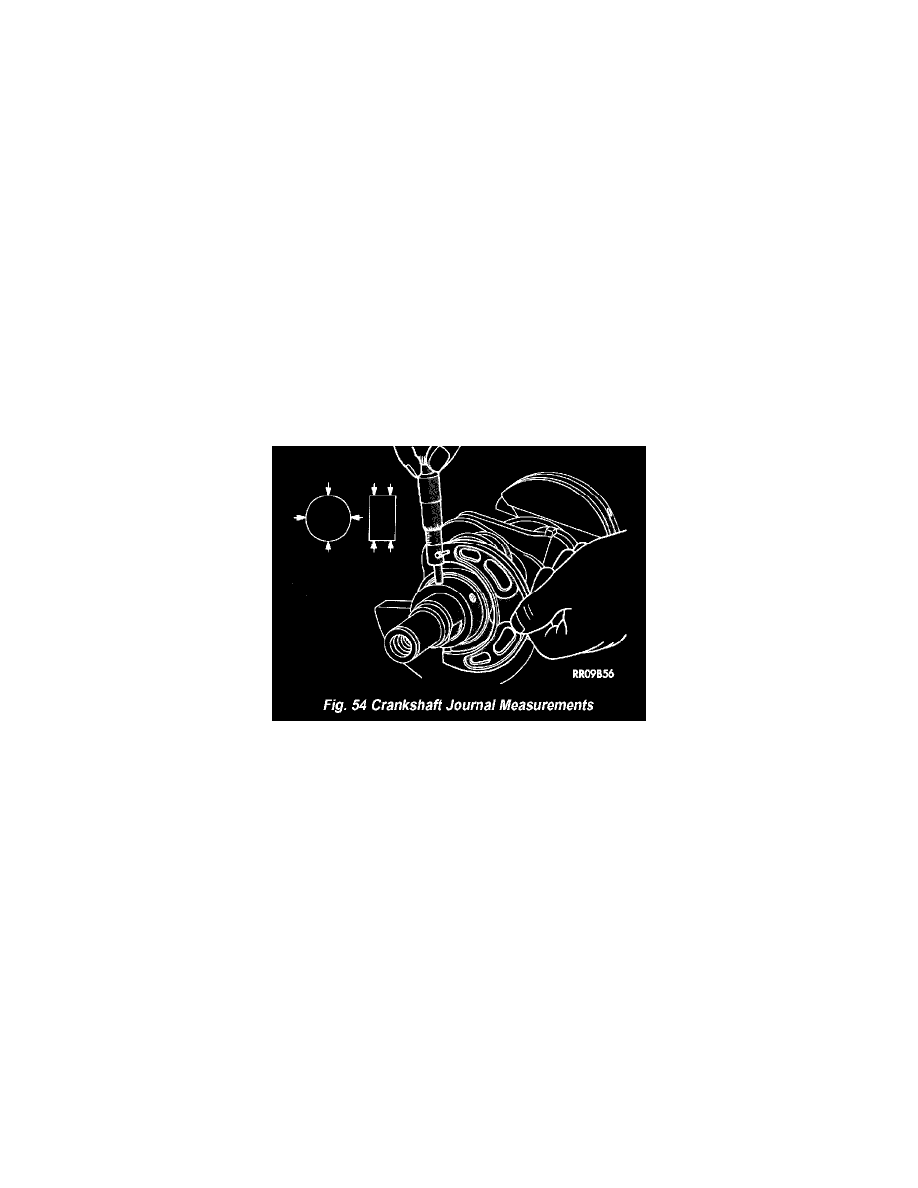
Fig.54
The crankshaft journals should be checked for excessive wear, taper and scoring (Fig. 54). Limits of taper or out of round on any crankshaft journals
should within specifications. Journal grinding should not exceed 0.305 mm (0.012 in.) under the standard journal diameter. DO NOT grind thrust
faces of No. 3 main bearing. DO NOT nick crank pin or bearing fillets. After grinding, remove rough edges from crankshaft oil holes and clean out all
passages.
CAUTION: With the nodular cast iron crankshafts, it is important that the final paper or cloth polish be in the same direction as normal rotation in
the engine.
INSTALLATION
1. Lubricate with engine oil and install the crankshaft main bearing halves in the engine block.