
Grand Caravan FWD V6-3.3L VIN 3 Flex Fuel (2002)
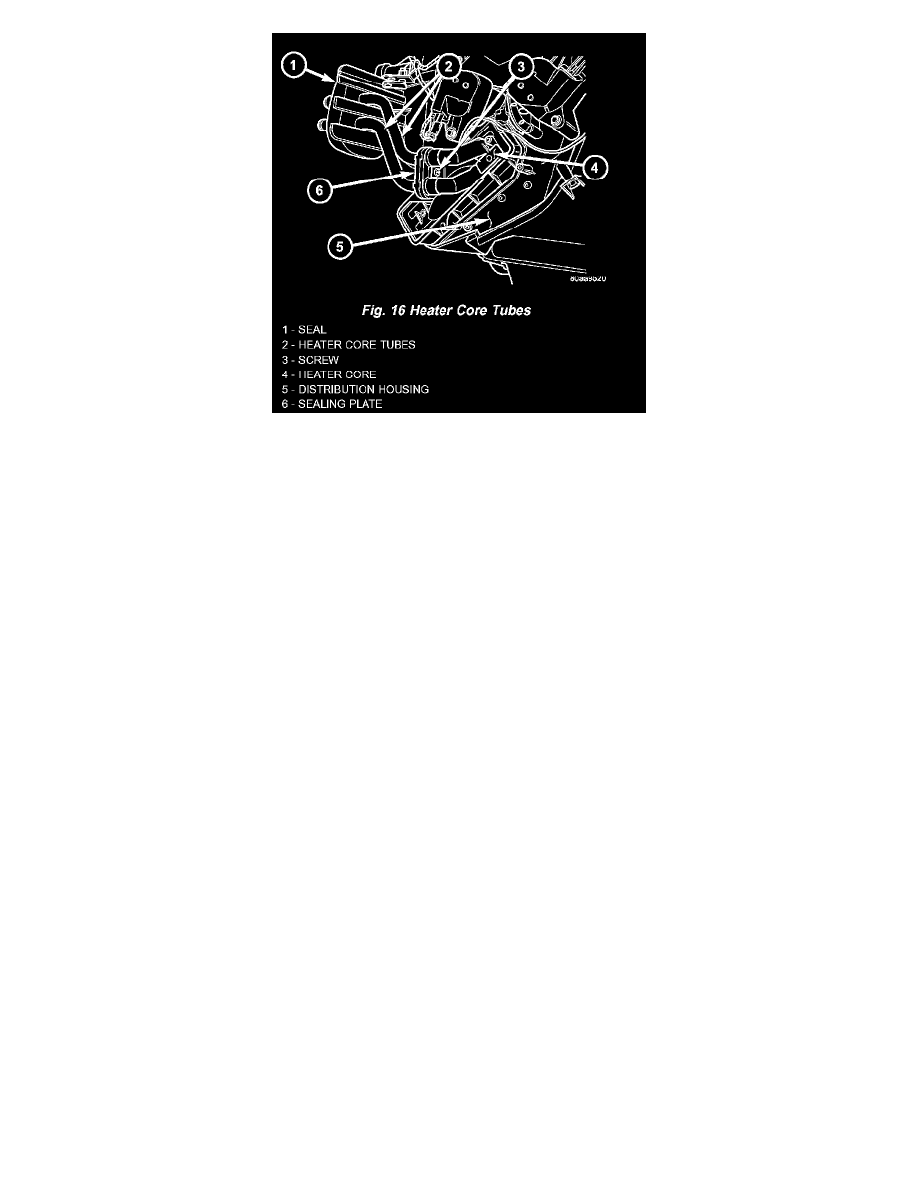
Fig.16 Heater Core Tubes
9. Remove the screw that secures the heater core tube sealing plate to the heater core supply and return ports.
10. Push both heater core tubes simultaneously toward the dash panel far enough to disengage their fittings from the heater core supply and return
ports.
11. Install plugs in, or tape over the opened heater core tube fittings and both heater core ports.
12. Use absorbent toweling to mop up any engine coolant spills from the preceding operation.
13. Pull both heater core tubes simultaneously slightly away from the distribution housing and rearward far enough to disengage the engine
compartment ends of the tubes from the dash panel seal.
14. Remove the heater core tubes and sealing plate as a unit from beneath the instrument panel.
15. Use absorbent toweling to clean up any engine coolant spills from the preceding operation.
INSTALLATION
1. Remove the plugs or tape from both heater core tube fittings and both heater core ports.
2. Position the heater core tubes and sealing plate as a unit beneath the instrument panel.
3. Align the engine compartment ends of both heater core tubes with the openings in the dash panel seal and push them simultaneously forward
through the seal far enough to engage the heater core ends of the tubes with the heater core supply and return ports.
4. Position both heater core tubes and the sealing plate simultaneously to the heater core supply and return ports.
5. The heater core tubes each have a slot that must be indexed to a location tab within each of the heater core ports. Adjust the position of the tubes
as required so that the sealing plate fits flush against the heater core supply and return ports, which indicates that the tubes are properly indexed.
6. Install and tighten the screw that secures the heater core tube sealing plate to the heater core supply and return ports. Tighten the screw to 3 Nm
(27 in. lbs.).
7. Position the heater core shield onto the distribution housing. Be certain that the two location tabs on the front of the shield are engaged in the
receptacles in the two lower finger formations of the evaporator housing near the dash panel.
8. Install and tighten the three screws that secure the heater core shield to the left end of the HVAC distribution housing. Tighten the screws to 2 Nm
(17 in. lbs.).
9. Reinstall the silencer under the driver side end of the instrument panel.
10. Reconnect the heater hoses to the heater hose tubes. Refer to "Heater Hose : Service and Repair" See: Heater Hose/Service and Repair
11. Reconnect the battery negative cable.
12. Refill the engine cooling system. Refer to "Engine, Cooling and Exhaust : Cooling System : Service and Repair" See: Engine, Cooling and
Exhaust/Cooling System/Service and Repair