
Grand Caravan FWD V6-3.3L VIN 3 Flex Fuel (2002)
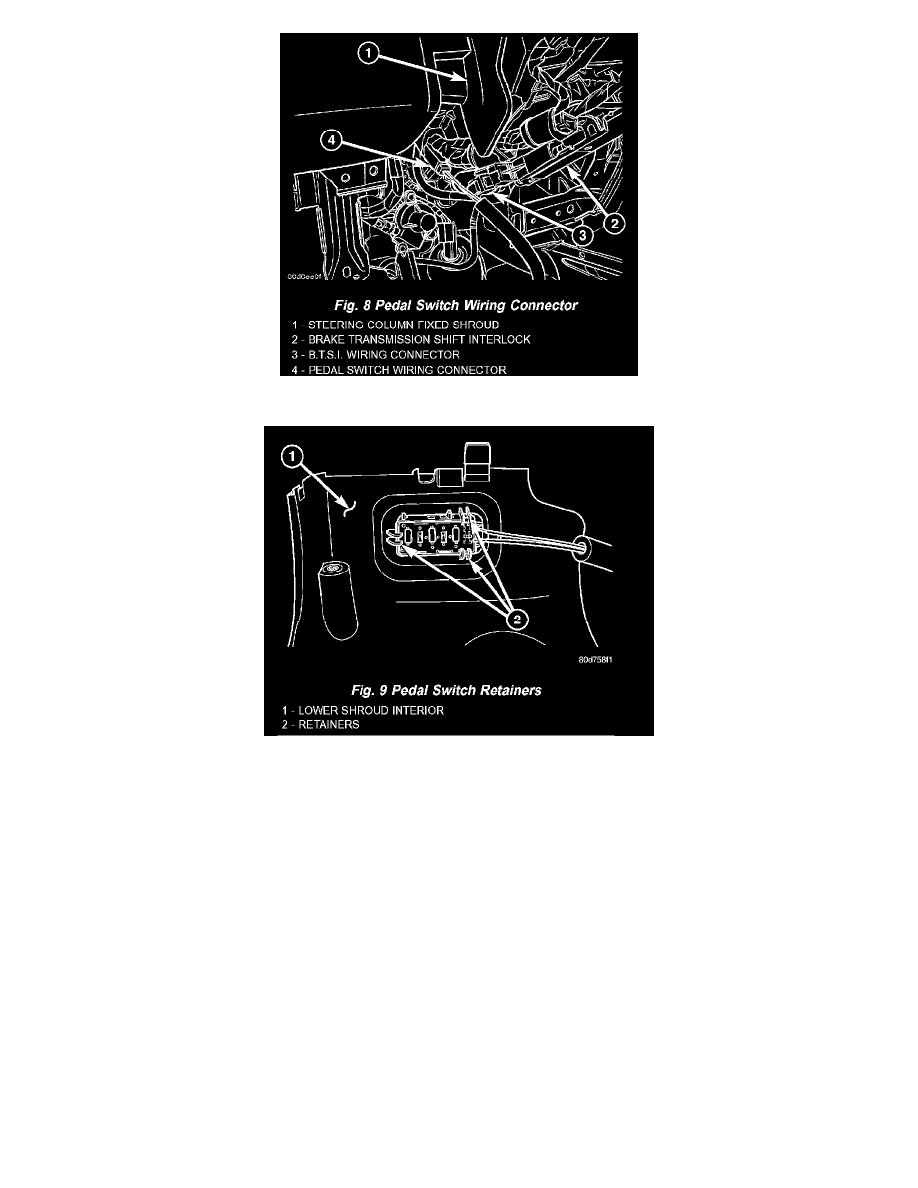
8. Remove the lower shroud with adjustable pedal switch; disconnect switch wiring connector along left side of column as shroud is removed.
9. Depress retainers on rear of adjustable pedal switch, then remove switch from lower shroud.
INSTALLATION
1. Guide adjustable pedal switch wiring through mounting hole in lower shroud.
2. Align switch retainers with notches in mounting hole and snap the switch into place.
3. Connect adjustable pedal switch wiring connector along left side of column.
4. Install the lower shroud with adjustable pedal switch. Install screws fastening steering column shrouds to steering column.
5. Install knee blocker reinforcement plate.
6. Connect parking brake release link to release handle.
7. Install data link diagnostic connector to mounting hole in reinforcement plate.
8. Install lower steering column cover/knee blocker.
9. Install silencer panel below lower steering column cover/knee blocker.
10. Connect ground cable to negative post of battery.
11. Connect scan tool (DRB III) to data link diagnostic connector located below steering column.
12. Turn ignition key to ON position.
13. Using scan tool, check for and clear any existing adjustable pedal fault codes.
14. Test operation of adjustable pedals, memory sets and RKE (if equipped). If applicable, reset radio and clock.
15. Recheck for any fault codes.
16. Turn key to OFF and remove scan tool from vehicle.