Grand Caravan FWD V6-3.3L VIN 3 Flex Fuel (2002)

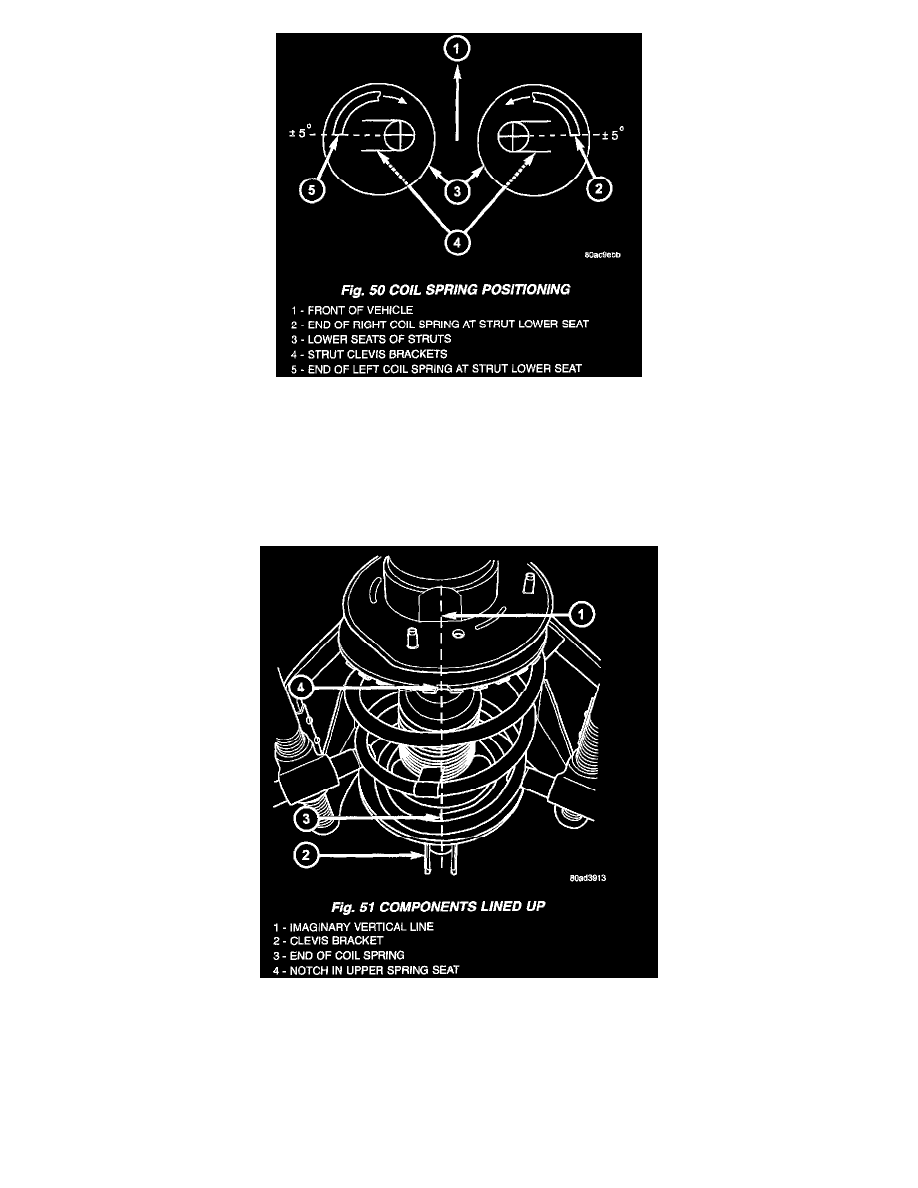
9. Install the strut through the bottom of the coil spring until the lower spring seat contacts the lower end of the coil spring. The clevis bracket on the
strut should point straight outward away from the compressor (to the 6 o'clock position). This position should be within 5° of the lower end tip of
the coil spring. If necessary, reposition the strut or coil spring in the compressor so both of these line up straight outward away from the
compressor (to the 6 o'clock position). Install the clamp to hold the strut and coil together.
10. Install the strut mount over the strut shaft and onto the top of the pivot bearing and upper seat as shown. Loosely install the retaining nut on the
strut shaft.
11. Install Strut Nut Socket (on the end of a torque wrench), Special Tool 6864, on the strut shaft retaining nut. Next, install a 10 mm socket on the
hex on the end of the strut shaft. While holding the strut shaft from turning, tighten the strut shaft retaining nut to a torque of 100 Nm (75 ft. lbs.).
NOTE: Before releasing the tension the compressor has on the spring, using the following figure as reference, make sure the upper spring seat,
coil spring and strut clevis bracket are all lined up properly (within 5° of one another).
12. Slowly release the tension from the coil spring by backing off the compressor drive fully. As the tension is relieved, make sure the upper mount,
pivot bearing and upper seat are align properly. Remove the clamp from the lower end of the coil spring and strut. Push back the spring
compressor upper and lower hooks, then remove the strut assembly from the spring compressor.
13. Install strut assembly on the vehicle.
