
Grand Caravan FWD V6-3.3L VIN 3 Flex Fuel (2002)
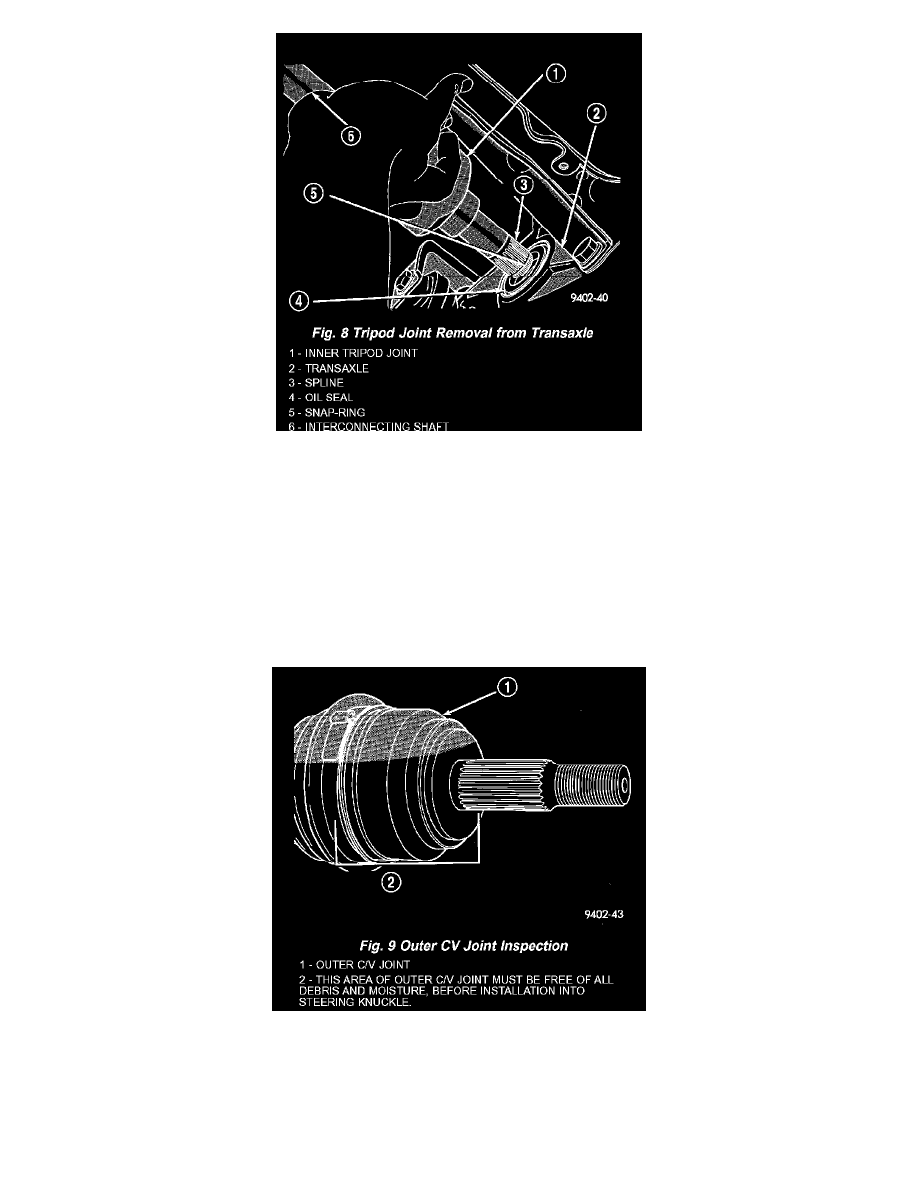
14. Hold inner tripod joint and interconnecting shaft of half shaft assembly. Remove inner tripod joint from transaxle, by pulling it straight out of
transaxle side gear and transaxle oil seal (Fig. 8). When removing tripod joint, do not let spline or snap-ring drag across sealing lip of the transaxle
to tripod joint oil seal.
INSTALLATION
1. Thoroughly clean spline and oil seal sealing surface, on tripod joint. Lightly lubricate oil seal sealing surface on tripod joint with fresh clean
transmission lubricant.
2. Holding half shaft assembly by tripod joint and interconnecting shaft, install tripod joint into transaxle side gear as far as possible by hand (Fig. 8).
3. Grasp inner tripod joint an interconnecting shaft. Forcefully push the tripod joint into side gear of transaxle, until snap-ring is engaged with
transaxle side gear. Test that snap-ring is fully engaged with side gear by attempting to remove tripod joint from transaxle by hand. If snap-ring is
fully engaged with side gear, tripod joint will not be removable by hand.
4. Clean all debris and moisture out of steering knuckle, in the area were outer CV joint will be installed into steering knuckle.
5. Ensure that front of outer CV joint which fits against the face of the hub and bearing is free of debris and moisture before installing outer CV joint
into hub and bearing assembly (Fig. 9).
6. Slide half shaft back into front hub and bearing assembly.
CAUTION: The steering knuckle to strut assembly attaching bolts are serrated and must not be turned during installation. Install nuts while holding
bolts stationary in the steering knuckle.