Grand Caravan FWD V6-3.3L VIN 3 Flex Fuel (2002)

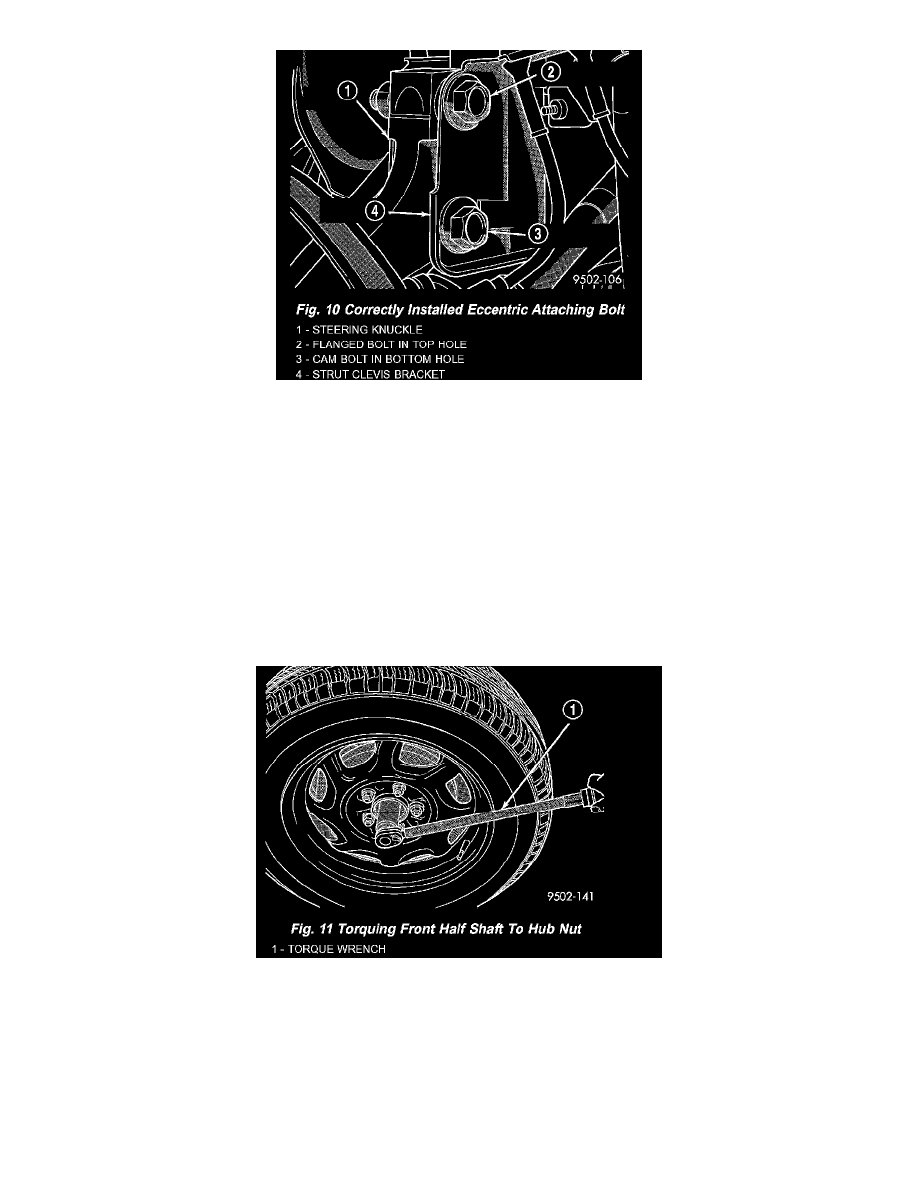
CAUTION: If the vehicle being serviced is equipped with eccentric strut assembly attaching bolts, the eccentric bolt must be installed in the bottom
(slotted) hole on the strut clevis bracket (Fig. 10).
7. Install steering knuckle in clevis bracket of strut damper assembly. Install the strut damper to steering knuckle attaching bolts. Tighten both bolts
to a torque of 81 Nm (60 ft. lbs.) plus an additional 1/4 turn.
8. Install braking disc on hub and bearing assembly.
9. Install disc brake caliper assembly on steering knuckle. Caliper is installed, by first sliding bottom of caliper assembly under abutment on steering
knuckle, and then rotating top of caliper against top abutment.
10. Install disc brake caliper adapter to steering knuckle attaching bolts (Fig. 4). Tighten the disc brake caliper adapter attaching bolts to a torque of
169 Nm (125 ft. lbs.).
11. Clean all foreign matter from the threads of the outer CV joint. Install the washer and half shaft to hub/bearing assembly nut on half shaft and
securely tighten nut.
12. Install front wheel and tire assembly. Install and tighten the wheel mounting stud nuts in proper sequence until all nuts are torqued to half the
required specification. Then repeat the tightening sequence to the full specified torque of 135 Nm (100 ft. lbs.).
13. Lower vehicle.
14. With the vehicle's brakes applied to keep hub from turning, tighten the hub nut to a torque of 244 Nm (180 ft. lbs.) (Fig. 11).
15. Install the spring wave washer on the end of the half shaft.
16. Install the hub nut lock, and a new cotter pin (Fig. 2). Wrap cotter pin prongs tightly around the hub nut lock as shown in (Fig. 2).
17. Check for correct fluid level in transaxle assembly.
