
Grand Caravan FWD V6-3.8L VIN L (2001)
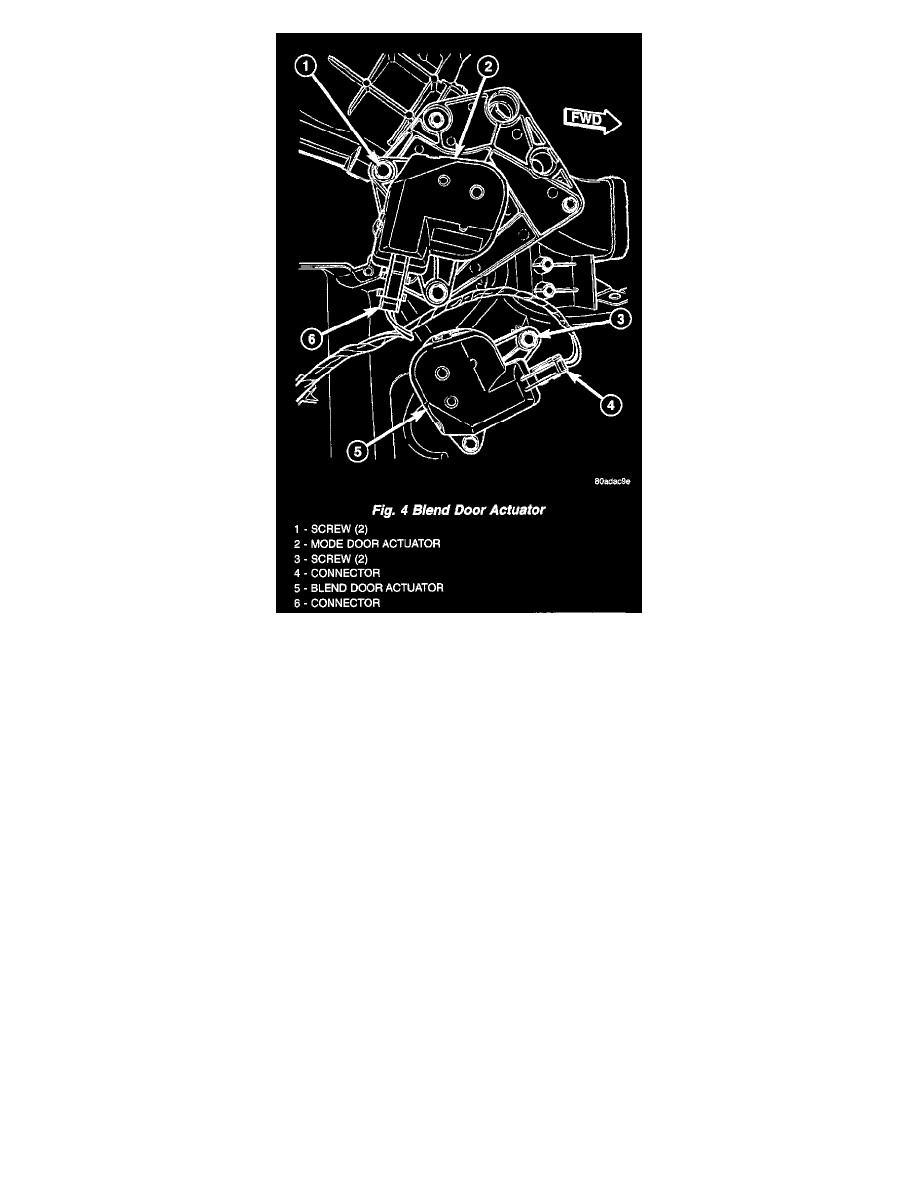
Fig.4 Blend Door Actuator
6. Carefully pull the top of the rear heater-A/C unit housing away from the right quarter inner panel far enough to reach between the rear heater-A/C
unit housing and the quarter inner panel to access the blend door actuator.
7. Remove the two screws that secure the blend door actuator to the rear heater-A/C unit housing.
8. Pull the blend door actuator away from the rear heater-A/C unit housing far enough to disengage the actuator output shaft from the blend air door
pivot.
9. Raise the blend door actuator far enough to access and disconnect the rear HVAC wire harness connector for the actuator from the actuator
connector receptacle.
10. Remove the blend door actuator from between the rear heater-A/C unit housing and the quarter inner panel.
INSTALLATION
1. Position the blend door actuator between the rear heater-A/C unit housing and the quarter inner panel.
2. Reconnect the rear HVAC wire harness connector for the blend door actuator to the actuator connector receptacle.
3. Position the blend door actuator onto the rear heater-A/C unit housing. If necessary, rotate the actuator slightly to align the splines on the actuator
output shaft with those in the blend air door pivot.
4. Install and tighten the two screws that secure the blend door actuator to the rear heater-A/C unit housing. Tighten the screws to 2 Nm (18 in. lbs.).
5. Push the top of the rear heater-A/C unit housing back into position against the right quarter inner panel.
6. Install and tighten the screw that secures the front of the rear heater-A/C unit housing to the right quarter inner panel. Tighten the screw to 11 Nm
(97 in. lbs.).
7. Install and tighten the screw that secures the back of the rear heater-A/C unit housing to the right D-pillar. Tighten the screw to 11 Nm (97 in. lbs.)
.
8. Install and tighten the two screws that secure the top of the quarter trim panel attaching bracket to the quarter inner panel. Tighten the screws to
1.7 Nm (15 in. lbs.).
9. Reinstall the right quarter trim panel and right D-pillar trim panel onto the quarter inner panel. Refer to: "Body and Frame : Interior Trim :
Service and Repair" See: Body and Frame/Interior Moulding / Trim/Trim Panel/Service and Repair
10. Reconnect the battery negative cable.
11. Perform the heater-A/C control calibration procedure. Refer to: "Control Assembly : Service and Repair" See: Control Assembly/Service and
Repair