
Grand Caravan FWD V6-3.8L VIN L (2001)
Controller Antilock Brake: Service and Repair
REMOVAL
1. Disconnect the battery cables.
2. Remove the battery (Refer to BATTERY - REMOVAL).
3. Disconnect the vacuum hose connector at the tank built into the battery tray.
4. Remove the screw securing the coolant filler neck to the battery tray.
5. Remove the battery tray (Refer to BATTERY SYSTEM/TRAY - REMOVAL).
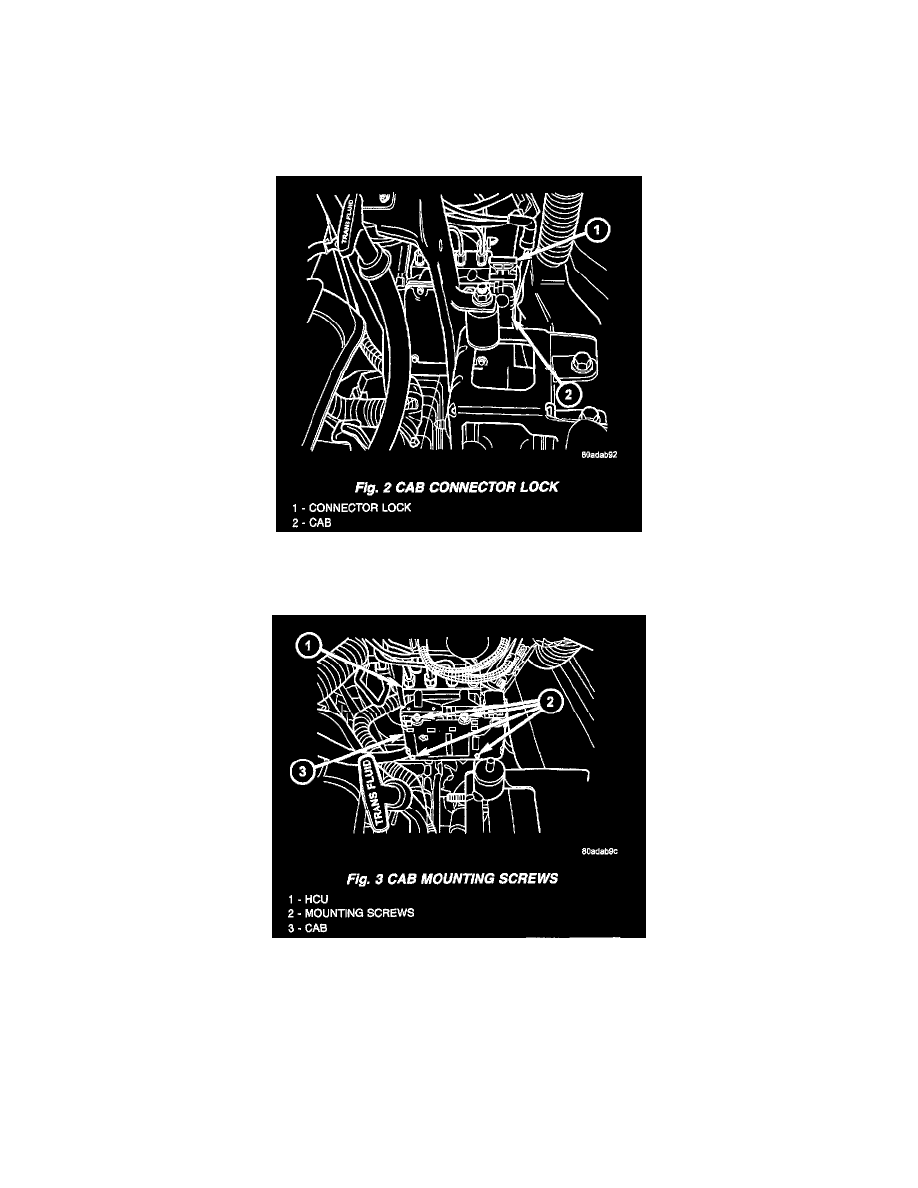
Fig.2 CAB Connector Lock
6. Pull up on the CAB connector lock and disconnect the 24-way electrical connector and the pump/ motor connector from the CAB
Fig.3 CAB Mounting Screws
7. Remove the screws securing the CAB to the vehicle
INSTALLATION
1. Install screws to secure the CAB to the vehicle Tighten the mounting screws to 2 Nm (17 in lbs).
2. Reconnect the 24-way electrical and the pump/motor connector
3. Install the battery tray (Refer to TRAY - INSTALLATION).
4. Install the screw securing the coolant filler neck to the battery tray.
5. Reconnect the vacuum hose to the coolant tank built into the battery tray.
6. Install the battery (Refer to BATTERY - INSTALLATION).