
Grand Caravan FWD V6-3.8L VIN L (2001)
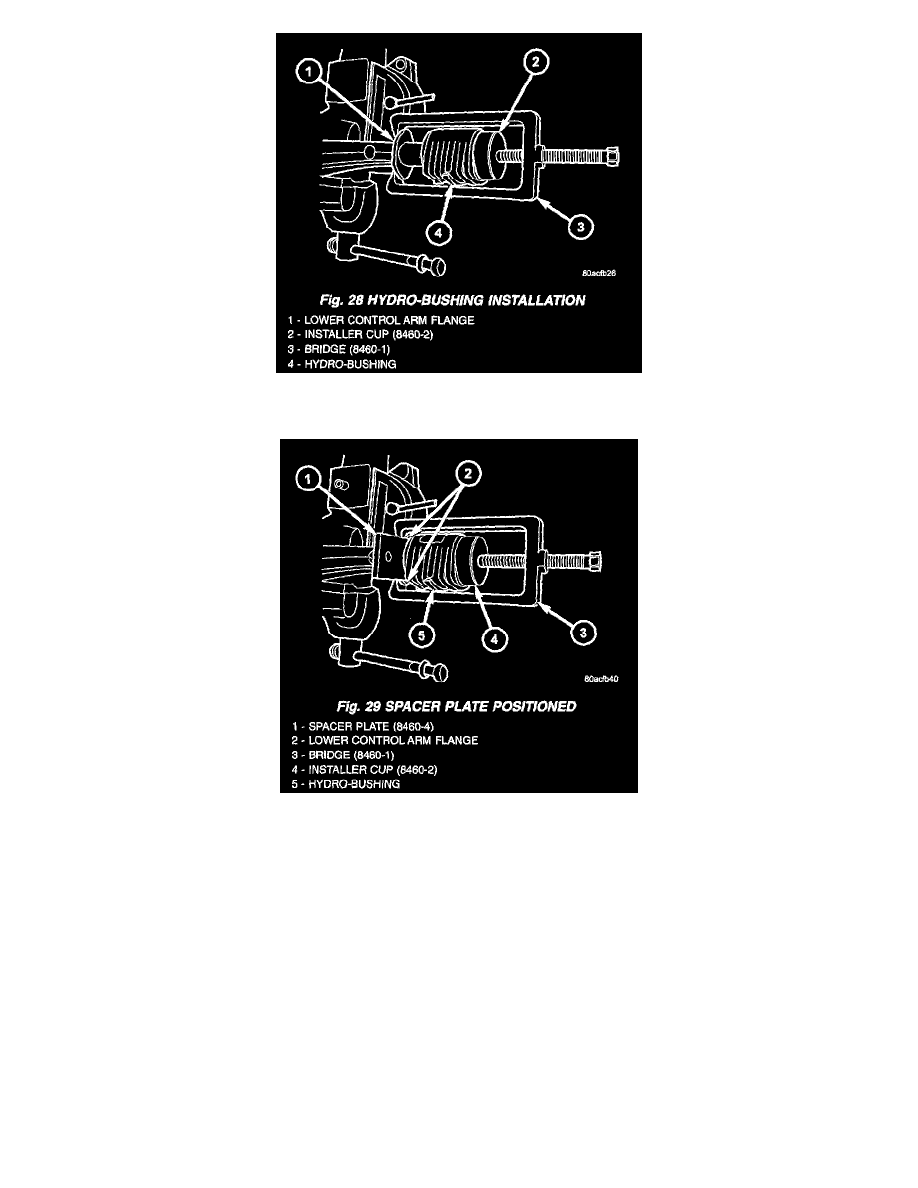
3. Install Remover/Installer, Special Tool 8460, over bushing and lower control arm as shown. Engage flange on lower control arm with tips of
Bridge, Special Tool 8460-1 as shown. The contoured side of Installer Cup, Special Tool 8460-2, should be fitted up against rear of the bushing.
4. Begin to tighten forcing screw. As bushing nears lower control arm flange, place Spacer Plate, Special Tool 8460-4 between flange and bushing
inner sleeve, straddling the stem as shown.
5. Install bushing up against Spacer Plate, tightening the bridge forcing screw with a torque wrench until approximately 50 Nm (37 ft. lbs.) torque is
reached. This will properly space bushing on the stem in relation to the flange.
6. Back off the forcing screw and remove tool.
7. Install lower control arm on vehicle.