
Intrepid V6-2.7L VIN R (2003)
5. Remove the screw securing the brake tubes to the left stabilizer bar isolator bushing retainer.
6. Remove the 4 bolts attaching both stabilizer bar isolator bushing retainers to the frame rails (the 2 rearward attaching bolts also attach the front
corners of the rear suspension crossmember in place). Allow the stabilizer bar to hang down out of the way.
7. Remove the screw securing the fuel filler neck to the left frame rail.
8. Position a transmission jack under the fuel tank.
9. Remove the attaching bolts securing both fuel tank mounting straps. First, remove the right, then the left attaching bolt. Allow the straps to hang
down.
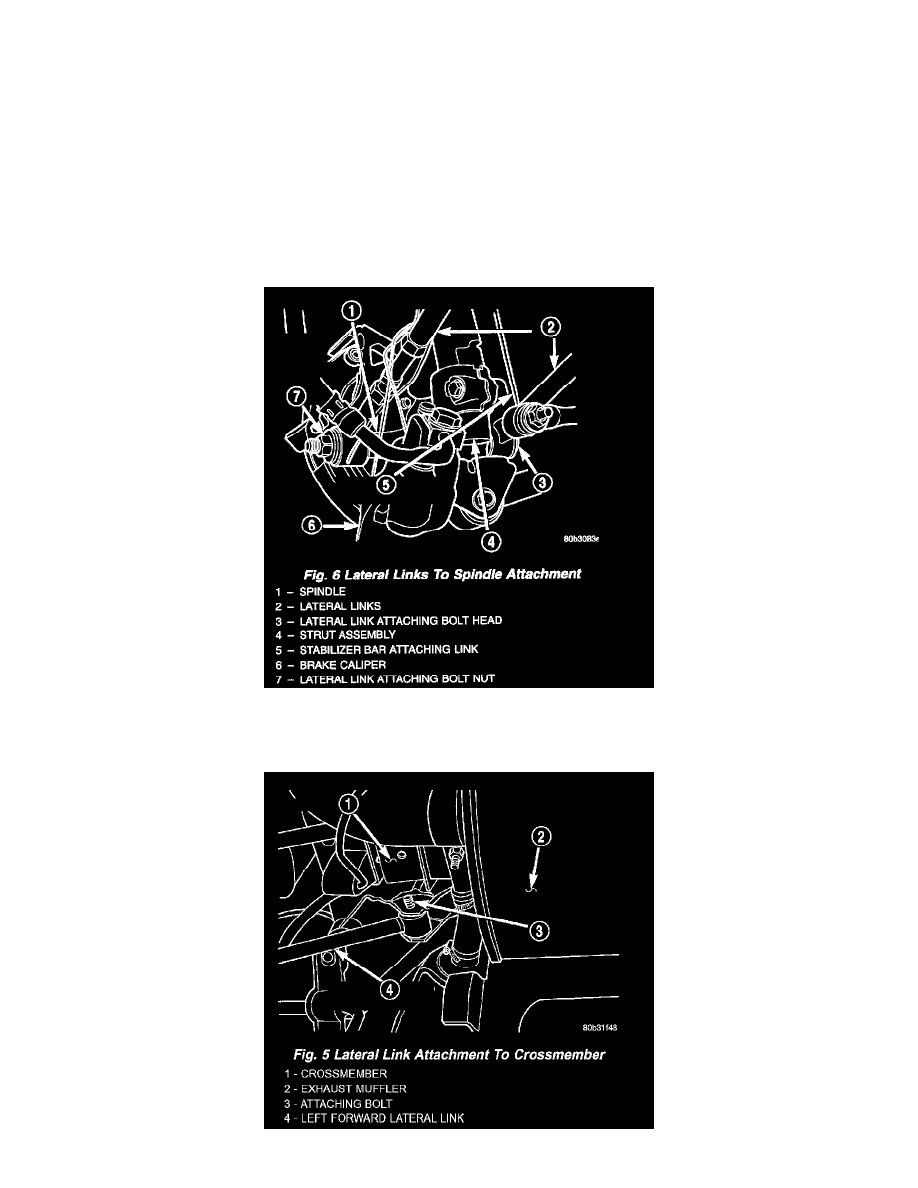
10. Lower the transmission jack and fuel tank just enough to allow for removal of the lateral link attaching bolt at the crossmember.
11. Remove the left forward lateral link from the crossmember.
LEFT REAR AND BOTH RIGHT LATERAL LINKS
1. Raise vehicle on jackstands or centered on a frame contact hoist.
2. Remove rear wheel and tire assembly from the vehicle.
3. Remove the nut and bolt attaching the left lateral links to the spindle.
4. Remove the nut and bolt attaching the lateral link to the rear suspension crossmember. Note the direction in which the lateral arm attaching bolt is
installed.