
Intrepid V6-2.7L VIN R (2003)
3. Remove drip rail weatherstrips as necessary to gain access to screws holding windshield side moldings (Fig. 2). Pull outward on molding at the
bottom of A-pillars using pliers.
Fig. 3
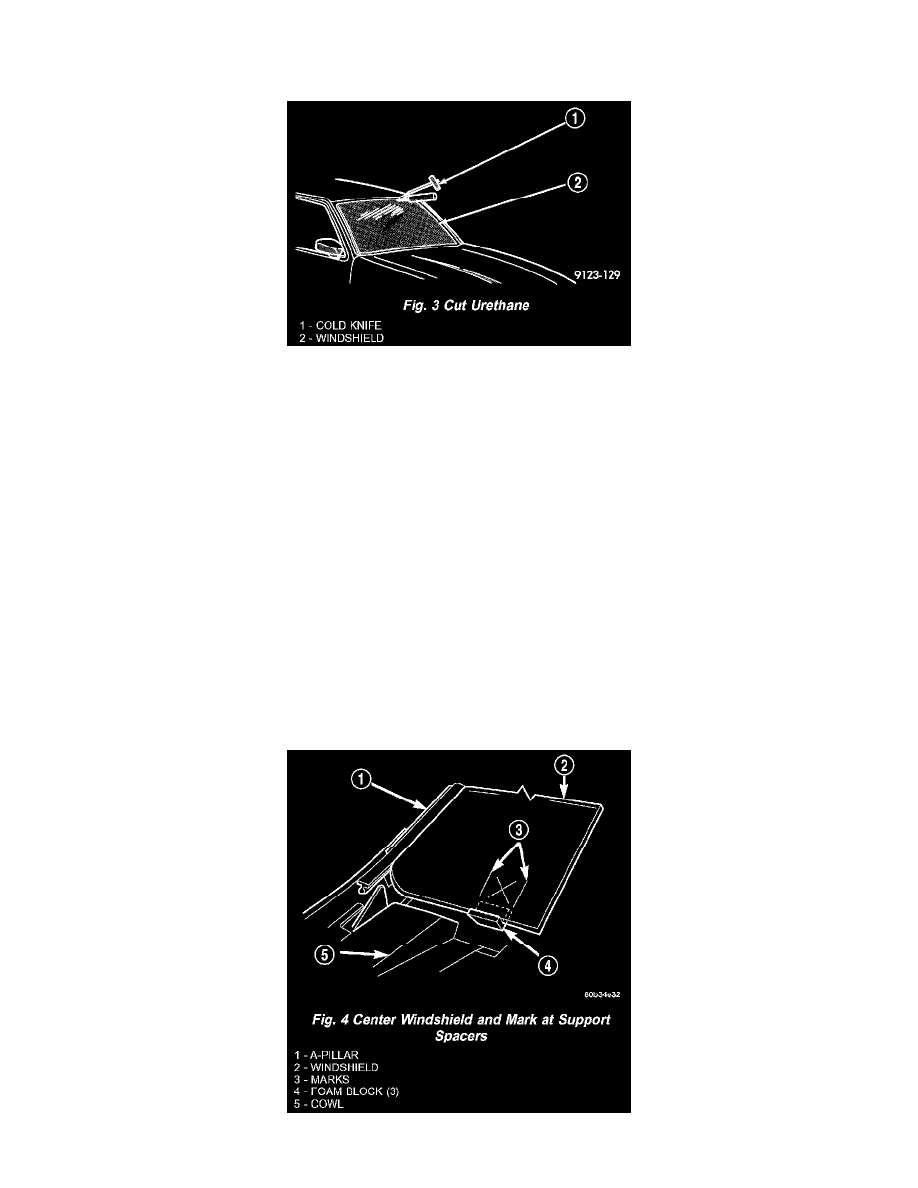
4. Cut urethane bonding from around windshield using a suitable sharp cold knife. A pneumatic cutting device can be used if available. (Fig. 3)
5. Remove windshield from vehicle.
INSTALLATION
The urethane adhesive holding the windshield to the opening pinch weld (fence) can be cut using a sharp cold knife from the exterior of the vehicle.
Using the cold knife method is effective if the windshield is already broken. If the glass must be salvaged, cutting the urethane adhesive from the interior
of the vehicle using a reciprocating or oscillating power knife is recommended.
CAUTION:
-
Open the left front door glass before installing windshield to avoid pressurizing the passenger compartment, If a door is slammed before
urethane bonding is cured, water leaks can result. Allow the urethane at least 24 hours to cure before returning the vehicle to use.
-
To avoid stressing the replacement windshield, the urethane bonding material on the windshield fence should be smooth and consistent to
the shape of the replacement windshield. The support spacers should be cleaned and properly installed on weld studs or repair screws at
bottom of windshield opening.
1. Replace the center lower foam block with a new one to prevent a buzz, squeak or rattle condition.
2. Place replacement windshield into position and center in the opening against the support spacers.
3. Verify the glass lays evenly against the pinch weld fence at the sides, top and bottom of the replacement windshield. If not, the pinch weld fence
must be formed to the shape of the new glass.
Fig. 4