
Intrepid V6-215 3.5L (1995)
9.
Disconnect expansion valve from evaporator. Refer to expansion valve removal in service manual for complete procedure. Cap the expansion
valve and evaporator openings. This will prevent any dirt or moisture from entering the refrigerant system during servicing.
CAUTION:
The lubricant used in this air conditioning system absorbs moisture readily (similar to brake fluid). Do not leave any portion of the system open for
extended periods of time.
10.
Remove push-on wiring harness clamp from stud on harness running along engine compartment dash panel.
11.
Remove the three heater housing retaining nuts from the studs. These studs project through the dash panel into the engine compartment.
12.
Remove right and left interior door post kick panels.
13.
Remove right and left side bezel end caps from either end of the instrument panel. These caps are held in place by a series of clips.
14.
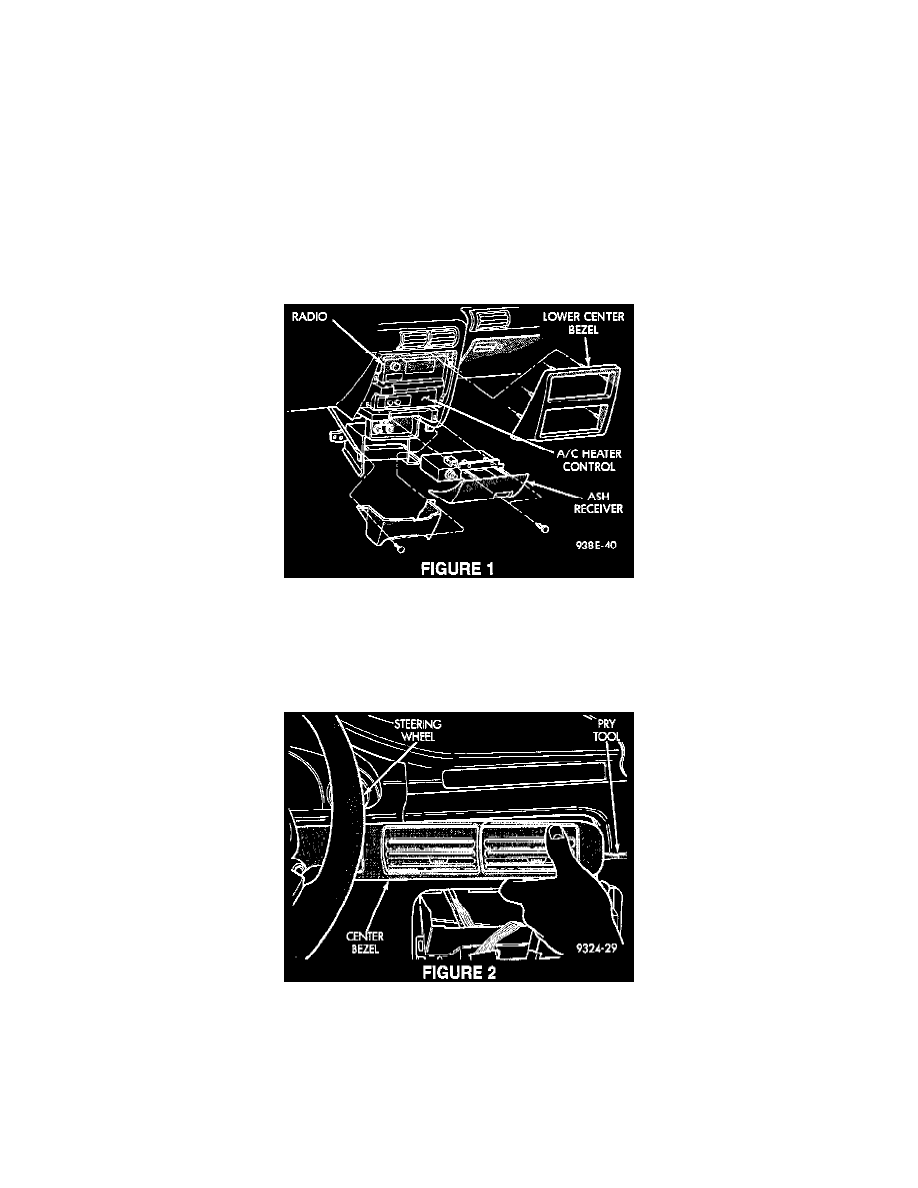
Remove ash receiver. Remove the radio and A/C control lower center bezel which is held in place by six clips. This can be done by carefully
prying the bezel from the instrument panel (Figure 1).
15.
Remove the radio and unplug the radio connections, and set aside.
16.
Remove the heater A/C control head, unplug connectors, and set aside.
17.
Remove the center instrument panel bezel (Figure 2). This bezel is held in place by four clips. It can be removed by carefully prying it from the
instrument panel. Disconnect wiring at bezel.
18.
If the vehicle is equipped with a center console, remove shift knob and surrounding console bezel. Remove fasteners and place console out of the
way.
19.
Unbolt rear console mounting bracket.
20.
Remove air duct for rear heater vents.