
Intrepid V6-215 3.5L (1995)
10.
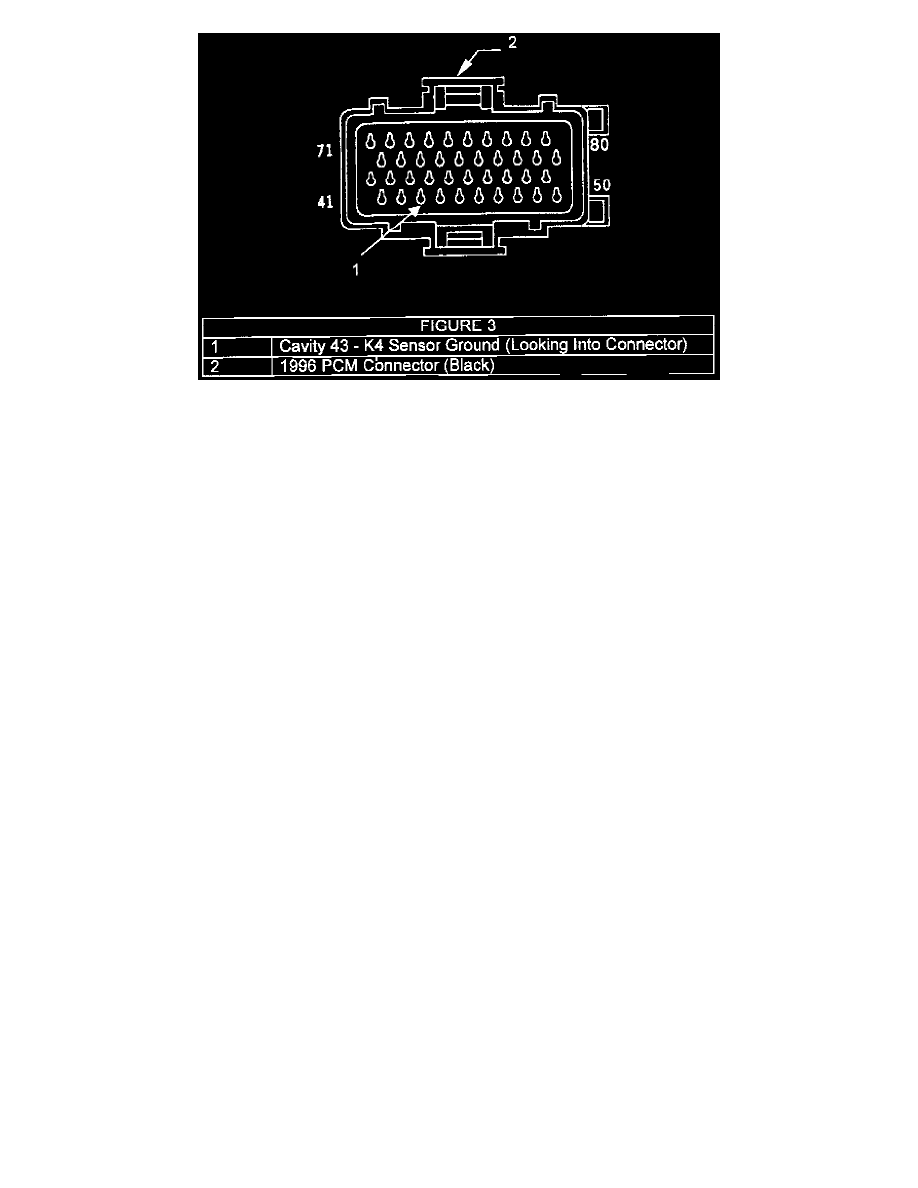
Locate and remove the (C137) 60 way PCM connector on 1995 models (Figure 2) or the (C174) 40 way PCM connector on 1996 models (Figure
3).
11.
Unwrap the tape as required to expose the insulation 3 to 4 inches behind the connector.
10.
Remove the wire dress cover from the rear of the connector. Locate the K4 circuit BK/LB (1995 cavity 4 & 1996 cavity 43).
12.
Cut the K4 wire 1-1/2 inches from the PCM connector. Strip both ends of the cut wire and the end of the new lead.
12.
Slip a piece of heat shrink tube p/n 04778570 over the lead connected to the PCM connector. Make sure the shrink tube is long enough to seal the
splice after soldering.
13.
Twist all three leads together and solder the splice with rosin core solder. Slide the heat shrink tube over the splice and shrink with a heat gun until
sealant flows from both ends of the shrink tubing.
14.
Reinstall the wire dress cover to the rear of the PCM connector. Using electrical tape p/n 04778138, tape over the repaired area to match the
original construction of the harness finishing the tape on the tape flange of the wire dress cover.
15.
Reconnect the oxygen sensors and the connector to the powertrain control module.
16.
Reconnect the battery negative cable.
17.
Verify the wiring repair by watching the oxygen sensor switch on the sensor read screen of the DRB III(R).