
Intrepid V6-215 3.5L (1995)
1.
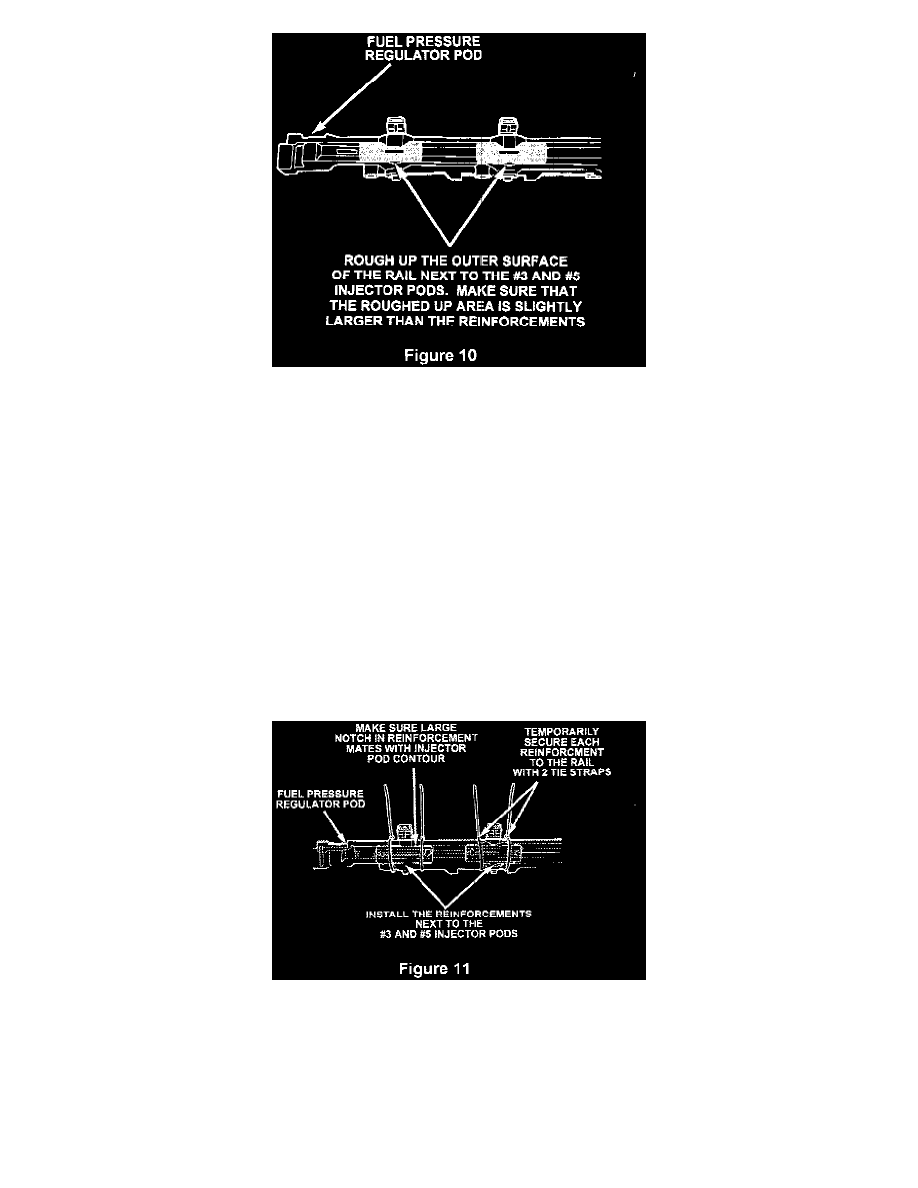
Using the supplied sandpaper, rough up the outer surface of the outlet rail next to the # 3 and # 5 injector pods as shown in Figure 10.
2.
Clean each of the roughed up areas using the supplied alcohol wipes. Use one alcohol wipe for each area.
3.
Prepare the epoxy as follows:
CAUTION:
Read warning on back of epoxy package.
a.
Break the center of the epoxy package by rolling the side of the package with the largest amount of material toward the center and applying
pressure to the rolled up section.
b.
Mix thoroughly in the package until the color is uniform (approximately 60-90 seconds). Do not use excessive pressure or puncture the
package during mixing.
c.
Cut the corner of the package and apply immediately.
NOTE:
Material set time is approximately 6-8 minutes.
4.
Apply the epoxy to the back (concave) side of one of the supplied reinforcements. IMMEDIATELY install the reinforcement on the outlet rail in
one of the roughed up areas next to the # 3 or # 5 injector pod. Position the reinforcement so that the large notch is up and it fits around the
injector pod. (Figure 11).
5.
Temporarily secure the reinforcement to the outlet rail with two (2) of the supplied tie straps (Figure 11).
6.
Apply epoxy to the back (concave) side of the other supplied reinforcement. IMMEDIATELY install the reinforcement on the outlet rail in the
other roughed up area next to the # 3 or # 5 injector pod (Figure 11). Position the reinforcement so that the large notch is up and it fits around the
injector pod.