
Intrepid V6-215 3.5L (1995)
5.
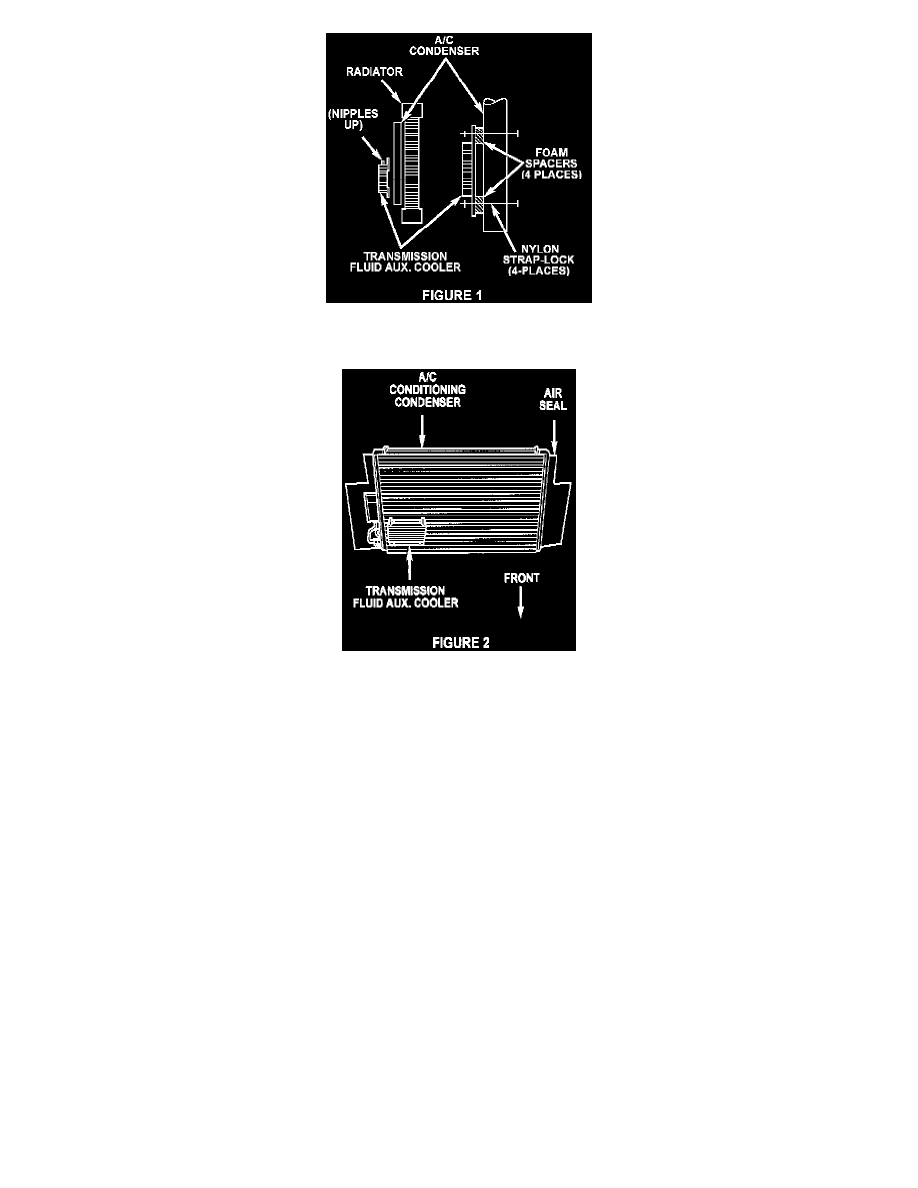
Apply four foam pads to the flat side of the transmission fluid auxiliary cooler mounting flange so the holes of the pads align with the four
outboard holes in the mounting flange. Apply an additional foam pad on top of each pad already installed (Refer to Figure 1).
6.
From the back side of the A/C condenser, insert one of the mounting straps approximately 2 in. inboard of the right side edge of the condenser fins
and through the third row (from the bottom) of fins of the A/C condenser (Refer to Figure 2).
7.
Measure 190 mm (7.5 in.) inboard of the first mounting strap and insert another mounting strap through the third row of fins.
8.
Install the lower mounting holes of the transmission fluid auxiliary cooler over the mounting straps installed in steps 6 and 7 with the inlet/outlet
nipples up and the foam pads on mounting flange toward the A/C condenser.
9.
Loosely install strap locks on the two mounting straps.
10.
Install the two remaining mounting straps from the back side of the A/C condenser through the fins so the straps align with and pass through the
upper mounting holes (with the foam pads) of the transmission fluid auxiliary cooler.
11.
Install mounting strap locks on the upper straps and tighten all the locks against the transmission fluid auxiliary cooler so the foam pads are
slightly compressed.
12.
Remove the two top mounting screws for the right headlamp assembly.
NOTE:
BE SURE THE RUBBER SIDE AIR BAFFLES ARE IN POSITION. FAILURE TO INSTALL THE BAFFLES WILL RESULT IN A HIGHER
OPERATING TEMPERATURE FOR THE TRANSMISSION AND HIGHER A/C COMPRESSOR HEAD PRESSURE.
13.
Install the A/C condenser and the A/C discharge hose/line bracket to the radiator.
14.
Install the two top mounting screws for the right headlamp assembly.
15.
Inspect the A/C line 0-rings for damage and replace if necessary.