
Intrepid V6-3.2L VIN J (1998)
14.
If an insulator shows signs of corrosion, all wires must be removed by clipping them at the base of the insulators using a wire cutter.
15.
Strip the insulation from the wires to expose 1/8 in. of copper wire, make sure the strands of wire are not cut, just the insulation.
16.
The body side harness connectors use female terminals and the door side harness connectors use male terminals.
17.
Carefully crimp new terminals onto the wires using a crimping tool, Snap-On, # PWC47, or equivalent.
18.
Assemble the repaired circuits into the new insulators. Transfer the circuits into the new insulators. Use the connector that was removed with the
clipping procedure in step # 14 to see which wire goes into which cavity.
19.
Grease all cavities of both connectors with Mopar Dielectric Grease, p/n J8126688.
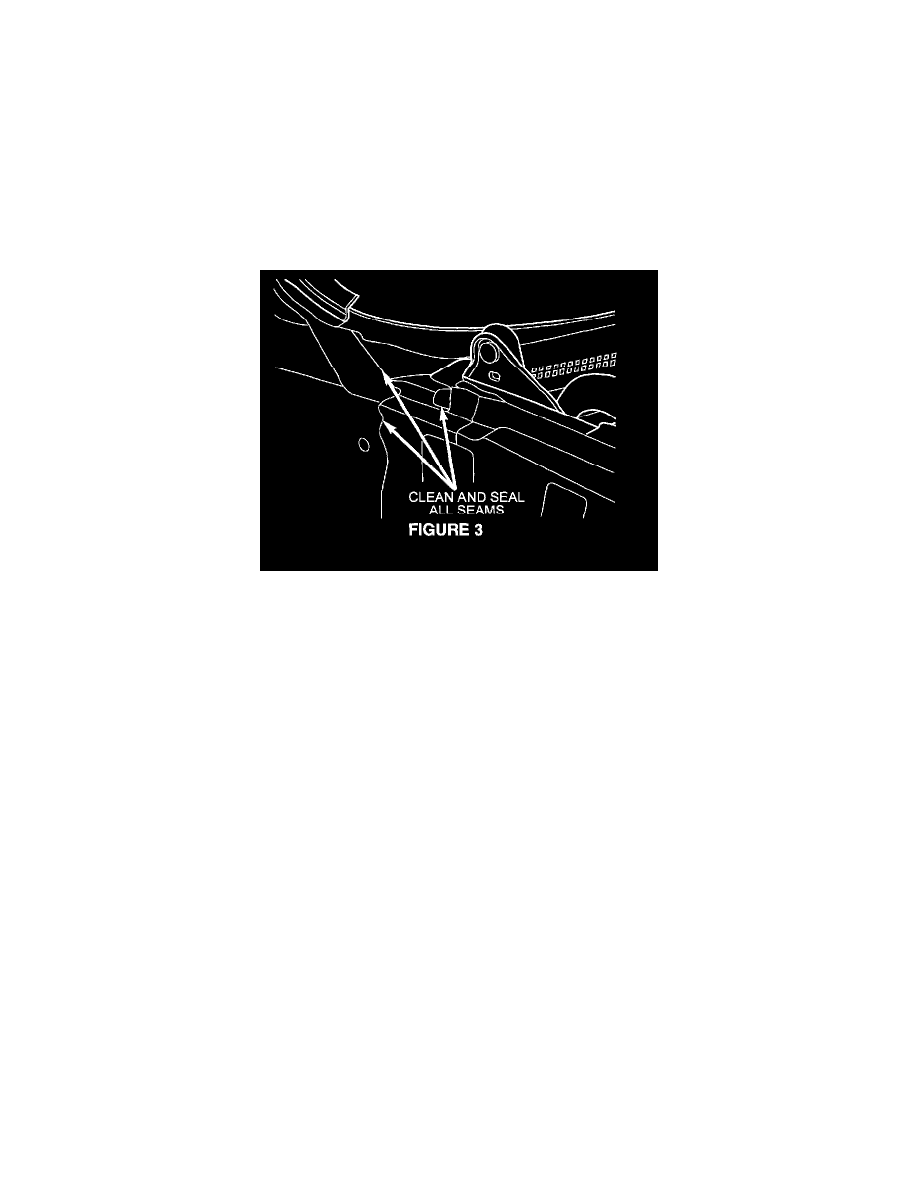
20.
Inspect the A-pillar/cowl load beam body seams (Figure 3). Remove any excess/squeezed out, over expanded, body sealer material from the
seams. Clean area with Mopar Super Clean, p/n 04886330AA, or equivalent.
21.
Seal all body seams with Mopar Paintable Repair Sealer, p/n 04318026, or Mopar Firm Setting Body Sealer, p/n 04856952, or equivalent.
22.
Water test vehicle to make sure no water is entering the A-pillar/cowl area.
23.
Install the repaired door wire harness insulators into the retainer.
24.
Connect the door harness and body harness insulators.
25.
Install the grommet boot into the retainer. The nipples on the inside of the boot must seat into the groove on the retainer or the grommet will not be
properly seated and it will leak.
26.
Insert the foam block, p/n 04759673AB, above the harness insulator inside the A-pillar/cowl to divert any water away from the connector.
27.
Install the fully assembled body/door connection into the body until it clicks. The arrow on the grommet boot should be pointing up.
28.
For fender installation, reverse the above procedures, steps 1 thru 9.
29.
Repeat procedure on the other side of vehicle if necessary.