Intrepid V6-3.2L VIN J (1998)

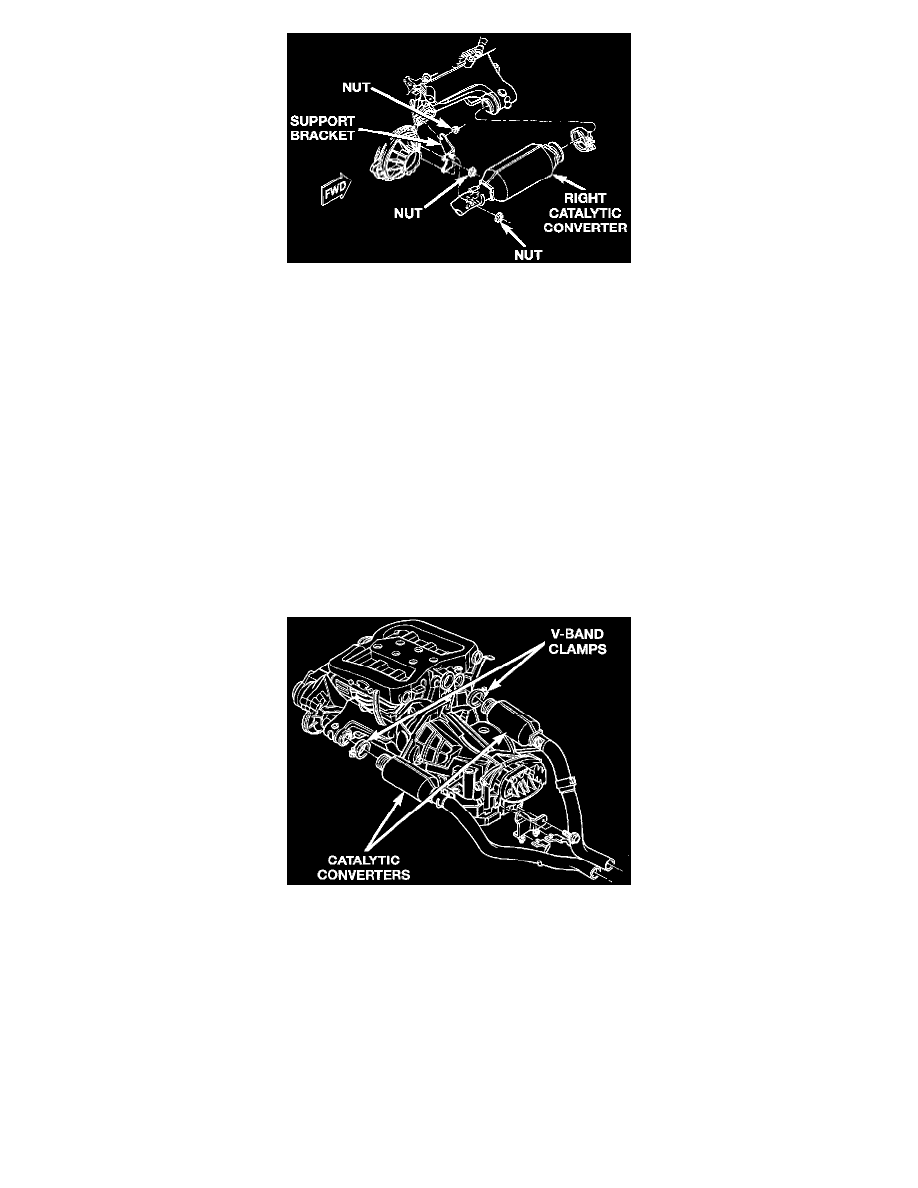
Figure 6-Front Exhaust Pipe Support-Right Side
9. Remove fastener attaching exhaust pipe front support to transaxle.
10. Disconnect downstream oxygen sensor connector and remove sensor from converter pipe.
11. Loosen and remove V-Band clamp at exhaust manifold.
NOTE: Do not reuse V-Band clamp.
12. Remove converter from engine compartment.
INSTALLATION
1. Position a NEW V-Band clamp onto the exhaust manifold outlet. DO NOT latch the clamp's T-bolt at this time.
2. Install catalytic converter. If necessary, stretch open the V-Band clamp to allow the converter to engage the manifold outlet.
3. Latch the V-Band clamp T-bolt.
4. Raise vehicle on hoist.
5. Install right side converter extension pipe, but do not tighten clamp at this time.
6. Lower vehicle on hoist.
NOTE: Check for proper alignment and clearance to underbody and engine compartment components before tightening clamps.
Figure 7-Catalytic Converters
7. Tighten V-Band clamp to 11 Nm (100 inch lbs.).
8. Install downstream oxygen sensor and connect electrical connector.
9. Install SRV (Single Runner Valve) vacuum reservoir and control valve assembly at right rear of engine. (3.2L Engine Only)
10. Install air cleaner assembly with air inlet hose.
11. Raise vehicle on hoist.
12. Tighten extension pipe band clamp to 61 Nm (45 ft. lbs.).
13. Install and/or tighten nut attaching extension pipe to transaxle bracket to 47 Nm (35 ft. lbs.).
14. Install nut attaching exhaust pipe front support to bracket on transaxle housing/differential cover and tighten to 47 Nm (35 ft. lbs.).
15. Install exhaust system.
16. Lower vehicle.
LEFT CATALYTIC CONVERTER
