
Intrepid V6-3.5L VIN V (2002)
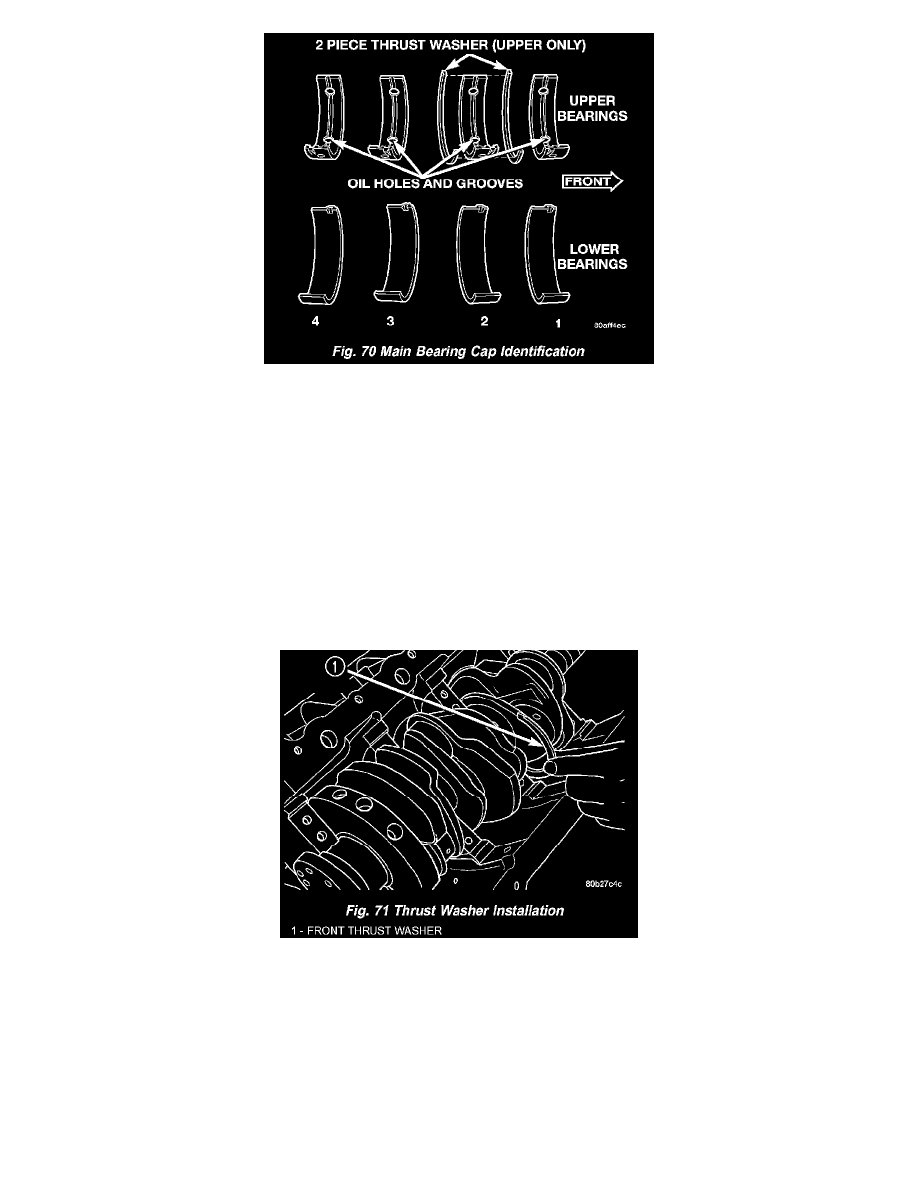
Bearing caps are not interchangeable and are marked to insure correct assembly. Upper and lower bearing halves are NOT interchangeable (Fig. 70).
CAUTION: Main bearings are select fit.
NOTE: Only one main bearing should be selectively fitted while all other main bearing caps are properly tightened.
When installing a new upper bearing shell, slightly chamfer the sharp edges from the plain side.
1. Lubricate main bearing with clean engine oil.
2. Start bearing in place, and insert Main Bearing Tool C-3059 into oil hole of crankshaft (Fig. 69).
3. Slowly rotate crankshaft counterclockwise sliding the bearing into position. Remove Special Main Bearing Tool C-3059.
NOTE: Lubricate main bearing cap bolts with engine oil before installation.
4. Lubricate and install lower bearing half and main cap Tighten bolts finger tight.
5. For installing thrust washers at the No. 2 main bearing location, use the following procedure:
a. Move crankshaft forward to limit of travel. Lubricate and install the front thrust washer by rolling the washer onto the machined shelf between
the No. 2 upper main bulk head and crankshaft thrust surface (Fig. 71).
b. Move crankshaft rearward to limit of travel. Lubricate and install the rear thrust washer by rolling the washer onto the machined shelf between
the No. 2 upper main bulk head and crankshaft thrust surface.
The main bearing cap bolts must be tightened in the proper sequence. First the inner main cap bolts, secondly the windage tray bolts, lastly the
main cap tie (horizontal) bolts.
6. Install each main bearing cap and tighten inner bolts finger tight.
7. Tighten inner main bearing cap bolts to 20 Nm (15 ft. lbs.) + 1/4 turn.
8. Measure crankshaft end play.