
Journey FWD V6-3.5L (2009)
b.
No >>> Perform rear crossmember centering and adjustment Repair Procedure.
SPECIAL TOOLS/EQUIPMENT REQUIRED:
TORQUE VERIFICATION REPAIR PROCEDURE:
1.
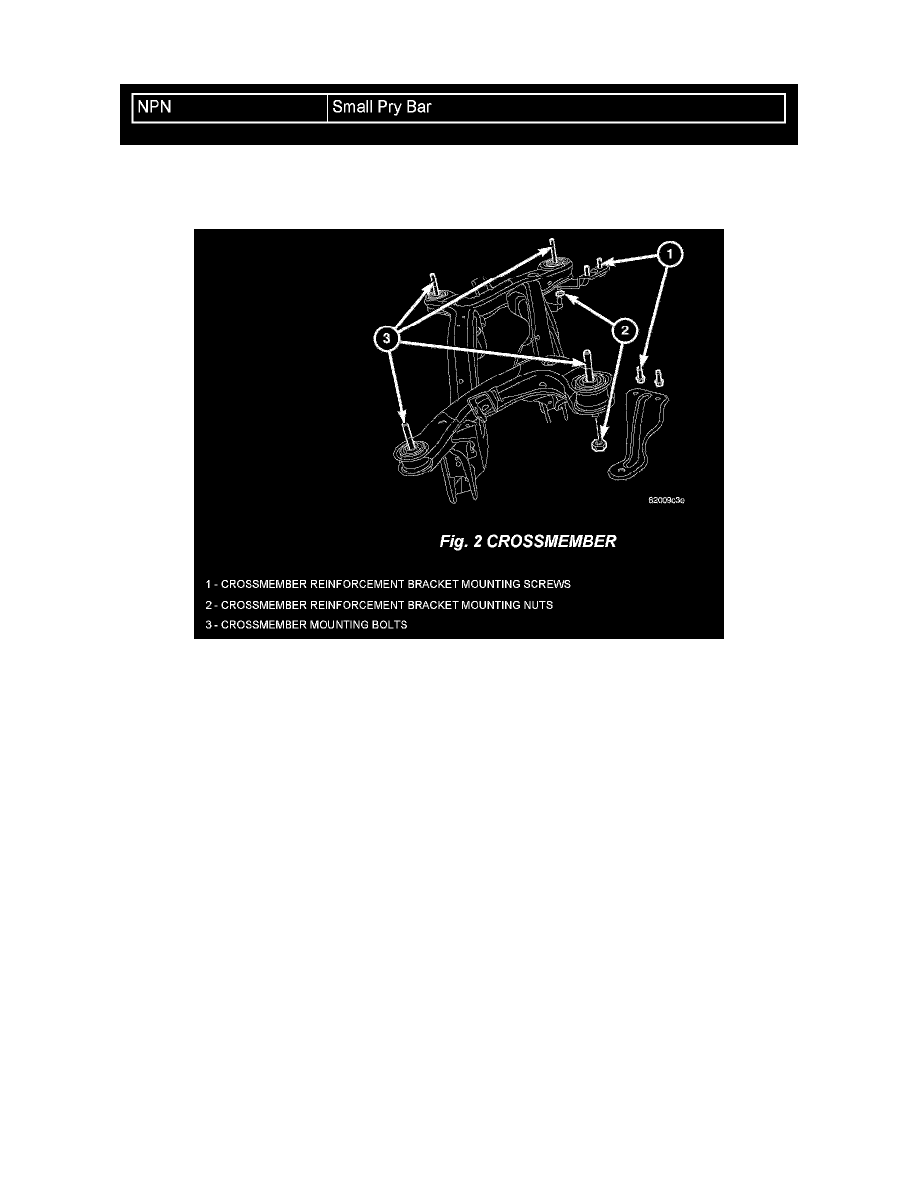
Remove the two mounting screws securing each crossmember reinforcement bracket (one each side of vehicle) to the body (Fig. 2).
2.
Remove the mounting nuts securing the crossmember reinforcement brackets to the crossmember rear mounting bolts (Fig. 2).
3.
Remove the brackets.
4.
Torque the forward (front) rear crossmember mounting bolts to 95 N.m (70 ft. lbs.).
5.
Torque the aft (rear) rear crossmember mounting bolts to 95 N.m (70 ft. lbs.).
6.
Position the crossmember reinforcement brackets (one each side of vehicle) over the crossmember rear mounting bolt head-studs and install the
mounting nuts, but do not tighten at this time.
7.
Install the mounting screws securing the crossmember reinforcement brackets to the body.
8.
Torque the screws to 55 N.m (41 ft. lbs.).
9.
Torque the mounting nuts securing the reinforcement brackets to the rear crossmember mounting bolts to 50 N.m (37 ft. lbs.).
10.
Lower the vehicle.
REAR CROSSMEMBER CENTERING AND ADJUSTMENT REPAIR PROCEDURE:
1.
Remove the two mounting screws securing each crossmember reinforcement bracket (one each side of vehicle) to the body (Fig. 2).
2.
Remove the mounting nuts securing the crossmember reinforcement brackets to the crossmember rear mounting bolts (Fig. 2).
3.
Remove the brackets.