
Journey FWD V6-3.5L (2009)
4. Immerse the piston head and rings in clean engine oil, slide the ring compressor over the piston and tighten with the special wrench. Ensure
position of rings does not change during this operation.
5. Install connecting rod bolt protectors on rod bolts.
6. Rotate crankshaft so that the connecting rod journal is on the center of the cylinder bore. Insert rod and piston into cylinder bore and guide rod
over the crankshaft journal.
CAUTION: Do Not interchange piston assemblies cylinder-to-cylinder or bank-to-bank.
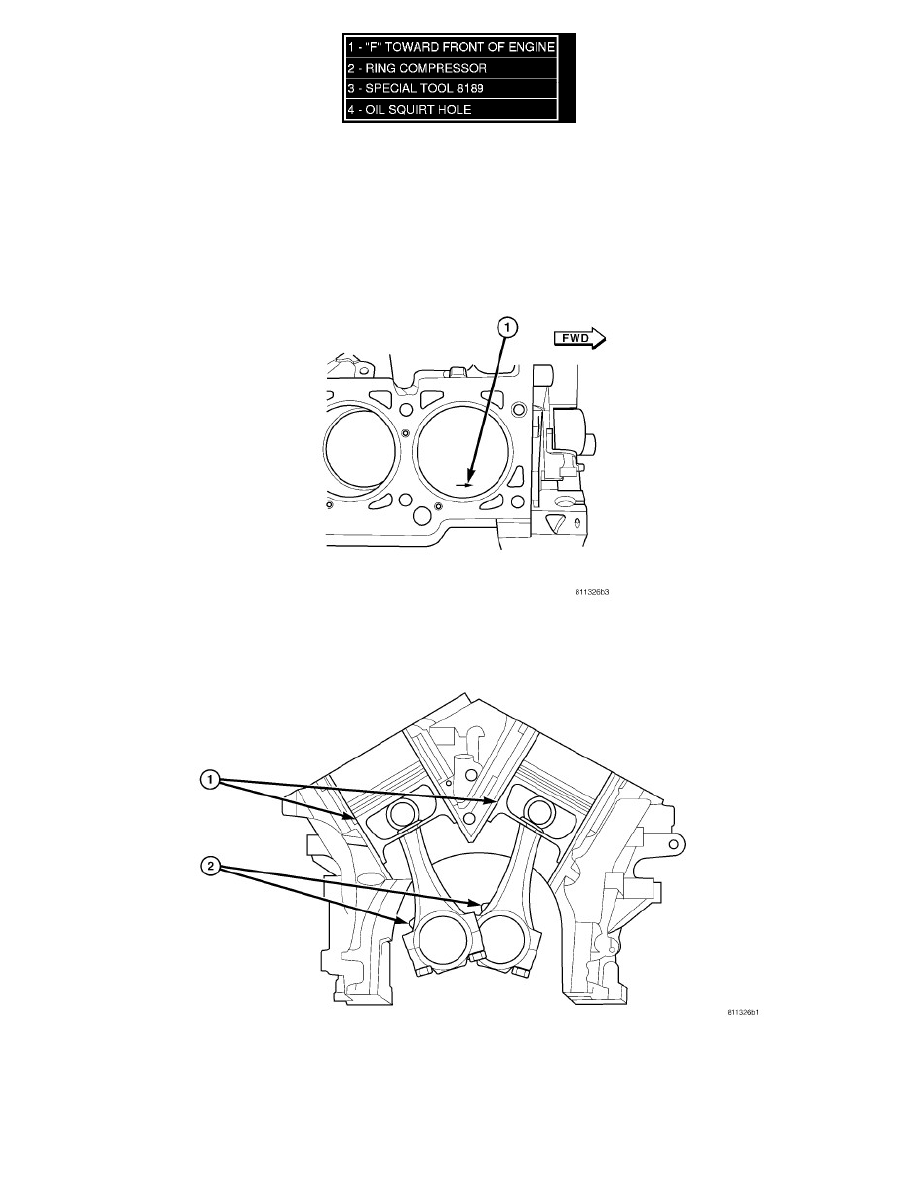
7. The arrow (1) on top of piston must be pointing toward front of engine and oil squirt hole on connecting rod faces the major thrust (right) side of
the cylinder bore.
8. Tap the piston down in cylinder bore, using a hammer handle. At the same time, guide connecting rod into position on connecting rod journal.
9. Install rod caps. Install cleaned and inspected connecting rod bolts and tighten to 27 Nm (20 ft. lbs.) Plus 1/4 turn.
10. Install the cylinder head(s) See: Cylinder Head Assembly/Service and Repair/Removal and Replacement/Cylinder Head - Installation
11. Install the oil pan. See: Engine Lubrication/Oil Pan/Service and Repair/Engine Oil Pan - Installation