
Journey FWD V6-3.5L (2009)
NOTE: It is necessary to compress the plunger into the tensioner body and install a locking pin prior to reinstalling the tensioner. See Timing
Belt Removal for tensioner compression procedure See: Timing Belt/Service and Repair/Removal and Replacement/Timing Belt &
Sprockets - Removal .
5. Hold the tensioner pulley against the belt and install the reset (pinned) timing belt tensioner (2) into the housing. Tighten attaching bolts to 28 Nm
(250 in. lbs.).
6. Remove tensioner retaining pin to allow the tensioner to extend to the pulley bracket.
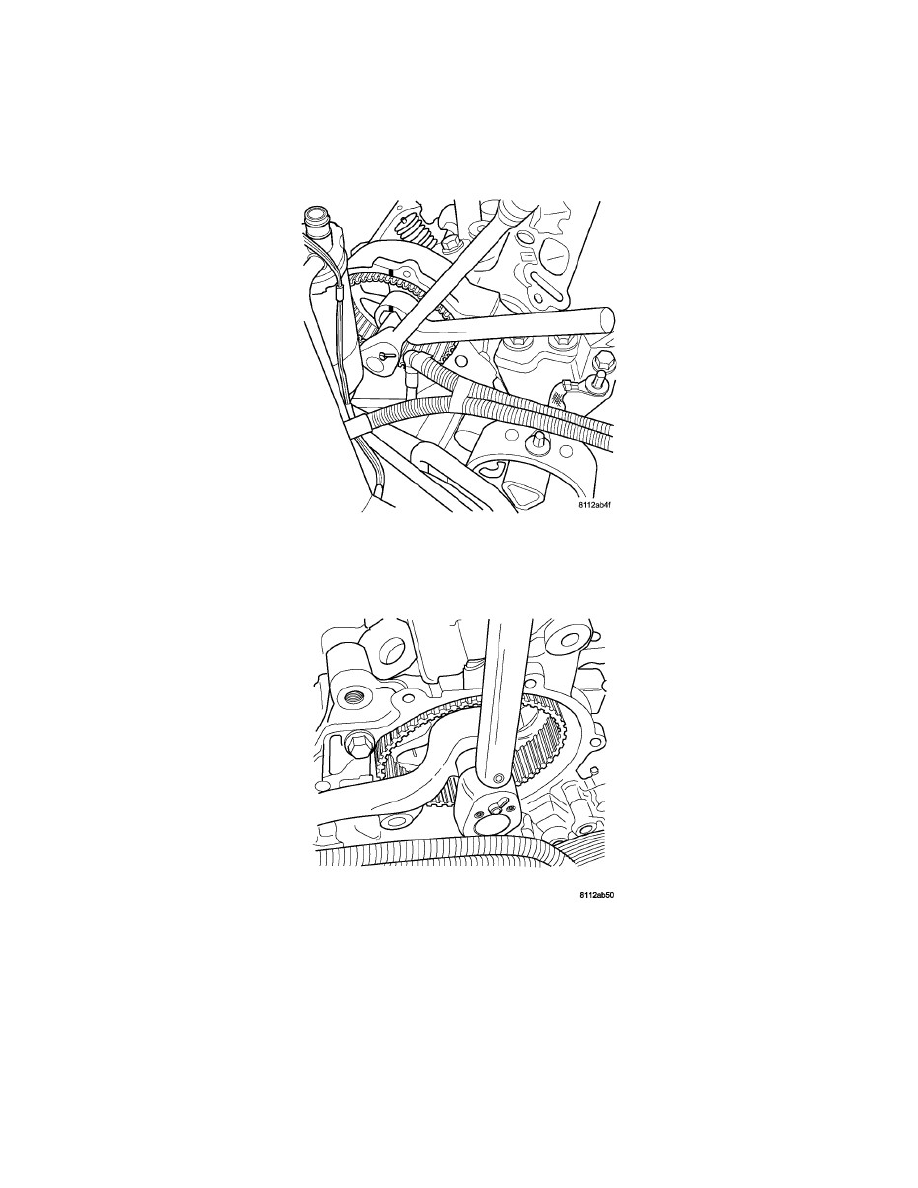
7. Hold the right camshaft sprocket hex with a 36 mm (1 7/16 in.) wrench and tighten the right camshaft bolt to 102 Nm (75 ft. lbs.) +90° turn.
8. Hold the left camshaft sprocket hex with a 36 mm (1 7/16 in.) wrench and tighten the left camshaft bolts to 102 Nm (75 ft. lbs.) +90° turn.
9. Install the rocker arm assemblies and cylinder head covers See: Camshaft, Lifters and Push Rods/Rocker Arm Assembly/Service and
Repair/Removal and Replacement/Valve Rocker Arm - Installation
10. Install the front timing belt cover See: Timing Cover/Service and Repair/Engine Timing Cover(s) - Installation
NOTE: The Cam/Crank Variation Relearn procedure must be performed anytime there has been a repair/replacement made to a powertrain
system, for example: flywheel, valvetrain, camshaft and/or crankshaft sensors or components See: Powertrain Management/Computers
and Control Systems/Testing and Inspection/Programming and Relearning