
Journey FWD V6-3.5L (2009)
1. Disconnect and isolate the negative battery cable.
2. Remove the right D-pillar trim panel See: Body and Frame/Interior Moulding / Trim/Trim Panel/Service and Repair/Pillar Trim/D-Pillar
Trim/Removal.
3. Remove right quarter trim panel See: Body and Frame/Interior Moulding / Trim/Trim Panel/Service and Repair/Luggage Compartment
Trim/Quarter Trim Panel - Removal.
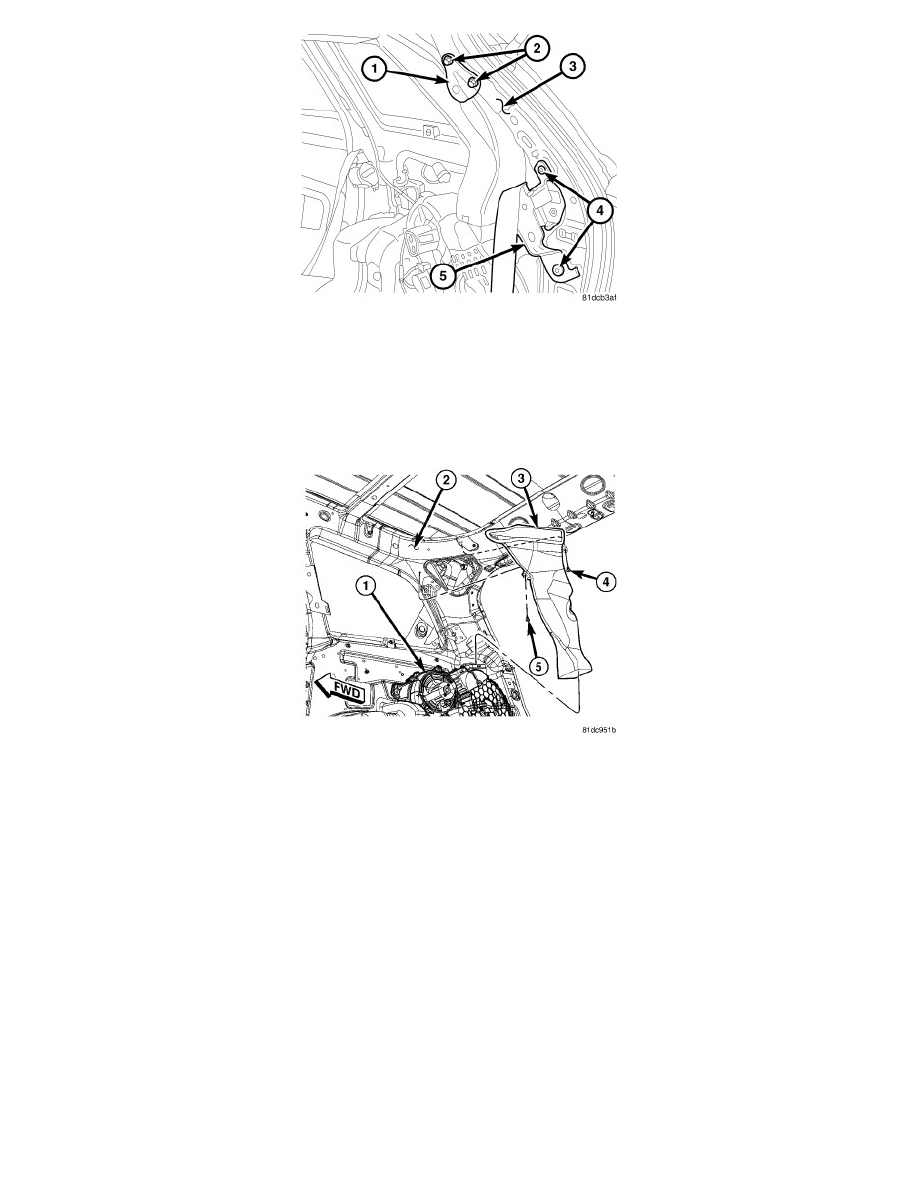
4. Remove the two bolts (2) that secure the upper seat belt bracket (1) to the right D-pillar (3) and remove the bracket.
5. Remove the two bolts (4) that secure the right seat belt retractor (5) to the right D-pillar and remove the retractor.
6. Remove the two retainers (4 and 5) that secure the rear ceiling distribution duct (3) to the right D-pillar (2).
7. Lift the rear ceiling distribution duct upward and disengage it from the rear heater-A/C housing (1).
CAUTION: Use care when removing the rear ceiling distribution duct from the heater-A/C housing to prevent damage to the molded plastic
support brace located on the top of the housing outlet. Failure to follow this caution could result in part of, or all of the support
brace falling into the rear housing, which may interfere with rear mode door operation.
8. Pull the bottom end of the rear ceiling distribution duct away from the rear heater-A/C housing and remove the duct.
Ceiling Distribution Duct - Installation
INSTALLATION