
Journey FWD V6-3.5L (2009)
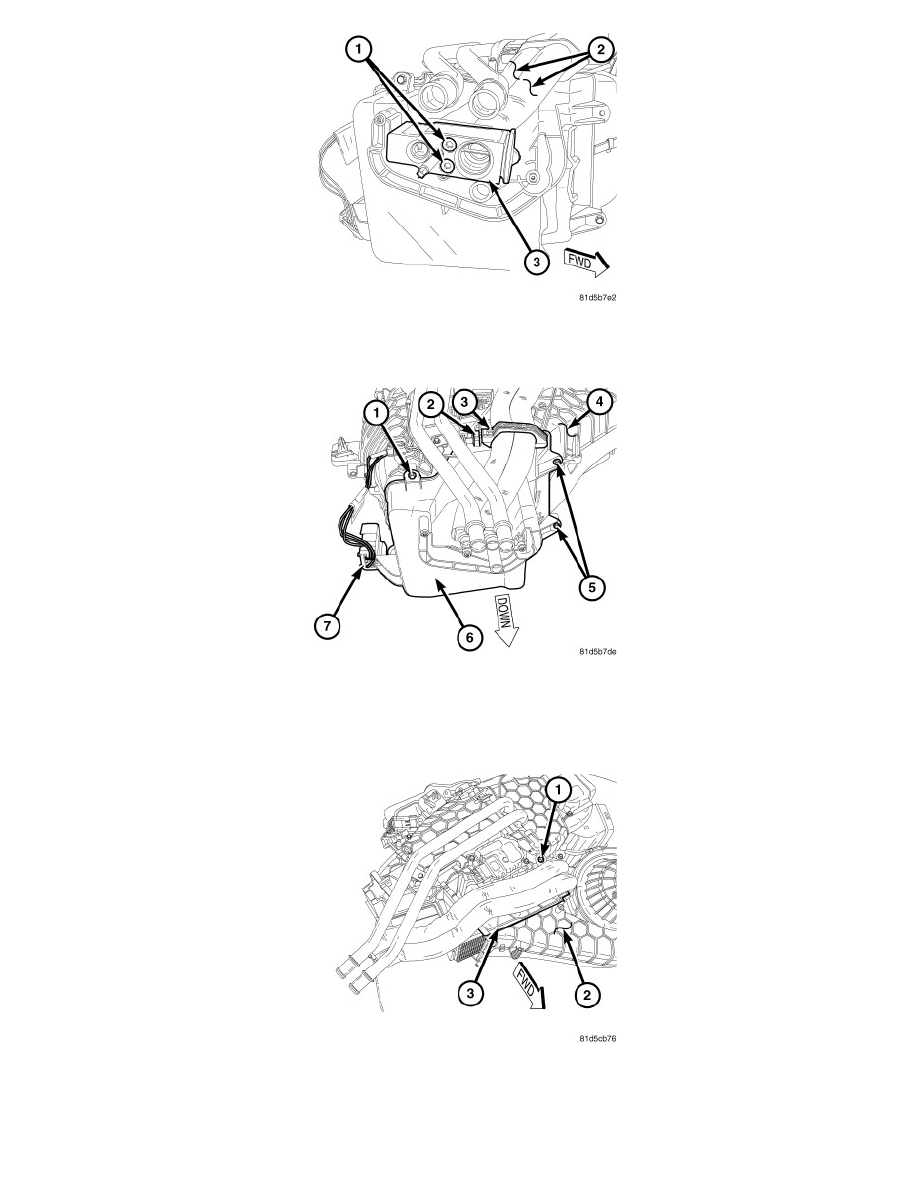
5. Remove the two screws (1) that secure the rear expansion valve (3) to the tapping plate located on the end of the rear evaporator tubes (2) and
remove the valve.
6. Remove and discard the O-ring seals and install plugs in, or tape over the opened evaporator tubes and expansion valve ports.
7. Remove the wire harness connector (7) from the lower rear heater-A/C housing (6).
8. Open the evaporator tube retaining bracket (3) located on the outboard side of the lower housing.
9. Remove the metal retaining clip (2) that secures the lower housing to the rear heater-A/C housing (4).
10. Remove the five screws (1 and 5) that secure the lower housing the rear heater-A/C housing and carefully remove the lower housing. Rotate and
tilt the lower housing as necessary for removal.
11. Remove the screw (1) that secures the rear evaporator cover (3) to the outboard side of the rear heater-A/C housing (2) and remove the cover of
the housing.