
Journey FWD V6-3.5L (2009)
3. Drain the engine cooling system See: Engine, Cooling and Exhaust/Cooling System/Service and Repair.
4. Raise and support the vehicle.
CAUTION: DO NOT apply excessive force on underbody heater lines or rear heater tubes when disconnecting the connections. Excessive force
may damage or deform the tubes and or lines, causing an engine coolant leak.
NOTE: Replacement of the rubber heater hose ends will be required if the rubber hoses are cut for removal.
5. Release the spring type hose clamps (4) and disconnect the underbody heater lines (5) from the rear heater core tubes located behind the right rear
wheel housing.
6. Lower the underbody heater lines and drain any residual coolant from the lines into a suitable container.
7. Loosen the fitting nuts (1) that secure the underbody refrigerant lines (7) to the underbody refrigerant extension lines and sealing plate (2 and 6).
8. Disconnect the underbody refrigerant lines from underbody refrigerant extension lines and remove and discard the O-ring seals.
9. Remove the nut (3) that secures the underbody refrigerant extension lines and sealing plate to the rear A/C expansion valve.
10. Disconnect the extension lines and sealing plate from the rear A/C expansion valve and remove and discard the O-ring seals.
11. Install plugs in, or tape over the opened underbody refrigerant line fittings and rear expansion valve ports.
12. Lower the vehicle.
13. Remove the right D-pillar trim panel See: Body and Frame/Interior Moulding / Trim/Trim Panel/Service and Repair/Pillar Trim/D-Pillar
Trim/Removal.
14. Remove right quarter trim panel See: Body and Frame/Interior Moulding / Trim/Trim Panel/Service and Repair/Luggage Compartment
Trim/Quarter Trim Panel - Removal.
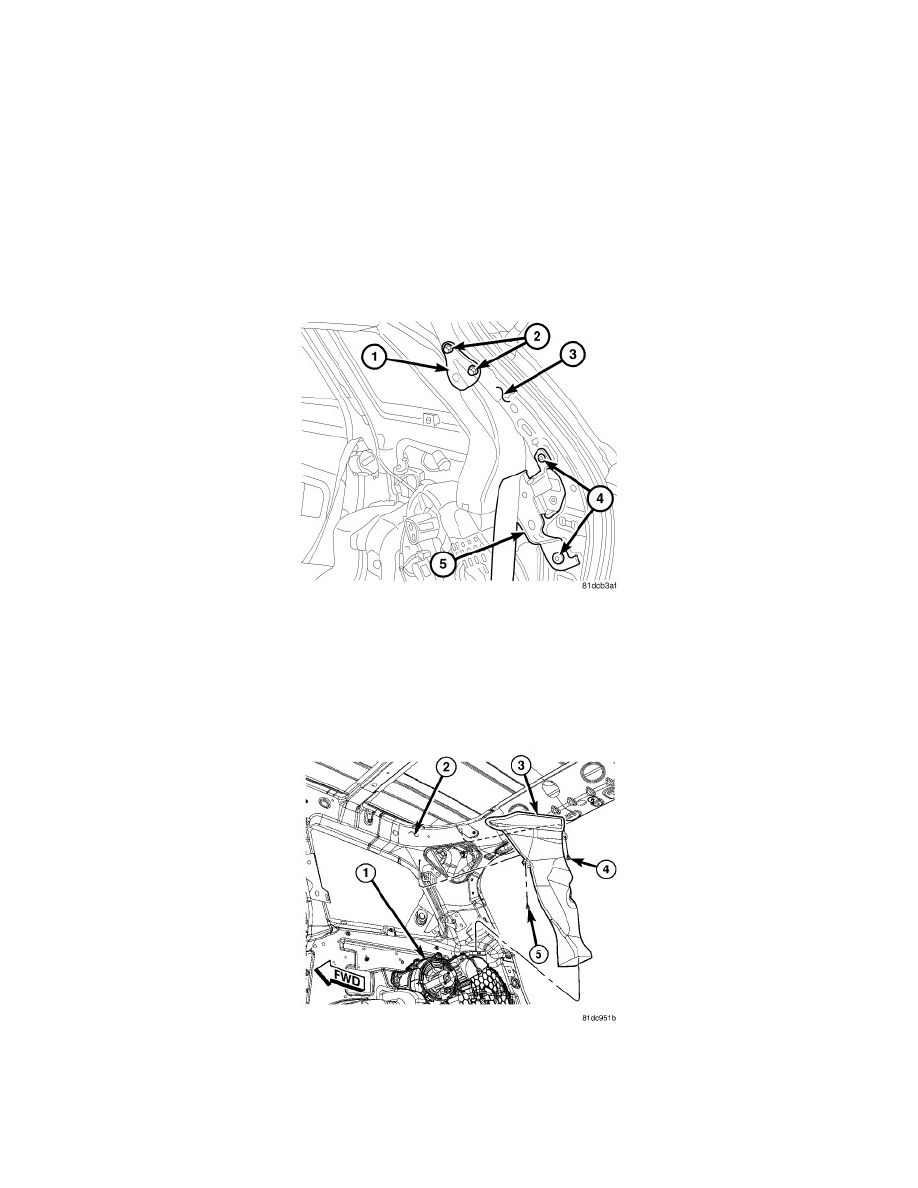
15. Remove the two bolts (2) that secure the upper seat belt bracket (1) to the right D-pillar (3) and remove the bracket.
16. Remove the two bolts (4) that secure the right seat belt retractor (5) to the right D-pillar and remove the retractor.
17. Remove the two retainers (4 and 5) that secure the rear ceiling distribution duct (3) to the right D-pillar (2).
18. Lift the rear ceiling distribution duct upward and disengage it from the rear heater-A/C housing (1).
CAUTION: Use care when removing the rear ceiling distribution duct from the heater-A/C housing to prevent damage to the molded plastic
support brace located on the top of the housing outlet. Failure to follow this caution could result in part of, or all of the support