
Journey FWD V6-3.5L (2009)
3. Install the nine screws (3) and three metal clips (5) that secure the two halves of the HVAC housing together. Tighten the screws to 1.2 Nm (10 in
lbs.). Make sure the metal clips are fully engaged to the housing halves.
NOTE: If the foam seal or plastic flange is deformed or damaged, it must be replaced.
4. Install the plastic flange and foam seal (2) over the evaporator tubes and onto the front of the HVAC housing. Make sure the four flange retaining
tabs are fully engaged to the housing.
5. Remove the tape or plugs from the expansion valve and evaporator ports.
6. Lubricate new O-ring seals with clean refrigerant oil and install them onto the evaporator tube fittings. Use only the specified O-ring seals as they
are made of a special material for the R-134a system. Use only refrigerant oil of the type recommended for the A/C compressor in the vehicle.
7. Install the A/C expansion valve (6) and the two retaining bolts. Tighten the bolts to 11 Nm (97 in. lbs.) See: Expansion Valve/Service and
Repair/A/C Expansion Valve - Installation.
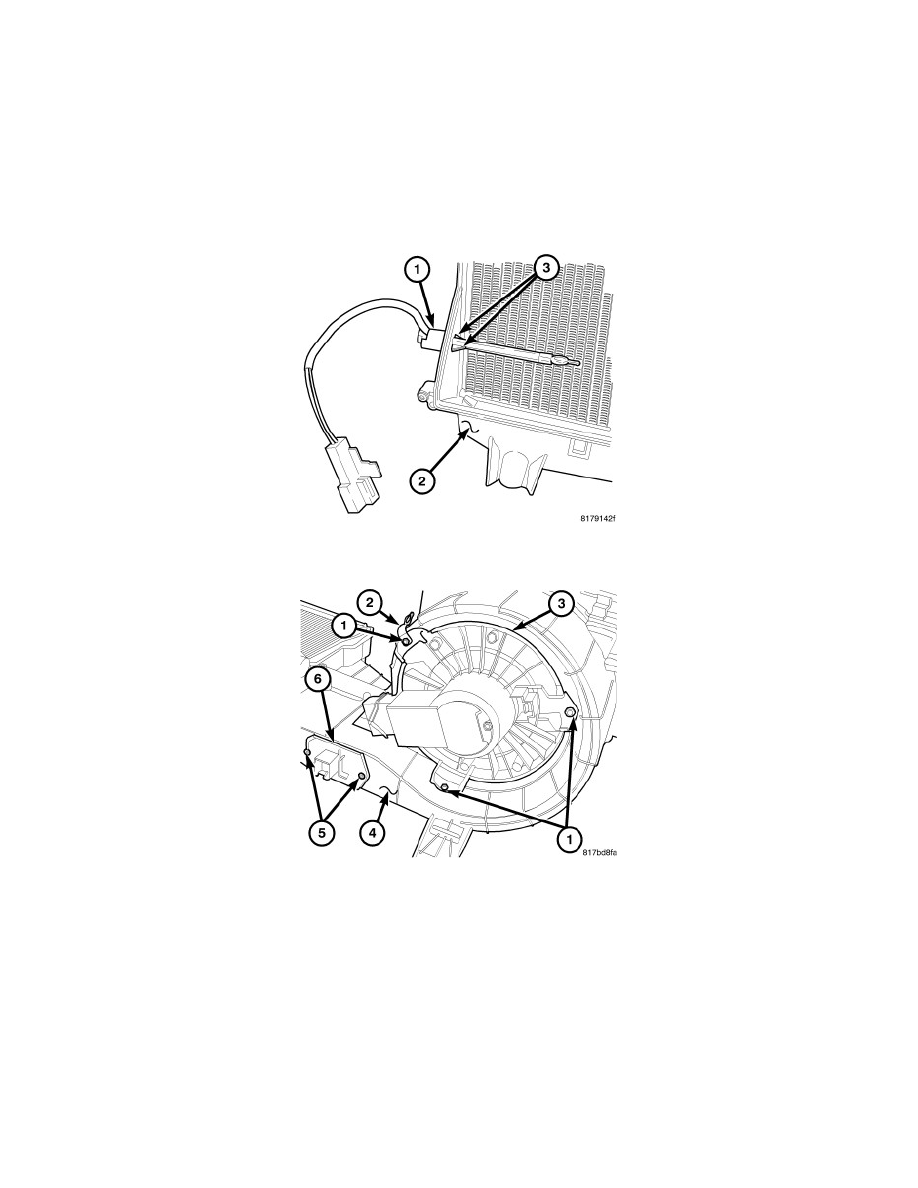
8. Install the evaporator temperature sensor (1) into the driver side of the HVAC housing (2). Make sure the retaining tabs (3) are fully engaged to
the housing.
NOTE: Manual temperature system shown. Automatic system similar.
9. Position the blower motor (3) into the bottom of the HVAC housing (4).
10. Install the wire lead bracket (2) and the three screws (1) that secure the blower motor to the HVAC housing. Tighten the screws to 1.2 Nm (10 in.
lbs.).
11. Position the blower motor resistor or power module (6) into the HVAC housing.
12. Install the two screws (5) that secure the resistor or power module to the HVAC housing. Tighten the screws to 1.2 Nm (10 in. lbs.).