
Journey FWD V6-3.5L (2009)
NOTE: Two slots are provided at the bottom of the heat shield to aid in heat shield removal, if equipped. Complete removal of the two bottom
heat shield retaining nuts is not required.
11. If equipped, reach behind the engine and remove the two bottom nuts the that secure the heat shield to the studs located on the dash panel and
remove the heat shield. Rotate and tilt the heat shield as required.
NOTE: It is only necessary to position the engine coolant reservoir and the power steering fluid reservoir out of the way. Draining of the
coolant and power steering fluid is not required.
12. Remove the engine coolant reservoir from the right side of the engine compartment and position it out of the way See: Engine, Cooling and
Exhaust/Cooling System/Coolant Reservoir/Service and Repair/Coolant Recovery Bottle - Removal.
13. Remove the power steering fluid reservoir from the right front strut tower and position it out of the way See: Steering and
Suspension/Steering/Power Steering/Power Steering Fluid Reservoir/Service and Repair/Reservoir, Power Steering Pump - Removal.
14. If equipped with ABS, remove the ABS control module and pump assembly and position the brake lines out of the way as necessary See: Brakes
and Traction Control/Antilock Brakes / Traction Control Systems/Hydraulic Control Assembly - Antilock Brakes/Service and Repair/Removal and
Replacement/Integrated Control Unit (ICU) - Installation.
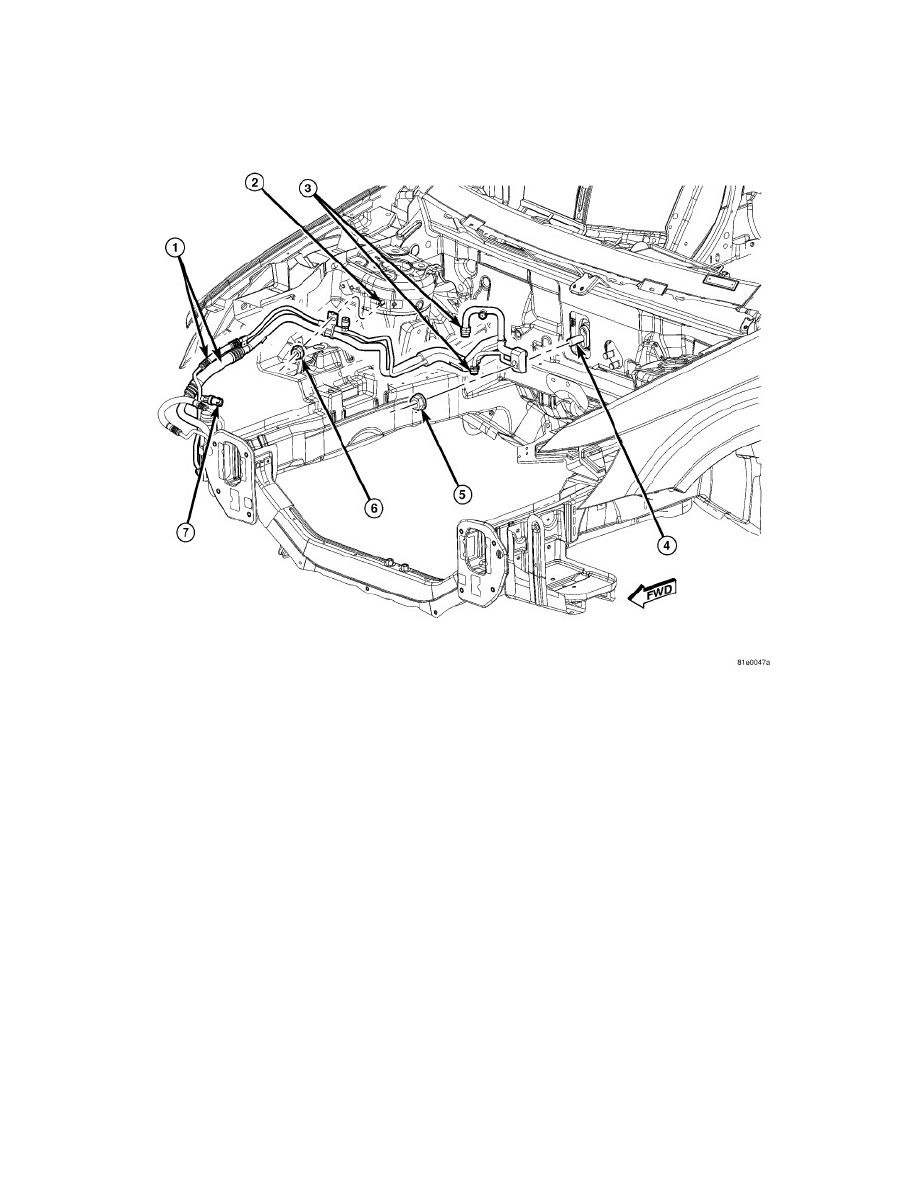
15. Disconnect the wire harness connector from the A/C pressure transducer (7) located on the A/C liquid line and remove the transducer if required
See: Heating and Air Conditioning/Refrigerant Pressure Sensor / Switch/Service and Repair/Front A/C Pressure Transducer - Removal.
16. If equipped with rear A/C, disconnect the rear A/C extension lines from the fittings (3) located on the A/C liquid and suction line assembly See:
A/C Underbody Lines - Removal.
17. Remove the nut (6) that secures the refrigerant line retaining bracket to the stud (2) located on the right front strut tower.
18. Remove the nut (5) that secures the A/C liquid and suction line assembly (1) to the A/C expansion valve (4).
19. Disconnect the A/C liquid and suction line assembly from the A/C expansion valve and remove and discard the O-ring seals.
20. Remove the A/C liquid and suction line assembly from the engine compartment.
21. Install plugs in, or tape over all of the opened refrigerant line fittings and the expansion valve and receiver/drier ports.