Journey FWD V6-3.5L (2009)

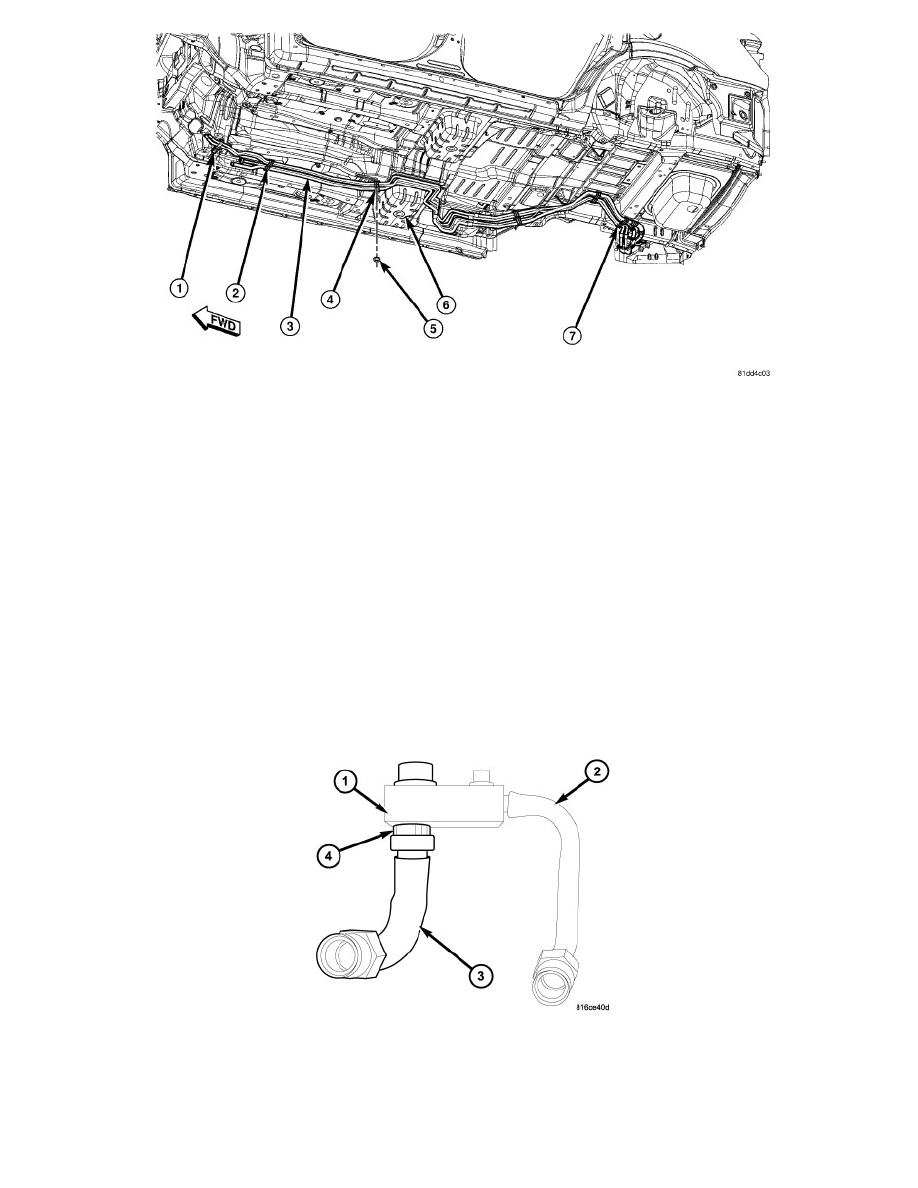
NOTE: Illustration shown with rear body cradle removed for clarity.
20. Remove the lower right rear shock retaining bolt See: Steering and Suspension/Suspension/Suspension Strut / Shock Absorber/Service and
Repair/Removal and Replacement/Rear Shock Absorber/Rear Shock Absorber, Coil-Over - Removal.
WARNING: Be sure to properly support the rear cradle before removing the right side retaining bolts. Failure to follow this warning may
result in serious or fatal injury.
21. Support the right side of the rear cradle with a suitable jack stand and remove the bolts that secure the right side of the cradle to the body See:
Body and Frame/Frame/Cross-Member/Service and Repair/Crossmember - Removal.
CAUTION: Use care not to damage the ABS wire lead or the brake line when lowering the rear cradle for clearance.
22. Carefully lower the jack stand until the right side of the rear cradle (supported by the stand) is approximately 76-101 mm (3-4 in.) below the body.
This will allow access to remove the underbody line assembly.
23. Remove the nut (5) that secures the underbody line bracket (4) to the stud located near the center of the underbody (6).
24. Disengage the remainder of the underbody line brackets (1, 2, and 7) from the studs located underneath the vehicle.
25. Rotate and tilt the underbody lines (3) as necessary and remove the lines from the vehicle.
26. Install plugs in, or tape over all the opened refrigerant line fittings and the rear expansion valve ports.
27. If required, place the extension lines and sealing plate (1) on a workbench, remove the nylon retaining clip (4) that secures the suction extension
line (3) to the sealing plate and remove the suction line from the sealing plate.
A/C Underbody Lines - Installation
