
Journey FWD V6-3.5L (2009)
WARNING: Be sure to properly support the rear cradle when installing the right side retaining bolts. Failure to follow this warning may result
in serious or fatal injury.
5. Install the bolts that secure the right side of the cradle to the body and remove the jack stand See: Body and Frame/Frame/Cross-Member/Service
and Repair/Crossmember - Installation.
6. Install the lower right rear shock retaining bolt See: Steering and Suspension/Suspension/Suspension Strut / Shock Absorber/Service and
Repair/Removal and Replacement/Rear Shock Absorber/Rear Shock Absorber, Coil-Over - Installation.
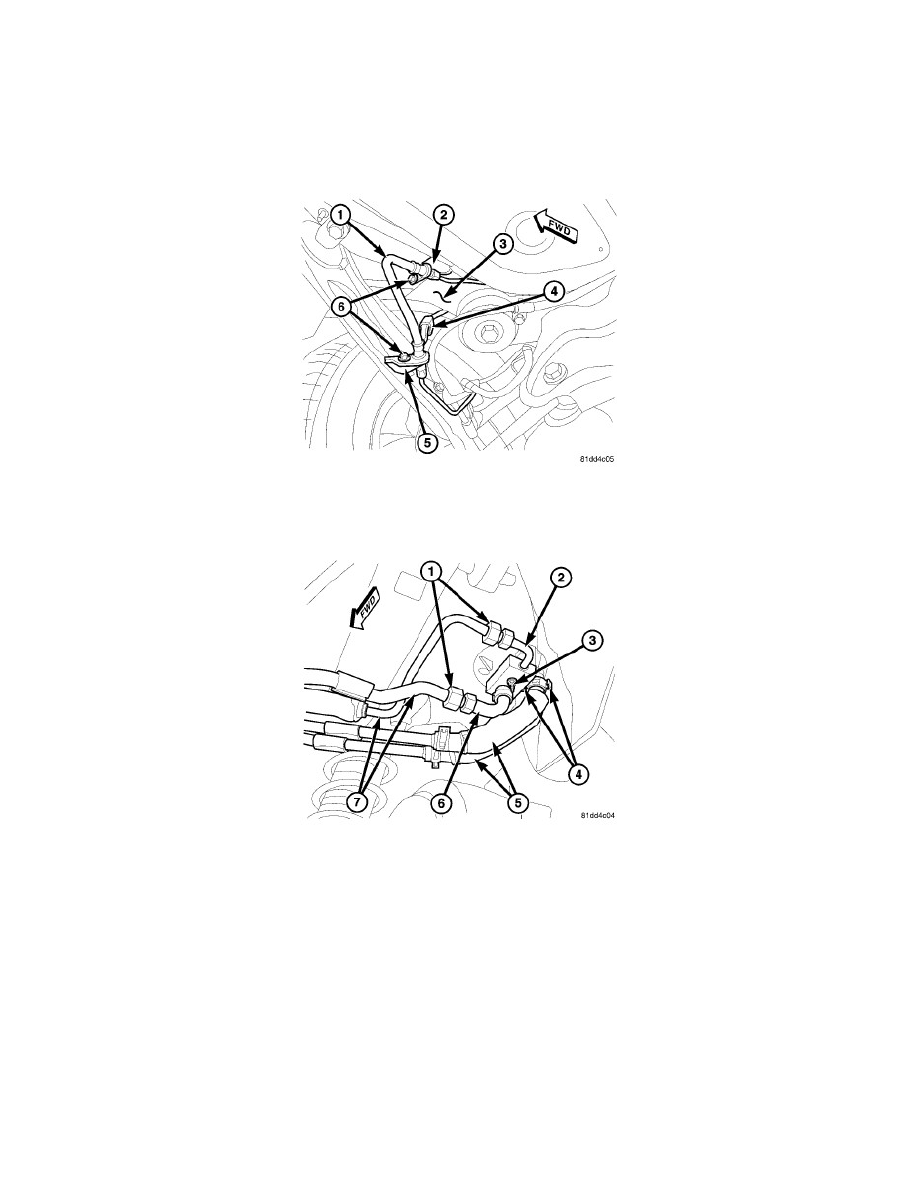
7. Connect the rear ABS wire harness lead and bracket (4) to the right side of the body (3).
8. Position the right rear brake line (1) onto the two brackets (2 and 5) and install the two retaining bolts (6). Tighten the bolts securely.
CAUTION: DO NOT apply excessive force on underbody heater lines or rear heater tubes fittings when connecting the connections. Excessive
force may damage or deform the tubes and or lines, causing an engine coolant leak.
NOTE: Replacement of the rubber heater hose ends will be required if the rubber hoses were cut for removal.
9. Remove the tape or plugs from all the opened refrigerant line fittings and the rear expansion valve ports.
10. Lubricate new rubber O-ring seals with clean refrigerant oil and install them onto the underbody refrigerant extension line fittings. Use only the
specified O-rings as they are made of a special material for the R-134a refrigerant system. Use only refrigerant oil of the type recommended for the
A/C compressor in the vehicle.
11. Connect the underbody refrigerant extension lines and sealing plate (2 and 6) to the rear A/C expansion valve.
12. Loosely install the nut (3) that secures the extension lines and sealing plate to the rear A/C expansion valve.
13. Connect the underbody refrigerant lines (7) to the underbody refrigerant extension lines and tighten the fitting nuts (1) to 23 Nm (17 ft. lbs.).
14. Tighten the nut that secures the extension lines and sealing plate to the rear A/C expansion valve to 11 Nm (97 in. lbs.).
15. Connect the underbody heater lines (5) to the rear heater core tubes located behind the right rear wheel housing and engage the spring type hose
clamps (4).