
Journey FWD V6-3.5L (2009)
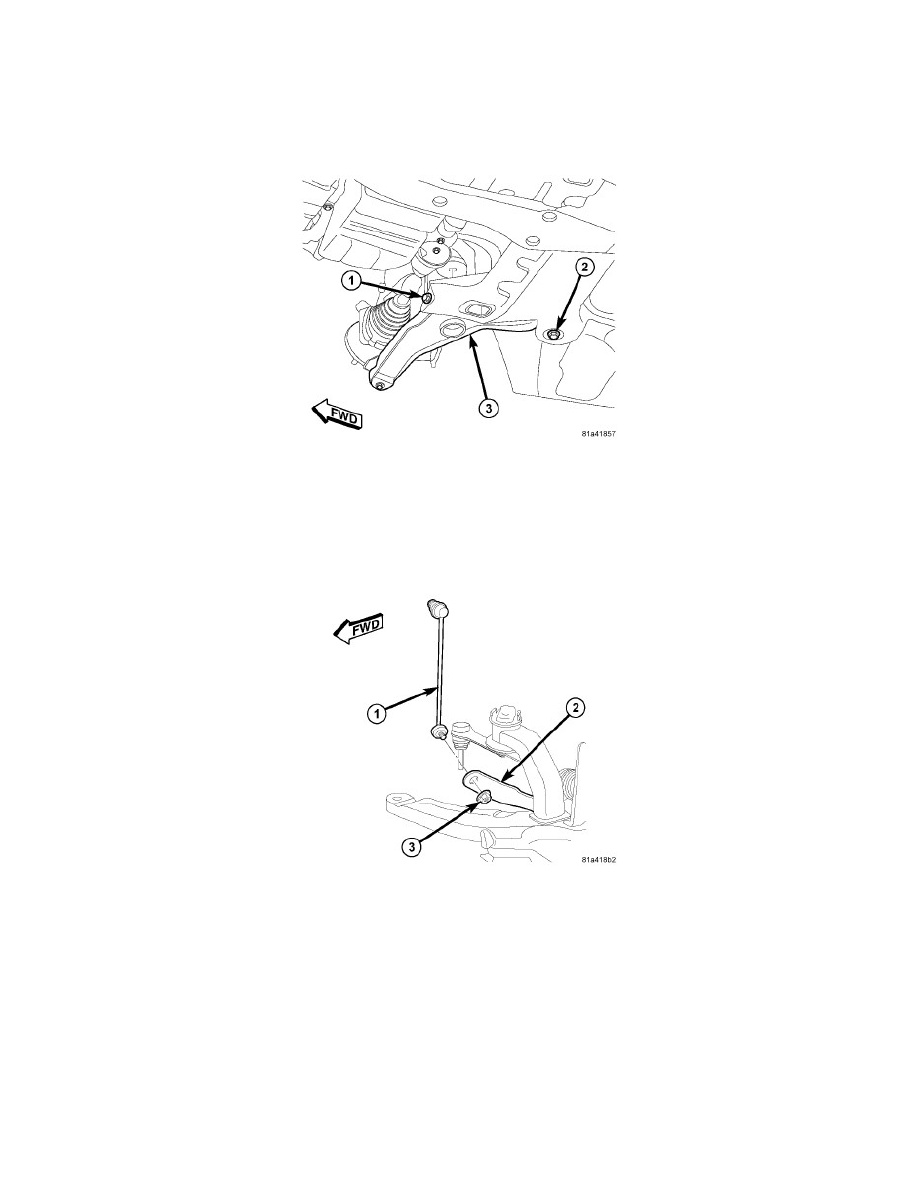
8. Remove the nut on the rear bolt (2) attaching the lower control arm (3) to the front suspension crossmember. Remove the bolt.
9. Remove the lower control arm (3) from the crossmember.
Front Lower Control Arm - Installation
INSTALLATION
1. Place the lower control arm (3) into the front suspension crossmember.
2. Insert the rear bolt (2) up through the crossmember and lower control arm (3). Install the nut on the top-end of the bolt, but do not tighten it at this
time.
3. Install, but do not fully tighten, the front bolt (1) attaching the lower control arm (3) to the crossmember.
4. With no weight or obstruction on the lower control arm, tighten the lower control arm front mounting bolt (1) to 200 Nm (148 ft. lbs.).
5. With no weight or obstruction on the lower control arm, tighten the lower control arm rear mounting bolt nut to 145 Nm (107 ft. lbs.).
6. Attach the stabilizer bar link (1) at each end of the stabilizer bar (2). At each link, install and tighten the nut (3) while holding the stabilizer bar
link lower stud stationary. Tighten the nuts to 48 Nm (35 ft. lbs.).
NOTE: If a new or cleaned lower control arm is being installed, it is important to have a film of general purpose grease around the ball joint
mounting hole on the lower control arm to avoid any future corrosion issues. Make sure the grease does not get inside the ball joint
mounting hole or on the ball joint stud during installation.