
Journey FWD V6-3.5L (2009)
CAUTION: Never use impact or high speed tools to remove the shock rod nut. Damage to the shock internal bearings can occur.
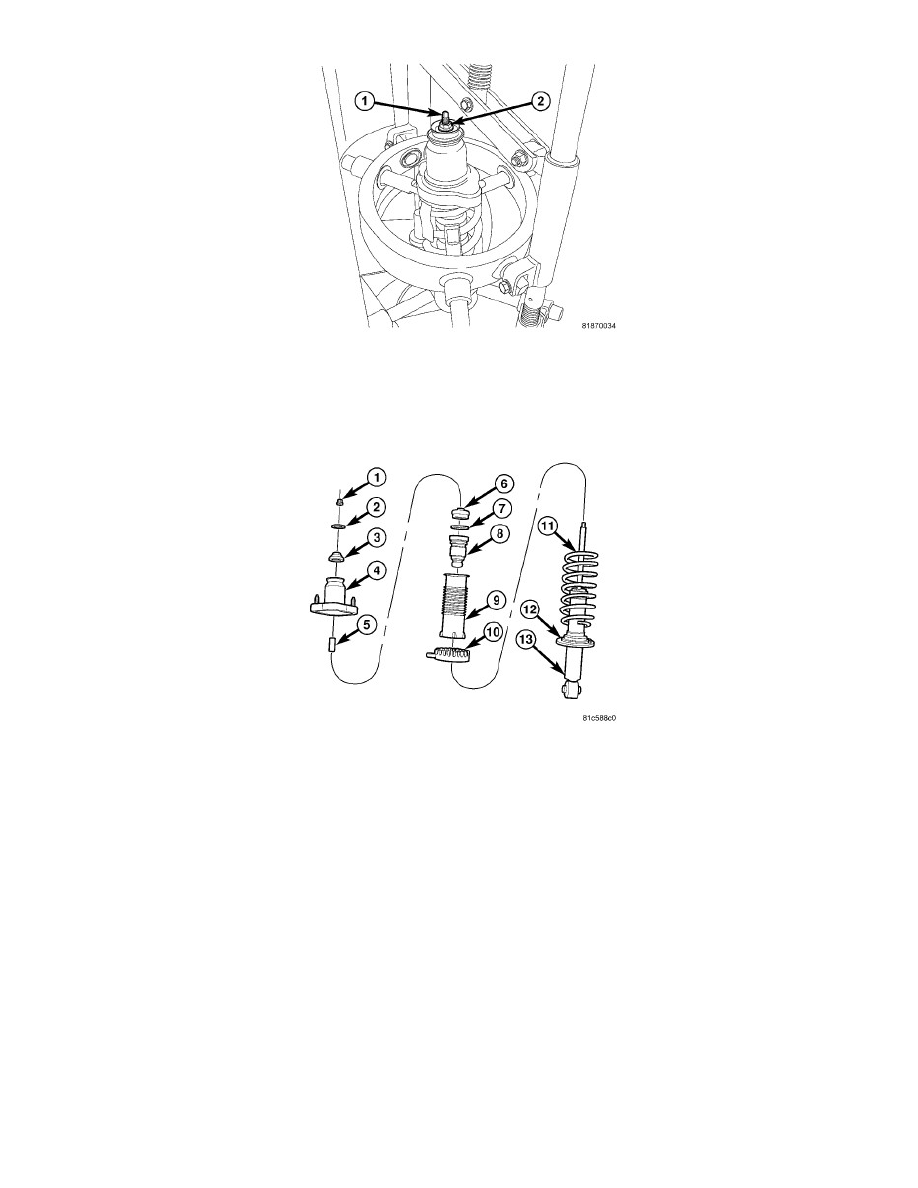
4. Once the spring is sufficiently compressed, install Snap-On(R) Shock Absorber Socket A139, or equivalent, on the end of the shock rod (1). While
holding the shock rod from turning, remove the nut (2) using a wrench. Remove the washer below the nut.
5. Remove the shock absorber (13) out through the bottom of the coil spring (11). The washer (7), jounce bumper (8), dust shield (9) and lower
spring isolator (12) will come out with the shock.
6. Slide the washer (7), jounce bumper (8), and dust shield (9) from the shock rod.
7. Remove the lower spring isolator (12) from the shock spring seat.
8. Remove the upper mounting bracket (4), bushings (3, 6), sleeve (5) and upper spring isolator (10) from the top of the spring.
9. Remove the bushings (3, 6), sleeve (5) and upper spring isolator (10) from the upper mounting bracket (4).
NOTE: If the coil spring needs to be serviced, proceed with the next step, otherwise, proceed with 11.
10. Release the tension from the coil spring by backing off the compressor drive completely. Push back the compressor hooks and remove the coil
spring.