
Lancer L4-135 2.2L SOHC (1986)
Service Procedure (Continued)
5.
Using a screwdriver placed in the hole in the rear of the electrical connector, gently pry the injector from the pod
(Figure 5).
6.
Make sure the injector lower O-ring has been removed from the pod.
7.
Clean the throttle body fuel injector pod with carburetor cleaner.
8.
From the parts package, place a new lower O-ring on the supplied injector and a new O-ring on the injector cap. The injector will have the
upper O-ring already installed.
9.
Use a thin film of white petroleum jelly to lubricate the new O-rings. It is important to lubricate only the O-rings.
Note:
Failure to do this step may result in fuel leaking past the O-rings.
FIGURE 6
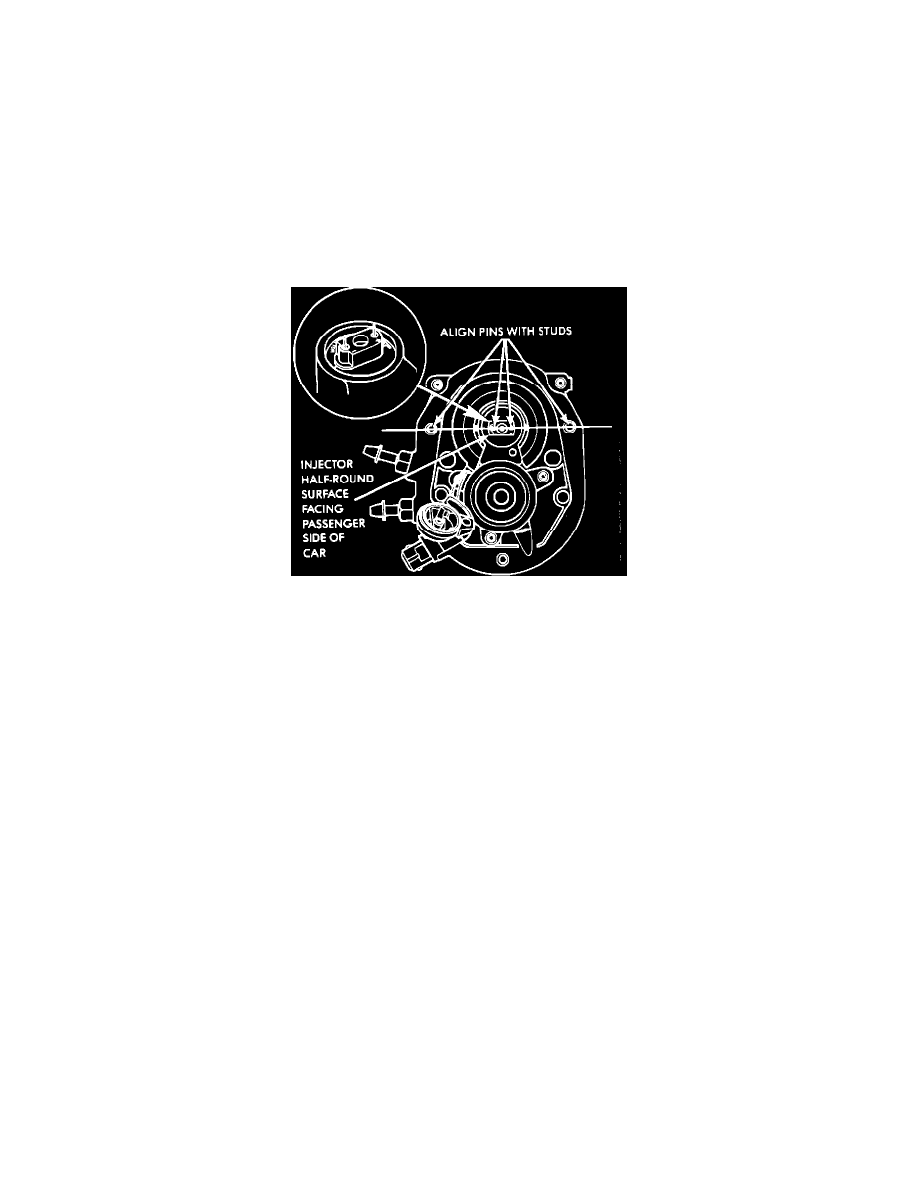
10.
Place the injector in the pod. Position the injector so that the cap can be installed without interference (Figure 6).
11.
Reinstall the cap and push down on it to ensure a good seal.
12.
Install the Torx screw and torque to 40 inch pounds.
13.
Reconnect the bullet connector removed in Step A 10 and tighten the gas cap.
Service Procedure (Continued)
14.
Press the [NO] key on the DRBII
15.
The display will read:
SELECT TEST CAMPAIGN 397
PRESS F1, F2 FOR MORE
Press the [F2] key until the display reads ENGINE OFF. Press the [YES] key.
16.
After ENGINE OFF is selected, the display will read:
CYCLE KEY 3 TIMES
Turn the ignition switch on/off, on/off, on within 5 seconds.
17.
Wait for the display to read:
55
READ
READ