
Magnum V6-2.7L VIN T (2007)
Lower
LOWER
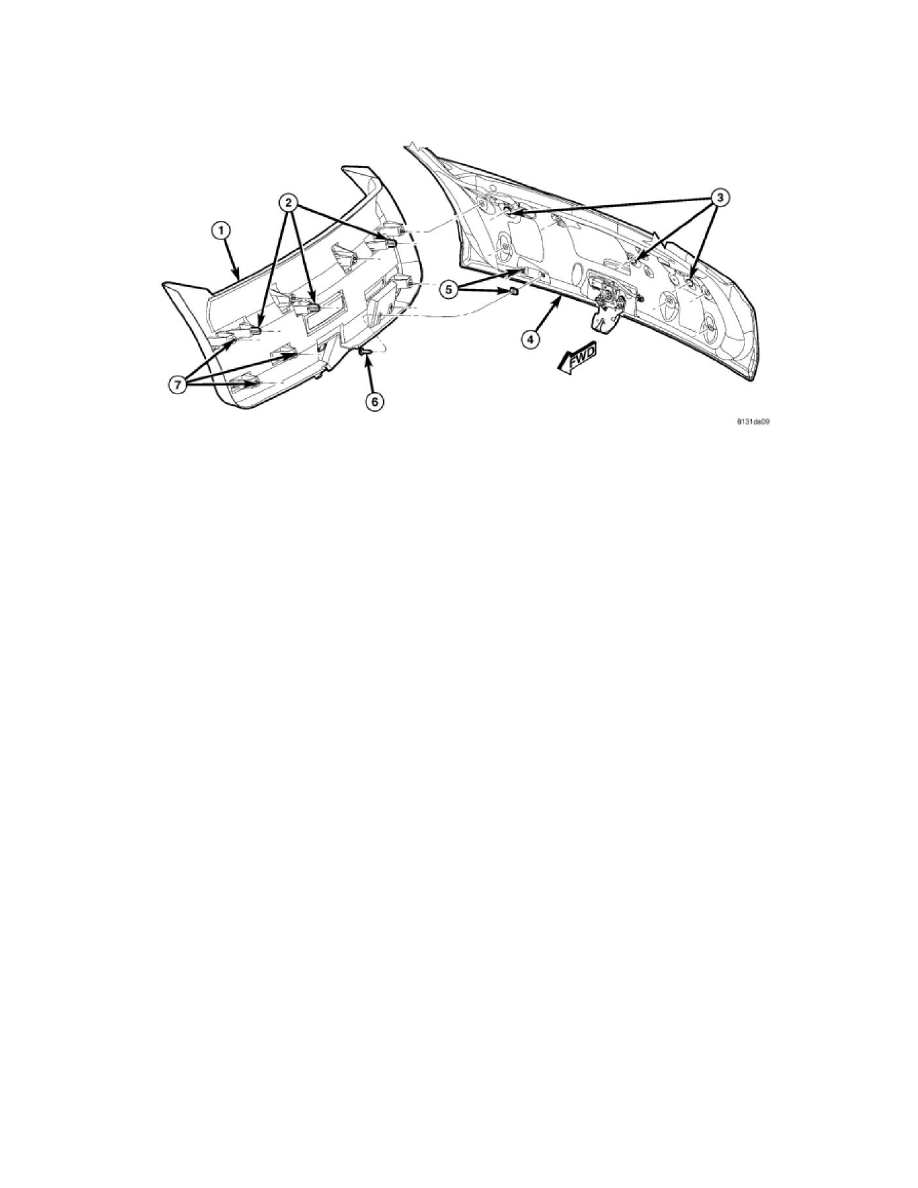
1. Check to be certain that the two U-nuts (5) are properly installed and in good condition on the inside of the liftgate (4).
2. Check to be certain that the seven push-in plastic fasteners (7) are properly installed and in good condition on the inside of the lower trim panel
(1).
3. Position the upper corners of the lower trim panel over the lower corners of the upper trim panel on the inside of the liftgate.
4. Align the three locator pins (2) on the back of the trim panel to the locator holes (3) on the inside of the liftgate.
5. Using hand pressure, press firmly and evenly on the trim panel over each of the seven push-in plastic fastener locations until the fasteners are fully
engaged in the holes on the inside of the liftgate.
6. Install and tighten the two screws (6) within the pull cup formation to the right of the latch that secure the lower trim panel to the U-nuts on the
inside of the liftgate. Tighten the screws to 3 Nm (27 in. lbs.).
7. Reinstall the lamp into the lower liftgate trim panel.
8. Reconnect the battery negative cable.
Upper
UPPER