
Magnum V6-2.7L VIN T (2007)
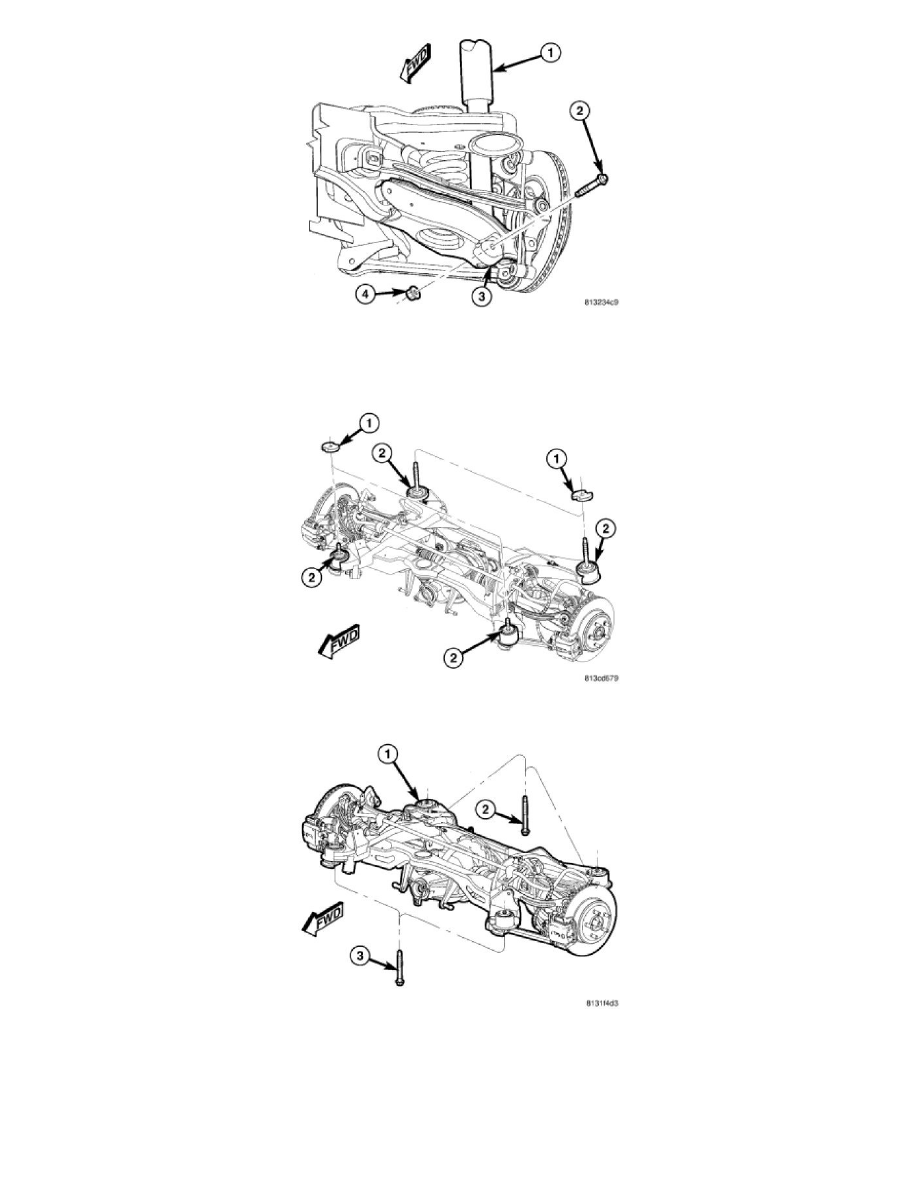
11. Carefully raise jack, guiding coil spring and lower end of shock absorber (1) into mounted positions. Once shock absorber (1) lower mounting hole
lines up with hole in spring link (3), stop jacking.
12. Install lower shock mounting bolt (2) and nut (4). Do not tighten at this time.
13. If vehicle is equipped with AWD, insert spacers (1) on top of right crossmember mount bushings (2) before crossmember is raised into place.
NOTE: There are four crossmember mounting bolts. Rear mounting bolts (2) are longer than front mounting bolts (3). Do not interchange
mounting bolts.
14. Raise right side of crossmember (1) into mounted position. Install right side crossmember mounting bolts (2 and 3). Snug, but do not fully
tighten bolts at this time.
15. Remove both front and rear crossmember mounting bolts (2 and 3) on left side of vehicle.