Magnum V6-3.5L VIN V (2006)

Trunk / Liftgate Latch: Service and Repair
LATCH
REMOVAL
1. Open the liftgate.
2. Disconnect and isolate the battery negative cable.
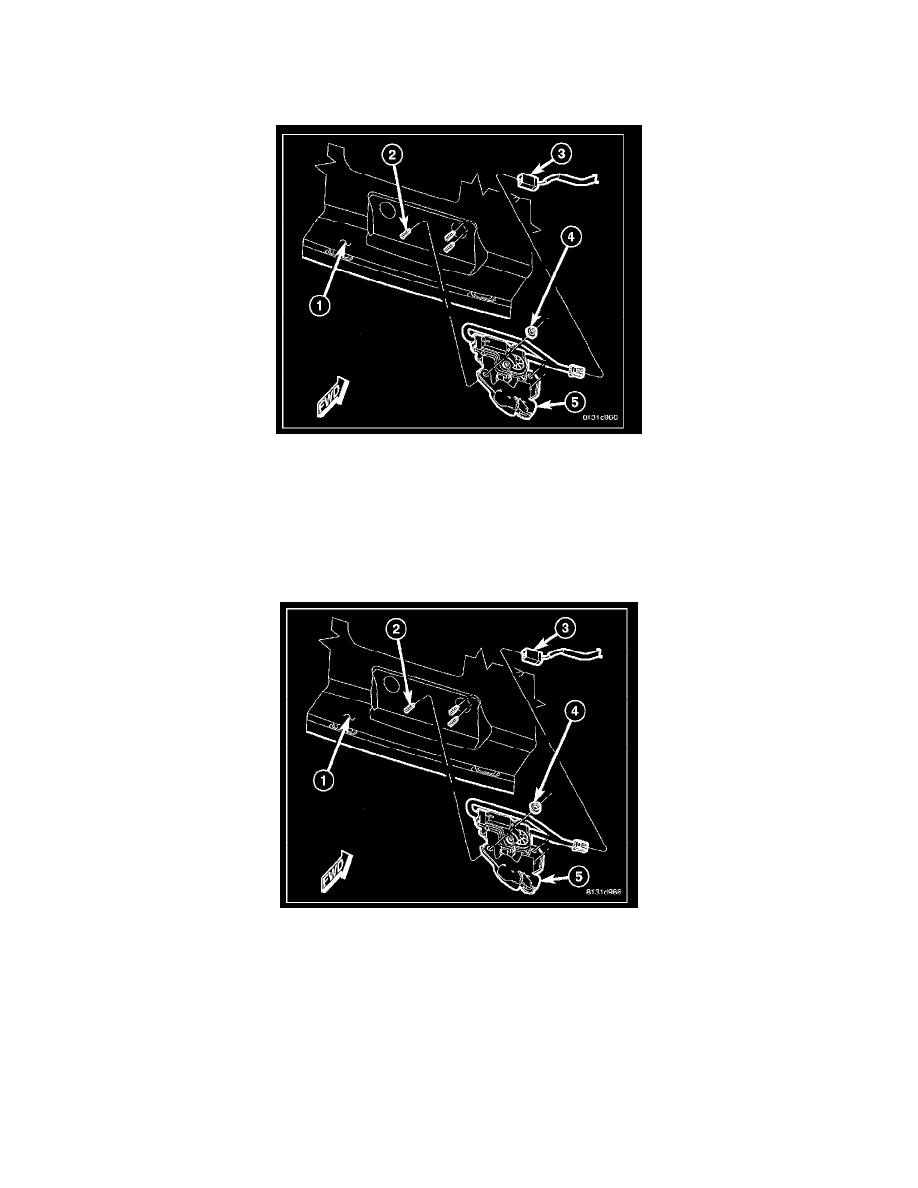
3. Remove the lower trim panel from the inside of the liftgate (1).
4. Disconnect the pigtail wire connector of the latch (5) from the take out of the liftgate wire harness (3) on the inside of the liftgate.
5. Remove the three nuts (4) that secure the latch to the studs (2) on the inside of the liftgate.
6. Remove the liftgate latch from the vehicle.
INSTALLATION
1. Position the latch (5) onto the studs (2) on the inside of the liftgate (1).
2. Install and tighten the three nuts (4) that secure the latch to the studs on the inside of the liftgate. Tighten the nuts to 12 N.m (9 ft.lbs.).
3. Reconnect the pigtail wire connector of the latch to the take out of the liftgate wire harness (3) on the inside of the liftgate.
4. Reinstall the lower trim panel onto the inside of the liftgate.
5. Reconnect the battery negative cable.
6. Close the liftgate.
