
Magnum V6-3.5L VIN V (2006)
18.
Remove oil pickup tube (Figure 23).
19.
Remove the stamped metal windage tray. Note which direction the windage tray is facing for installation later (Figure 23).
20.
Rotate the crankshaft clockwise until the # 2 connecting rod is at Bottom Dead Center (BDC).
21.
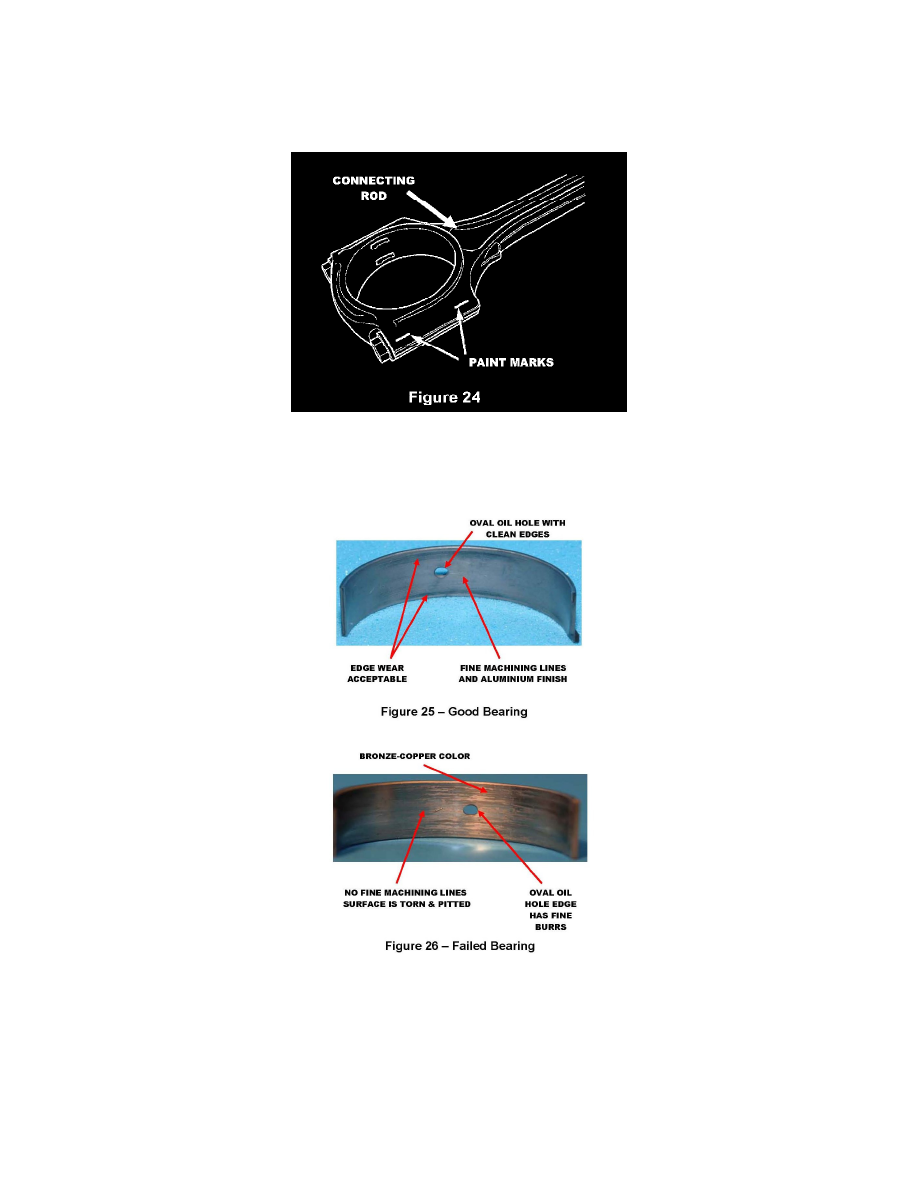
Paint mark one side of the connecting rod bearing cap and connecting rod before removal. This is to aide in the correct positioning of the
connecting rod cap to the connecting rod during assembly (Figure 24).
22.
Remove the # 2 connecting rod bearing bolts and rod cap.
23.
Inspect the crankshaft journal and connecting rod bearing shell. A good bearing is shown in Figure 25. A failed bearing is shown in Figure 26. If
any of the following conditions are observed, continue with Section D - CS Engine Replacement.
a.
Significant damage or wear to the connecting rod bearing from any of the following:
>
Galling
>
Embedded debris
>
Tab misalignment
>
Fine machining lines are not visible
>
Any bronze or copper coloration.