
Magnum V6-3.5L VIN V (2006)
28.
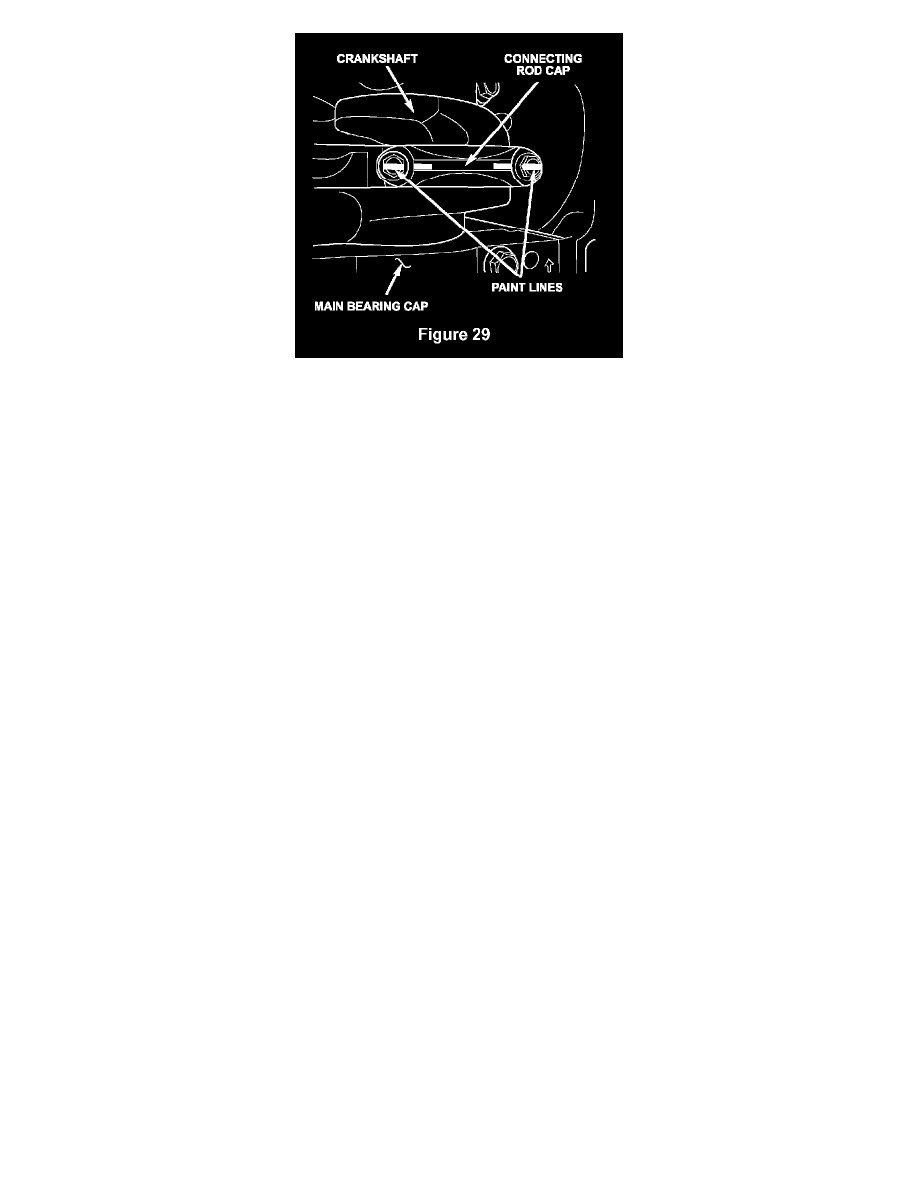
Once the proper torque is reached, wipe clean the screw head and connecting rod cap of oil. Draw a line with a paint pen between connecting rod
cap and the connecting rod screw head to indicate that each bolt torque was verified (Figure 29).
29.
Tighten both rod bolts another 90 degrees (1/4 turn).
30.
Install windage tray in the direction noted in Step 19. Lubricate windage tray bolts with engine oil and finger tighten all bolts. Tighten the windage
tray bolts to 20 ft. lbs. (27 Nm).
31.
Paint mark each windage tray bolt at the bolt flange to the windage tray.
32.
Beginning with any center windage tray bolt, turn the bolt clockwise until the paint mark shows it has rotated 90° from the initial position.
33.
Repeat Step 33 with each windage tray bolt in a circular sequence ending with the outmost bolts.
34.
Inspect the oil pick-up tube "O" ring for damage. If damaged, install a new "O" ring P/N 04792068.
35.
Install oil pickup tube and tighten bolt to 21 ft. lbs. (28 N.m).
CAUTION:
Do not to damage the oil pick up tube O-ring. Make sure it is correctly seated in the hole.
36.
Clean the engine oil pan.
37.
If the oil pan gasket is still attached to the engine at all four corners, use a clean shop cloth and wipe the oil pan gasket surfaces and continue with
Step 43. If the engine oil pan gasket was removed or has come loose, continue with Step 39.
CAUTION:
Do not use any cleaning fluids (such as brake cleaner) to clean gasket surfaces. Damage to the gasket will result.
38.
Clean the block oil pan gasket surface.
39.
Obtain new oil pan gasket P/N 04892072AA.