
Magnum V6-3.5L VIN V (2006)
54.
If so equipped, disconnect and relocate the 110 v power cord of the block heater onto the engine (Figure 33).
55.
Prop the hood fully open NOT using the vehicle hood prop rod.
56.
Support the transmission using a suitable floor jack.
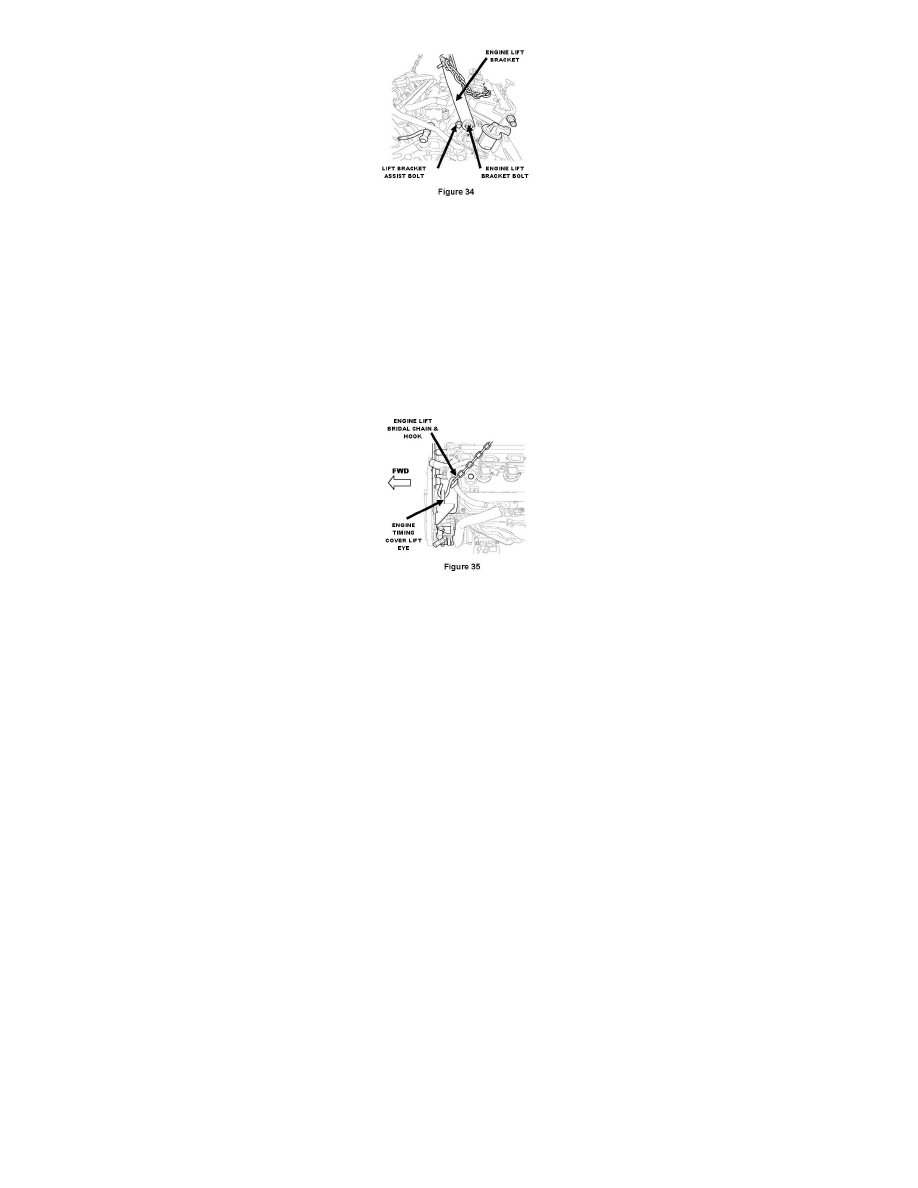
57.
Connect one end of the engine lifting bracket from special tool kit 8534 to the right rear of the cylinder head outer most bolt access hole with a
bolt and tighten (Figure 34).
58.
Install a bolt into the inner most bolt access hole next to the engine lift bracket to position the engine lift bracket (Figure 34).
59.
Attach the engine hoisting chain to the left timing cover engine lift eye and to the engine lift bracket installed in Step 57 at the rear of the right
cylinder head (Figure 35).
60.
Carefully remove the engine from the vehicle.
61.
For All Wheel Drive models: Remove the oil pan.
62.
Set the old engine in a suitable cradle to prevent the engine from tipping.
63.
Disconnect connectors for fuel injectors, ignition coil packs, temperature sensors, knock sensor, EGR valve, cam position sensor, and oil pressure
sensor.
64.
Remove engine wiring harness.
65.
Remove the left exhaust manifold heat shield.
66.
Remove the left exhaust manifold.
67.
Remove the left engine mount and bracket.
68.
Remove the right exhaust manifold heat shield.
69.
Remove the right exhaust manifold.
70.
Remove the right engine mount and bracket.
71.
Remove the drive plate, and drive plate backing plate. Discard the old bolts.
72.
Remove the EGR valve.
73.
Remove the accessory drive idler pulley.