Magnum V6-3.5L VIN V (2006)

40.
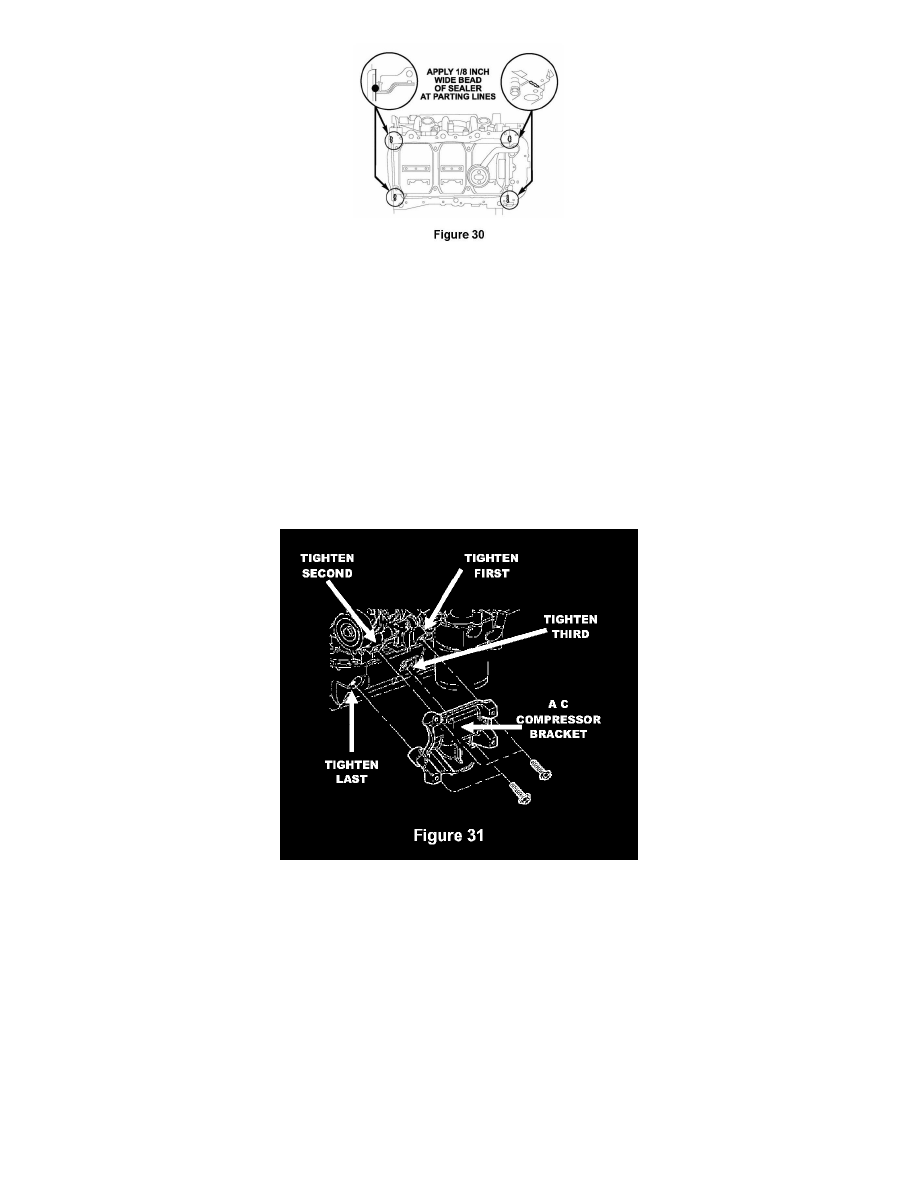
Apply a 1/8 inch bead of Mopar Engine RTV (PN 82300234) at the parting line of the oil pump housing and the rear seal retainer (Figure 30).
41.
Align the oil pan gasket onto the engine oil pan.
42.
Install the engine oil pan and hand start the bolts and nuts.
43.
Tighten the 8 mm oil pan bolts and nuts to 20 ft. lbs. (28 N.m).
44.
Tighten the two 6 mm engine oil pan bolt located in the rear of the engine oil pan to 105 in. lbs. (12 N.m).
45.
Install the access cover for the transmission torque converter bolts and tighten the bolts to 97 in. lbs. (11 N.m).
46.
For AWD models: Install the powertrain structural bracket between the engine oil pan and the transmission. Tighten the bolts to 40 ft. lbs. (54
N.m).
47.
Install the air conditioning mounting bracket and hand start the four bolts. Then tighten the bolts to 30 ft. lbs. (41 N.m) in the sequence as follows
(Figure 31):
a.
Tighten the upper rear bolt.
b.
Tighten the upper front bolt.
c.
Tighten the bottom rear bolt.
d.
Tighten the bottom front bolt.
NOTE:
Steps 48 and 59 must be followed exactly to minimize belt squealing due to air conditioning compressor pulley miss alignment.
48.
Locate the power steering return hose bracket to the upper left A/C compressor clearance hole. Install the four air conditioning compressor bolts
snug tight.
