
Magnum V6-3.5L VIN V (2006)
Valve Spring: Service and Repair
Cylinder Head On
REMOVAL - CYLINDER HEAD ON
1. Disconnect negative battery cable.
2. Remove upper intake manifold.
3. Remove cylinder head cover(s).
4. Remove rocker arm and shaft assembly.
5. Remove spark plugs.
6. Rotate the crankshaft clockwise, until the number 1 piston is at Top Dead Center (TDC) on the compression stroke.
7. With air hose attached to spark plug adapter installed in number 1 spark plug hole, apply 620.5 to 689 kPa (90 to 100 psi) air pressure. This is to
hold valves into place while servicing components.
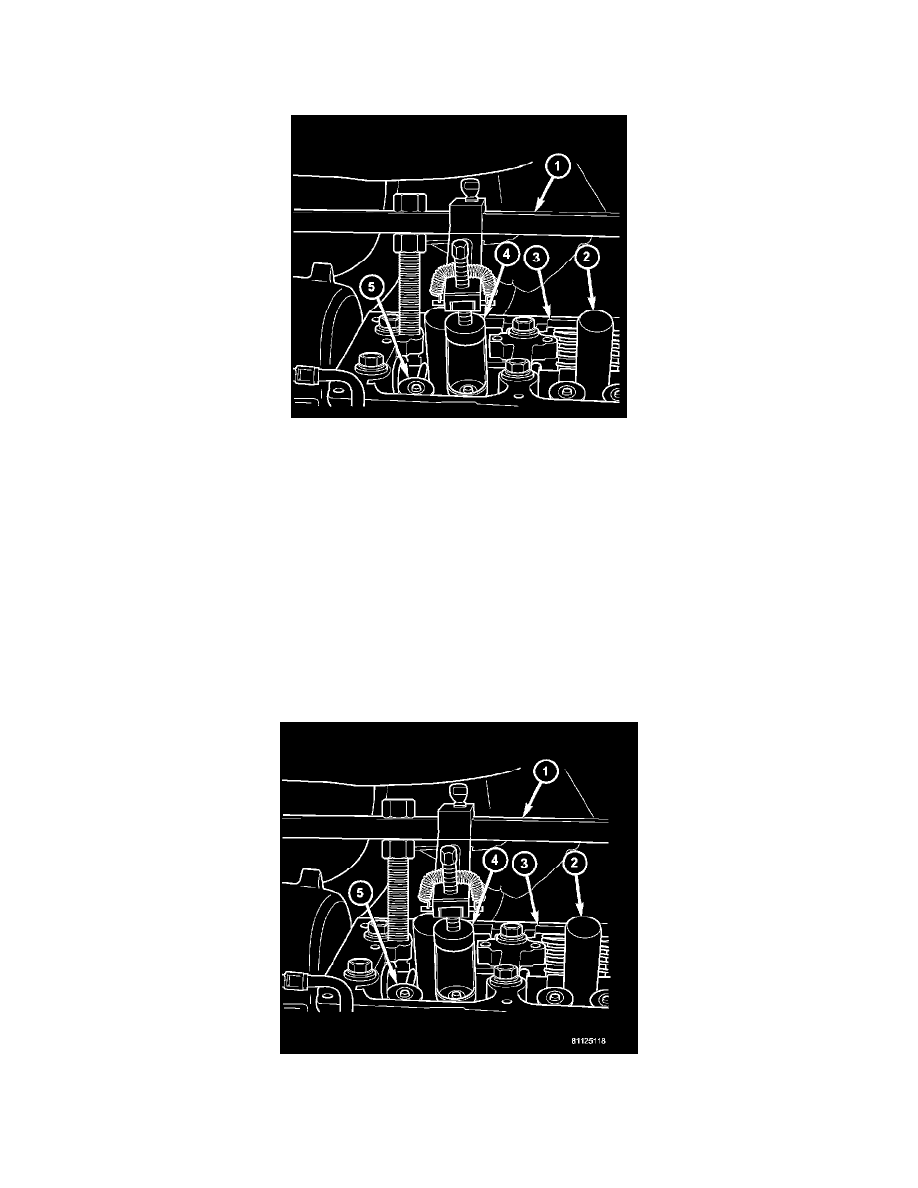
8. Using Tool MD 998772A (1) with adapter 6527 (4) or equivalent, compress valve spring and remove valve locks (5). Release tension on valve
spring, remove retainer (5) and valve spring.
9. Remove valve stem seal, if required.
10. Follow the same procedure on the remaining 5 cylinders using the firing sequence 1-2-3-4-5-6. Make sure piston is at TDC in each cylinder of the
valve spring that is being removed.
11. Remove spark plug adapter tool.
INSTALLATION - CYLINDER HEAD ON
1. Install new valve seal(s) if required.
2. Place valve spring (color-coded end facing up) and valve retainer into position.
3. Compress valve spring using Special Tool MD 998772A (1) with Adaptor 6527 (4) only enough to install locks (5).
4. After installing locks, release tension on valve spring and verify proper installation.