
Magnum V6-3.5L VIN V (2006)
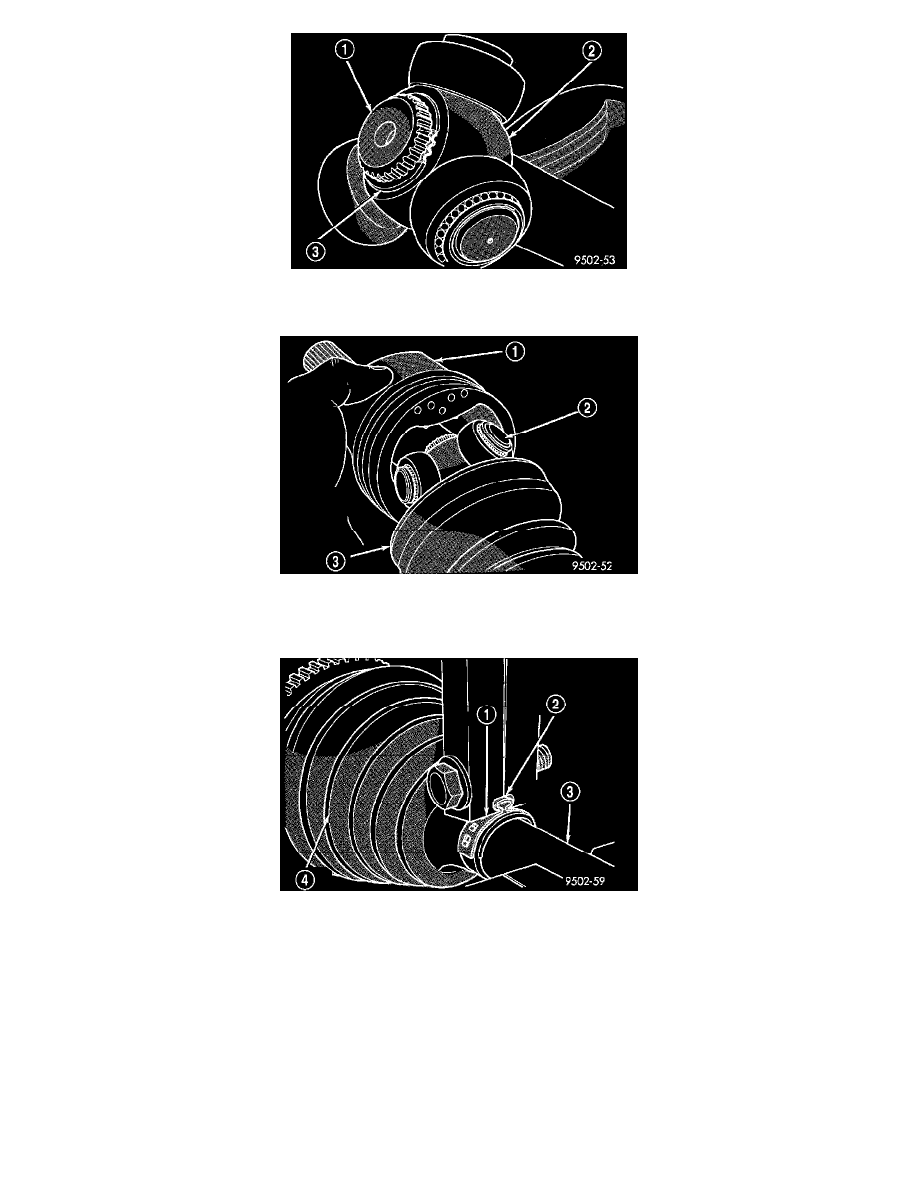
4. Install the spider assembly to interconnecting shaft retaining snap ring (3) into groove on end of interconnecting shaft. Be sure the snap ring is
fully seated into groove on interconnecting shaft.
5. Distribute 1/2 the amount of grease provided in the seal boot service package (DO NOT USE ANY OTHER TYPE OF GREASE) into tripod
housing. Put the remaining amount into the sealing boot.
6. Align tripod housing (1) with spider assembly (2) and then slide tripod housing over spider assembly and interconnecting shaft.
7. Install inner tripod joint seal boot to interconnecting shaft clamp evenly on sealing boot.
8. Clamp sealing boot (4) onto interconnecting shaft (3) using crimper, Special Tool C-4975-A and the following procedure. Place crimping tool
C-4975-A over bridge of clamp. Tighten nut on crimping tool C-4975-A until jaws on tool (2) are closed completely together, face to face.
CAUTION: Seal must not be dimpled, stretched or out of shape in any way. If seal is NOT shaped correctly, equalize pressure in seal and shape
it by hand.
9. Position sealing boot into the tripod housing retaining groove. Install seal boot retaining clamp evenly on sealing boot.
CAUTION: The following positioning procedure determines the correct air pressure inside the inner tripod joint assembly prior to clamping the
sealing boot to inner tripod joint housing. If this procedure is not done prior to clamping sealing boot to tripod joint housing sealing boot durability
can be adversely affected.
CAUTION: When venting the inner tripod joint assembly, use care so inner tripod sealing boot does not get punctured, or in any other way