
Magnum V8-5.7L (2008)
Heater Core: Service and Repair
Installation
INSTALLATION
WARNING: The heater core tubes are not serviced separately from the heater core. The heater core tubes should not be repositioned, loosened
or removed from the heater core. Failure to follow this warning could result in a coolant leak and possible personal injury or death.
NOTE: LHD model shown. RHD model similar.
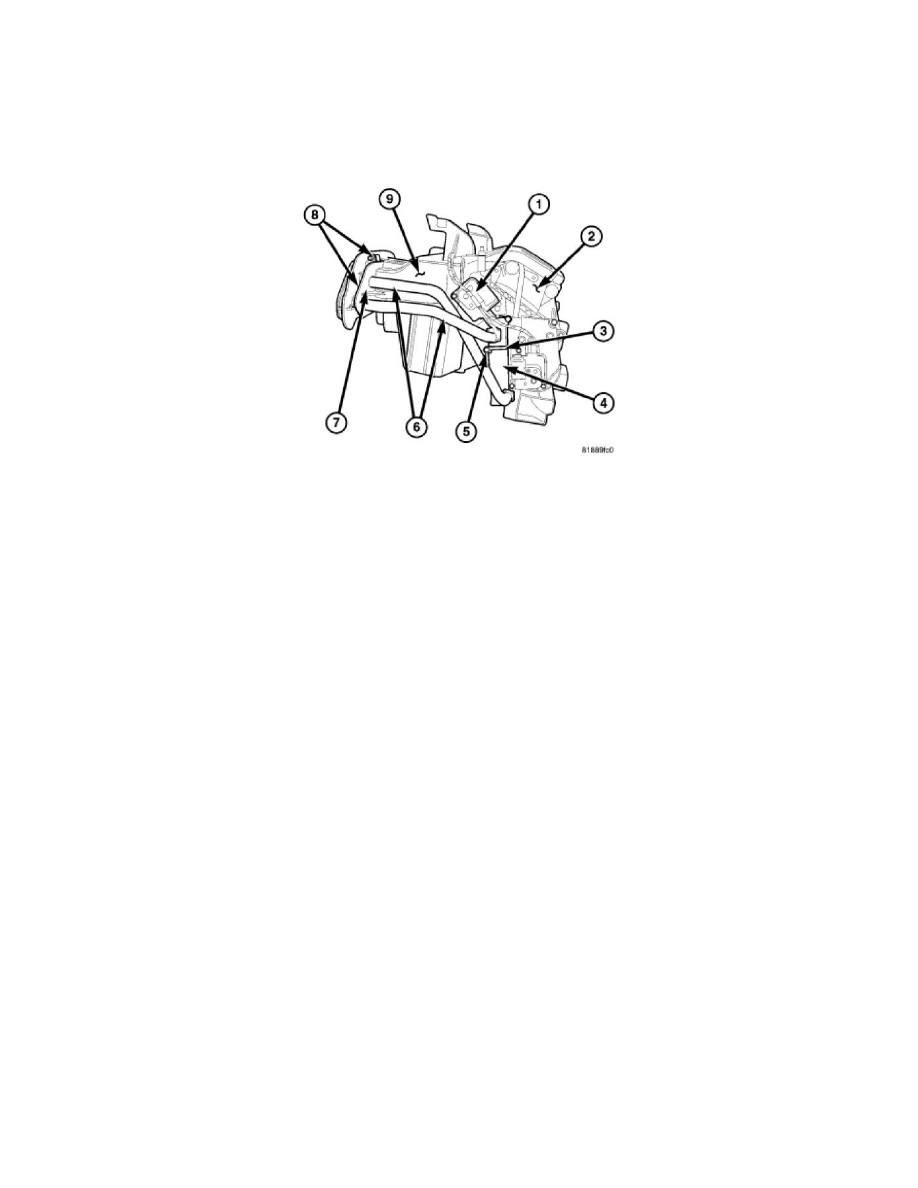
1. Carefully install the heater core (4) into the driver side of the HVAC air distribution housing (2) and position the heater core tubes (6) to the
HVAC housing (9).
2. Install heater core retaining bracket (3) onto the air distribution housing and install the retaining screw (5). Tighten the screw to 2.2 Nm (20 in.
lbs.).
3. Install the flange (7) over the heater core tubes and onto the HVAC housing and install the two flange retaining screws (8). Tighten the screws to
2.2 Nm (20 in. lbs.).
4. On LHD models, install the blend door actuator (1) to the driver side of the air distribution housing See: Heating and Air Conditioning/Air
Door/Air Door Actuator / Motor/Service and Repair/Blend Door Actuator - Installation.
5. Install the HVAC housing assembly See: Heating and Air Conditioning/Housing Assembly HVAC/Service and Repair/Removal and
Replacement/HVAC Housing - Installation.
6. Reconnect the negative battery cable.
7. If the heater core is being replaced, flush the cooling system See: Service and Repair.
8. Refill the engine cooling system See: Service and Repair.
9. Evacuate the refrigerant system See: Heating and Air Conditioning/Service and Repair/Refrigerant System Evacuate.
10. Charge the refrigerant system See: Heating and Air Conditioning/Service and Repair/Refrigerant System Charge.