
Magnum V8-5.7L (2008)
Marker Lamp: Service and Repair
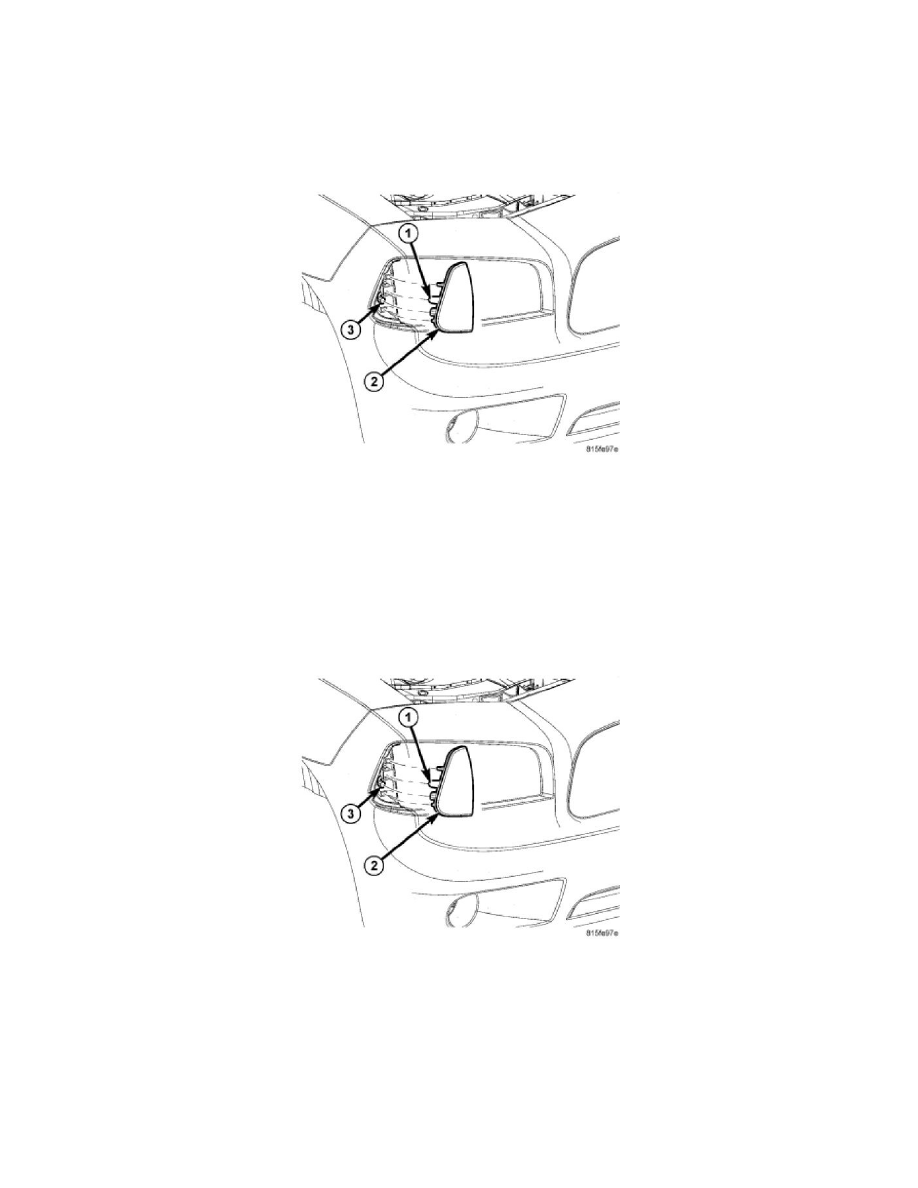
Front Side Marker Lamp Unit - Charger
Removal
REMOVAL
1. Open hood, disconnect and isolate the battery negative cable.
2. If removing the left front side marker lamp unit, the air cleaner housing must be removed to gain access to the release tabs. The right side is
accessible without removing any components.
3. Reach in behind the headlamp unit and on the outboard side of the unit, find and pinch together the release tabs (1) of the front side marker lamp
unit (2).
4. Push the unit (2) forward and out of the front fascia.
5. Disconnect the side marker lamp unit connector by releasing the retaining tab and pull it out of the lamp unit.
Installation
INSTALLATION
1. Connect the side marker lamp unit (2) electrical connector.
2. Push the unit (2) rearward making sure that the alignment dowel (3) is lined up and firmly push into place until it seats with a snap.
3. If the left front side marker lamp unit was replaced, the air cleaner housing must be reinstalled
4. Connect the battery negative cable and close hood.