
Magnum V8-5.7L (2008)
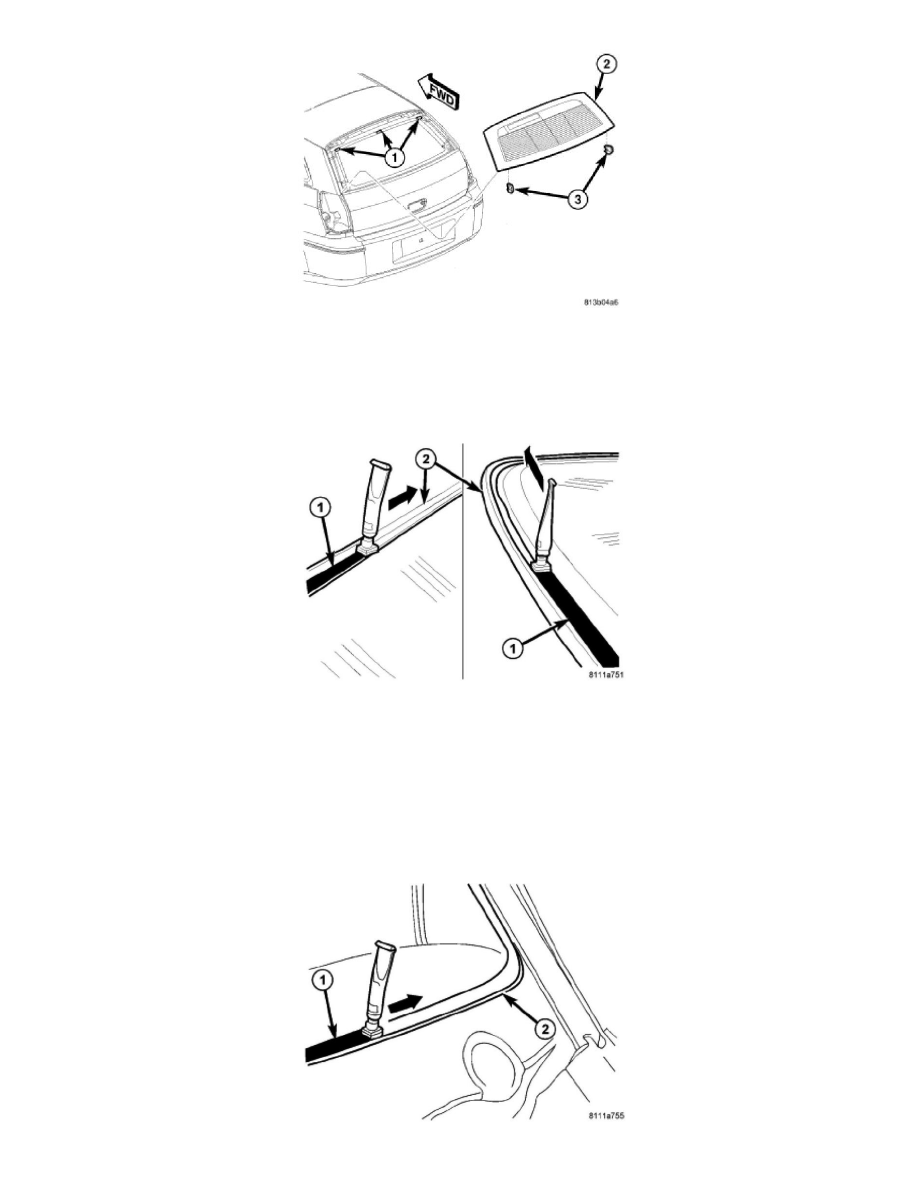
3. Replace any damaged or missing spacers (1 and 3).
4. Using an assistant, position the liftgate glass (2) into the liftgate glass opening and against the support spacers.
5. Verify the liftgate glass lays evenly against the liftgate fence at the top, bottom and sides of the opening. If not, the fence must be formed to the
shape of the liftgate glass.
6. Mark the liftgate glass and fence with a grease pencil or pieces of masking tape to use as a reference for installation.
7. Using an assistant, remove the liftgate glass from the liftgate glass opening and place it on a suitable padded work surface.
WARNING: Do not use solvent based glass cleaners to clean the liftgate glass before applying glass prep and primer or poor glass adhesion
may result.
8. Clean the inside of the liftgate glass with an ammonia based glass cleaner and a lint-free cloth.
9. Apply glass prep adhesion promoter 25 mm (1 in.) wide (1) around the perimeter of the liftgate glass (2) and 5 mm (0.2 in.) from the edge of the
glass and wipe dry with a clean lint-free cloth until no streaks are visible.
10. Apply glass primer 25 mm (1 in.) wide around the perimeter of the liftgate glass and 5 mm (0.2 in.) from the edge of the glass. Allow at least three
minutes drying time.
11. Using a flashlight, verify that the primer is completely and evenly installed along the perimeter of the liftgate glass.
12. Re-prime any area that is not fully and evenly primed.