
Magnum V8-5.7L VIN 2 (2007)
NOTE: LHD model shown. RHD model similar.
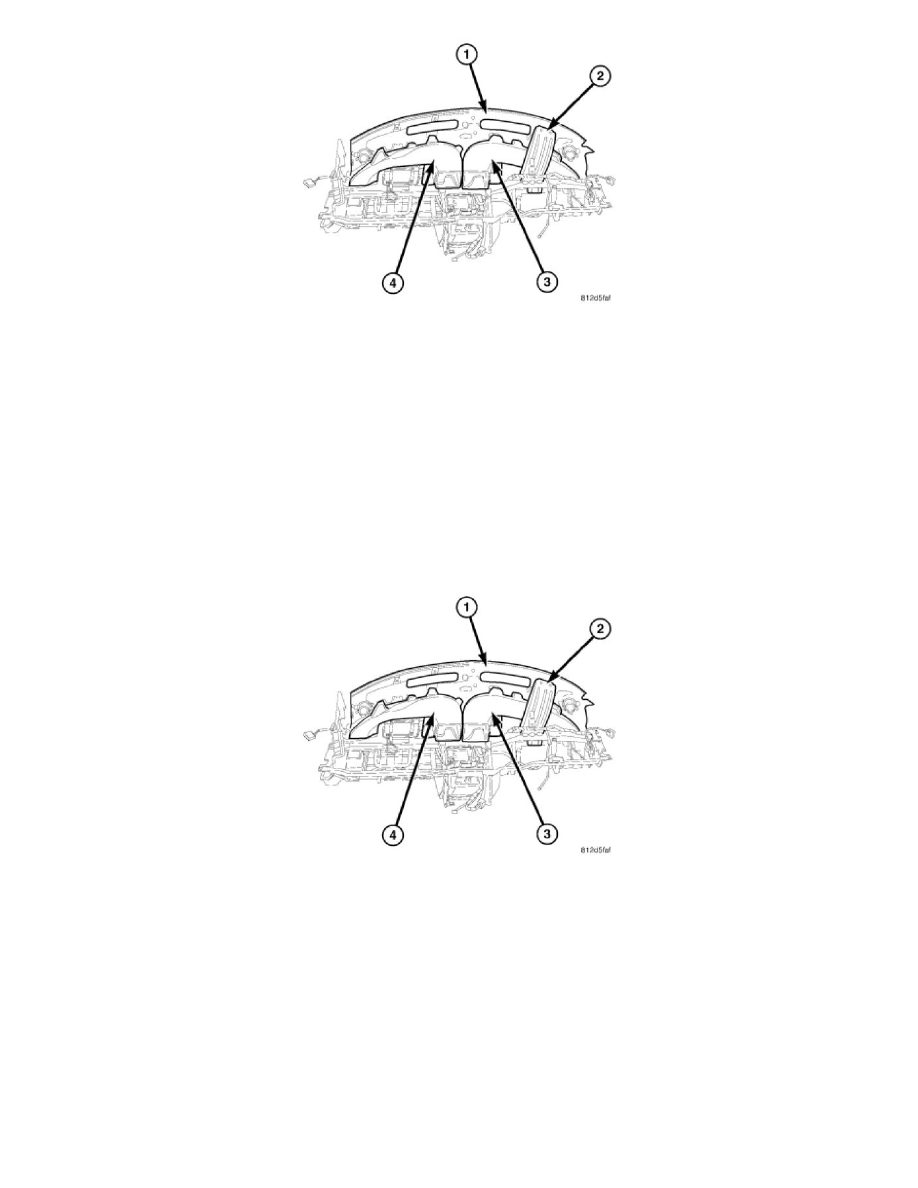
1. Remove the instrument panel and place it on a workbench.
2. Remove the screw that secures the instrument panel top pad (1) to the reinforcement bracket (2).
3. Remove the four screws that secure the driver side instrument panel duct and demister duct assembly (3) to the instrument panel and remove the
duct assembly.
4. Remove the four screws that secure the passenger side instrument panel duct and demister duct assembly (4) to the instrument panel and remove
the duct assembly.
Installation
INSTALLATION
NOTE: LHD model shown. RHD model similar.
1. Position the passenger side instrument panel duct and demister duct assembly (4) into the instrument panel.
2. Install the passenger side instrument panel duct and demister duct assembly onto the outlets of the instrument panel. Make sure that the ducts are
correctly installed over the instrument panel and demister outlet seals.
3. Install the four screws that secure the passenger side instrument panel duct and demister duct assembly to the instrument panel. Tighten the screws
to 2.2 Nm (20 in. lbs.).
4. Position the driver side instrument panel duct and demister duct assembly (3) into the instrument panel.
5. Install the driver side instrument panel duct and demister duct assembly onto the outlets of the instrument panel. Make sure that the ducts are
correctly installed over the instrument panel and demister outlet seals.
6. Install the four screws that secure the driver side instrument panel duct and demister duct assembly to the instrument panel. Tighten the screws to