
Magnum V8-5.7L VIN 2 (2007)
Fluid - Transfer Case: Service and Repair
STANDARD PROCEDURE - FLUID DRAIN AND FILL
1. Raise support vehicle.
2. Disconnect the front and rear propeller shafts from the transfer case. It is not necessary to completely remove the propeller shafts from the vehicle.
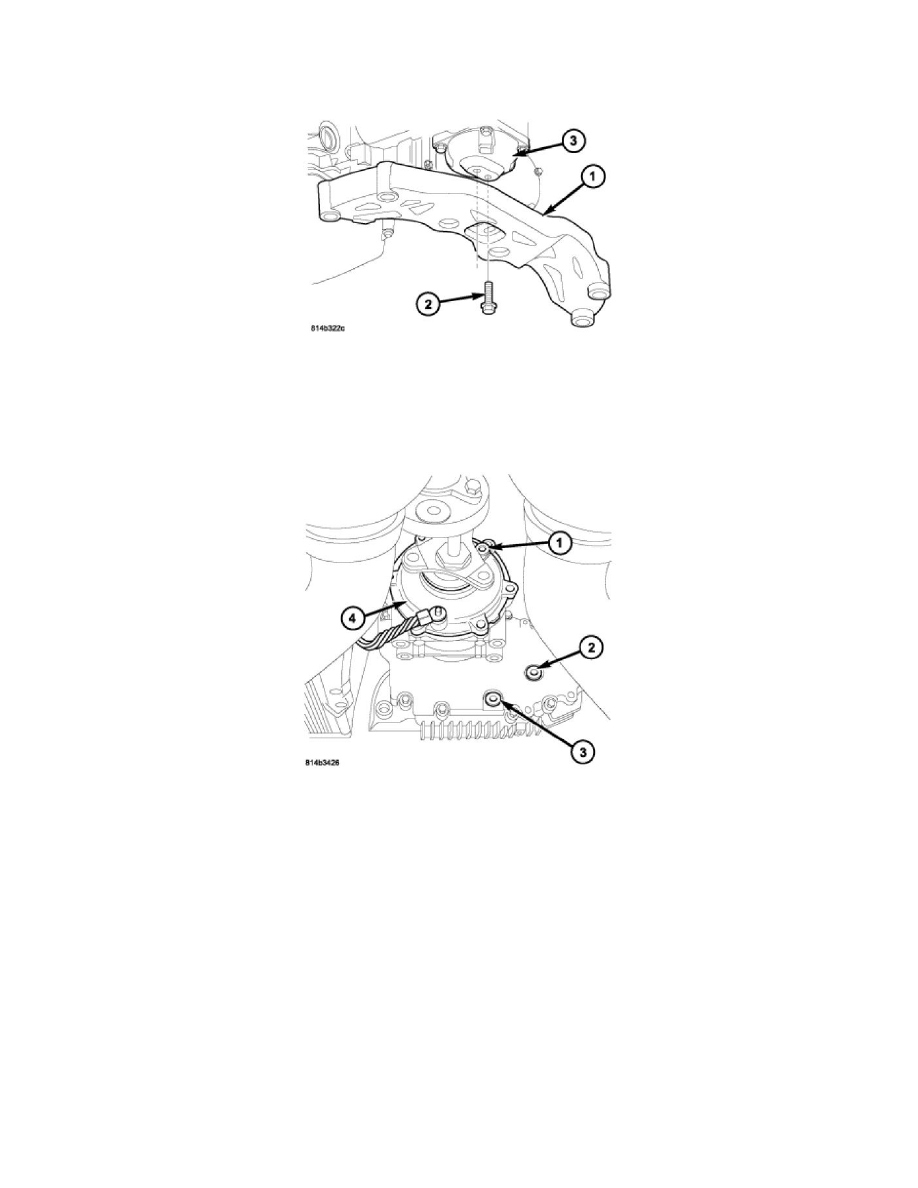
3. Support transmission (1) with jack stand.
4. Remove the bolts holding the transmission crossmember to the frame.
5. Remove the bolts (2) holding the transmission crossmember (1) to the transmission mount (3) and remove the crossmember from the vehicle.
6. Remove the transfer case dampner.
7. Clean the area around the transfer case plugs.
8. Remove the transfer case fill plug (1).
9. Remove the transfer case fluid level inspection plug (2).
10. Remove the transfer case drain plug (3) and drain transfer case lubricant.
NOTE: Inspect all the transfer case plug seals and replace as necessary.
11. Once the fluid has stopped draining, install the drain plug and tighten the plug to 25 Nm (18.5 ft.lbs.).
12. Raise the transfer case to the normal installed position.
CAUTION: The fluid must be poured through the fill opening since there is an area behind the opening that must be filled with fluid. Do
not attempt to fill the transfer case through the inspection hole.
13. Begin pouring the appropriate transfer case fluid in the fill hole until the fluid begins to run out of the inspection hole.
14. After the fluid has drained from the inspection hole for one to two minutes, install the inspection plug and tighten the plug to 30 Nm (22 ft.lbs.).
15. Install the fill plug and tighten the plug to 25 Nm (18.5 ft.lbs.).
16. Install the propeller shafts, transfer case dampner, and the transmission crossmember.