Magnum V8-5.7L VIN H (2005)

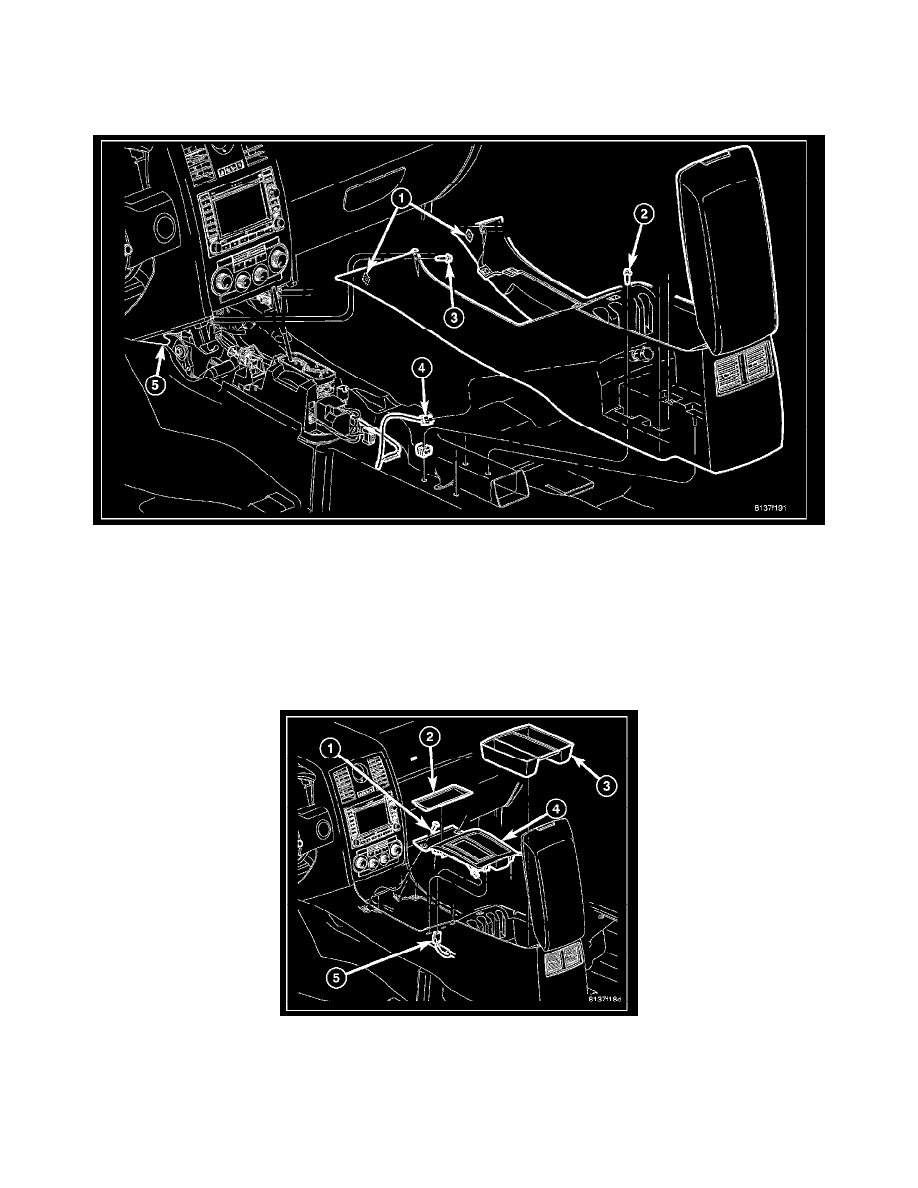
12. Slide the console rearward far enough to access and disconnect the jumper wire connector (4) from the accessory power outlet on the underside of
the console.
13. Remove the floor console from the vehicle.
INSTALLATION
1. Position the floor console into the vehicle rearward far enough to access and reconnect the jumper wire connector (4) to the accessory power outlet
on the underside of the console.
2. While holding both sides of the console at the front carefully engage the ears at the front of the console to the slots (5) at the lower instrument
panel.
3. Locate the two alignment holes at the front of the console over the two alignment pins on the instrument panel.
4. Engage the locating pin on the underside of the console rear bin into the slot in the top of the floor panel transmission tunnel.
5. Install and tighten the two screws (3) that secure the front of the console to the instrument panel. Tighten the screws to 3 N.m (23 in.lbs.).
6. Install and tighten the three 8 mm bolts (2) into the rear bin that secure the console to the floor panel transmission tunnel. Tighten the bolts to 5
N.m (40 in.lbs.).
7. Position the console shifter bezel (4) over the gear selector lever.
8. Position the tabs on the underside of the console shifter bezel into the holes in the floor console.
9. Install and tighten the two screws (1) that secure the front of the console shifter bezel to the console. Tighten the screws to 3 N.m (23 in.lbs.).
10. Position the mat (5) into the console rear bin with the curved edge oriented forward in the vehicle.
11. Position the mat (2) into the cubby bin at the front of the floor console.
12. Firmly push shifter trim ring (4) down the to position it to the gear selector.
13. Place the gear selector lever into the Park position.
