
Magnum V8-5.7L VIN H (2005)
Drive Belt: Service and Repair
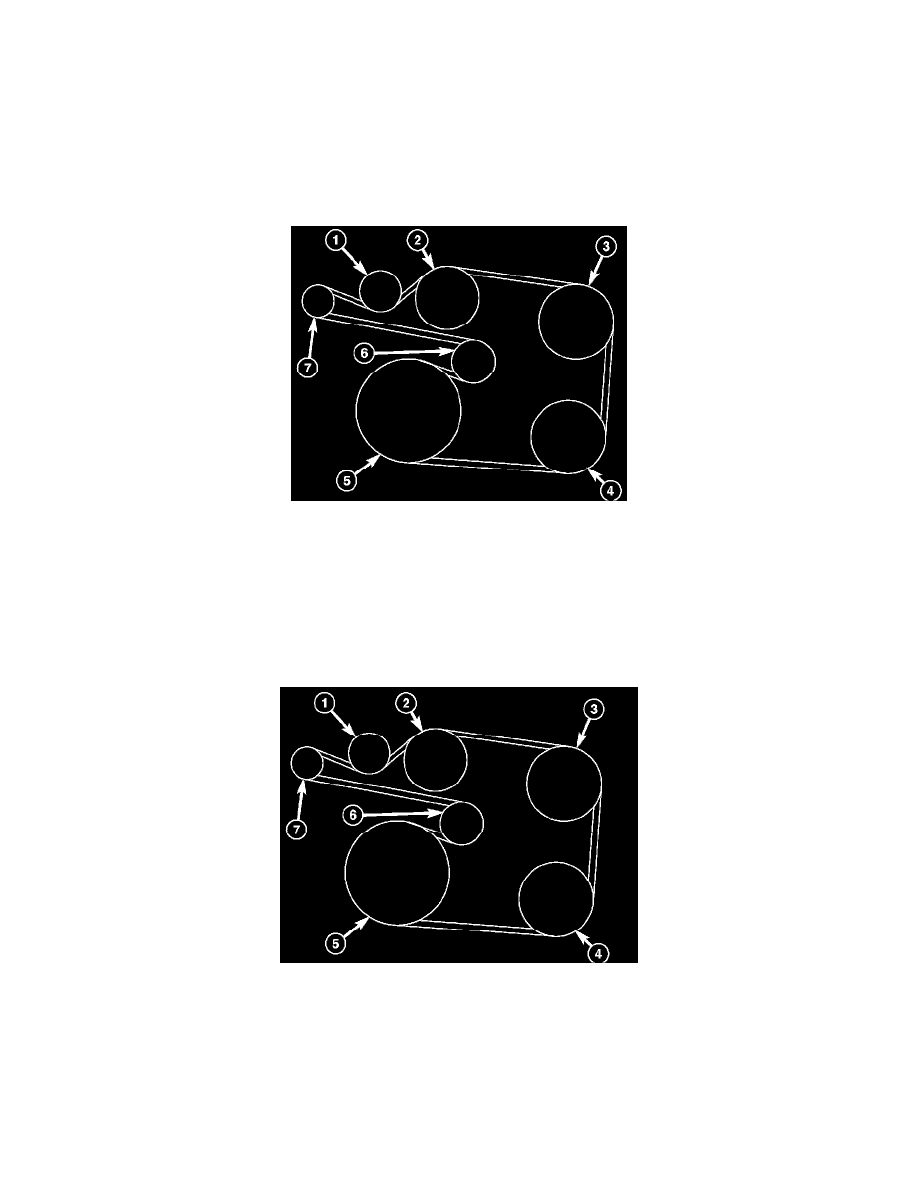
BELT-DRIVE
REMOVAL
CAUTION: DO NOT LET TENSIONER ARM SNAP BACK TO THE FREEARM POSITION, SEVER DAMAGE MAY OCCUR TO THE
TENSIONER.
Belt tension is not adjustable. Belt adjustment is maintained by an automatic (spring load) belt tensioner.
1. Disconnect negative battery cable from battery.
2. Rotate belt tensioner (6) counterclockwise until it contacts it's stop. Remove belt, then slowly rotate the tensioner into the freearm position.
INSTALLATION
Belt tension is not adjustable. Belt adjustment is maintained by an automatic (spring load) belt tensioner.
1. Check condition of all pulleys.
CAUTION: When installing the serpentine accessory drive belt, the belt MUST be routed correctly. If not, the engine may overheat due to the
water pump rotating in the wrong direction.
2. Install new belt. Route the belt around all pulleys except the idler pulley. Rotate the tensioner arm until it contacts it's stop position. Route the belt
around the idler and slowly let the tensioner rotate into the belt. Make sure the belt is seated onto all pulleys.
ON all engines, the tensioner (6) is equipped with an indexing tang on back of tensioner and an indexing stop on tensioner housing. If a new belt is
being installed, tang must be within approximately 6 - 8 mm (0.24 - 0.32 inch) of indexing stop (i.e. tang is approximately between the two
indexing stops). Belt is considered new if it has been used 15 minutes or less.
3. With the drive belt installed, inspect the belt wear indicator.