
Magnum V8-5.7L VIN H (2005)
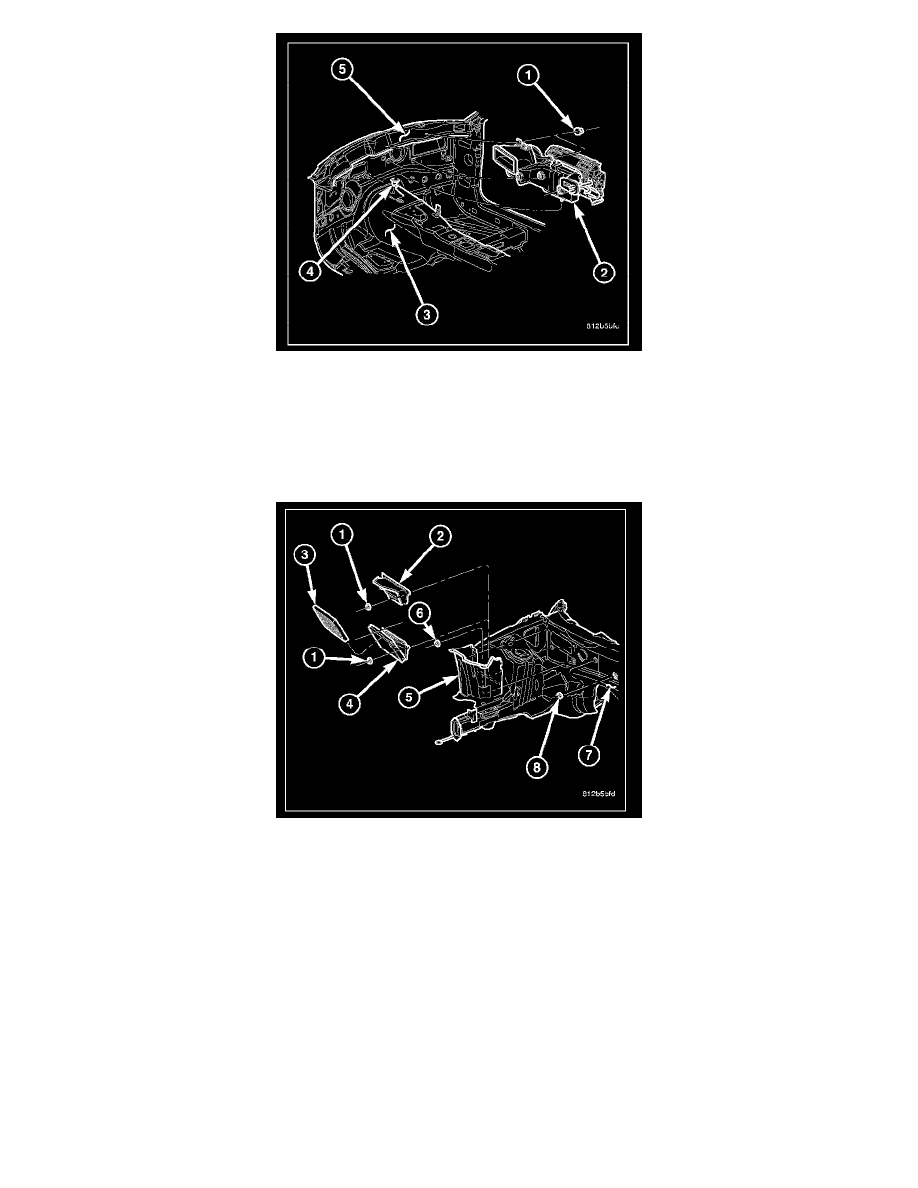
1. Position the HVAC housing assembly (2) into the passenger compartment with the mounting studs in their proper locations in the dash panel (5)
and the condensate drain tube into the grommet (4) on the floor panel (3).
2. Install the two nuts (1) that secure the HVAC housing to the passenger compartment side of the dash panel. Tighten the nuts to 3 N.m (26 in.lbs.).
3. Install the defroster ducts.
4. Connect the floor distribution ducts.
5. Connect the floor console duct.
6. Install the instrument panel.
7. Install the two nuts (8) that secure the HVAC housing to the engine compartment side of the dash panel (7). Tighten the nuts to 7 N.m (62 in.lbs.).
8. Reach into the fresh air inlet housing (5) and install the nut (6) that secures the HVAC housing to the engine compartment side of the dash panel.
Tighten the nut to 7 N.m (62 in.lbs.).
NOTE: Make sure to install the lead-in on the bottom edge of the water separator or the filter housing (depending on application) into the slot
located at the bottom of the fresh air inlet housing.
9. Install the fresh air inlet water separator (2) or particulate air filter housing (4) and filter (3) (depending on application) into the fresh air inlet
housing.
10. Install the two nuts (1) that secure the fresh air inlet water separator or particulate air filter housing to the dash panel (depending on application).
Tighten the nuts to 7 N.m (62 in.lbs.).
11. Connect the heater hoses to the heater core tubes.
12. Connect the A/C suction line and A/C liquid line to the A/C evaporator.
13. Install the wiper module assembly onto the dash panel.
14. Reconnect the negative battery cable.
15. If the heater core is being replaced, flush the cooling system.
16. Refill the engine cooling system.
17. Evacuate the refrigerant system.