Magnum V8-5.7L VIN H (2005)

11. Disconnect the front section of the A/C liquid line from the rear section of the liquid line and remove and discard the dual plane seal.
12. Install plugs in, or tape over the opened liquid line fittings.
13. Remove the front section of the A/C liquid line from the engine compartment.
INSTALLATION
NOTE: The A/C liquid line is serviced in two sections. The rear section of the liquid line is serviced as an assembly with the rear section of the A/C
suction line.
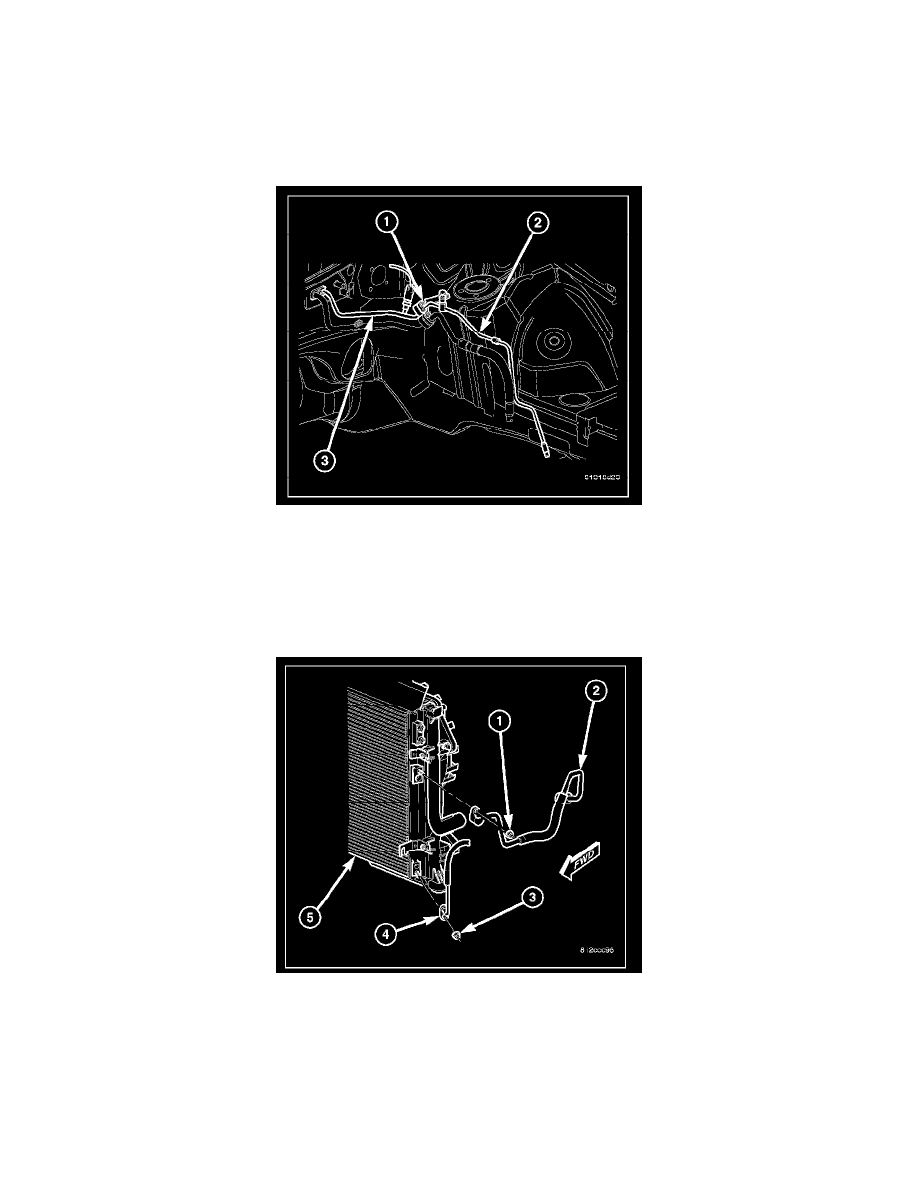
1. Position the front section of the liquid line (2) into the engine compartment.
2. Remove the tape or plugs from the fittings that connect the front section of the A/C liquid line to the rear section of the A/C liquid line (3).
3. Lubricate a new dual plane seal with clean refrigerant oil and install it onto the liquid line fitting. Use only the specified seal as it is made of a
special material for the R-134a system. Use only refrigerant oil of the type recommended for the A/C compressor in the vehicle.
4. Connect the front section of the A/C liquid line to the rear section of the A/C liquid line.
5. Install the nut (1) that secures the front section of the A/C liquid line to the rear section of the A/C liquid line. Tighten the nut to 22 N.m (16
ft.lbs.).
6. Raise and support the vehicle.
7. Remove the tape or plugs from the fitting on the front section of the A/C liquid line (4) and the outlet port of the A/C condenser (5).
8. Lubricate a new dual plane seal with clean refrigerant oil and install it onto the liquid line fitting. Use only the specified seal as it is made of a
special material for the R-134a system. Use only refrigerant oil of the type recommended for the A/C compressor in the vehicle.
9. Connect the A/C liquid line to the A/C condenser.
10. Install the nut (3) that secures the front section of the A/C liquid line to the A/C condenser. Tighten the nut to 22 N.m (16 ft.lbs.).
11. Install the front end splash shields.
12. Lower the vehicle.
13. Install the air cleaner housing.
